Each year, several members of an online group called Heartstrings Quilt Project challenge themselves to make 365 string blocks. Yes, that works out to be one a day but most of the quilters make them in sets of 24 or 48 blocks at a time. The group is informal and quilters are encouraged to make and donate their quilts locally. They also share photos, inspire each other with new fabric combinations and setting ideas, and cheer each other on.
I saw a photo on the Heartstrings Quilt Project page many years ago and it has always been an inspiration. I don’t have any rights to the picture so I’ll just share the link to it. Go check it out because it’ll probably inspire you too! It’s HERE .
I don’t have much time to sew during the holidays but that doesn’t mean I stop thinking about it. 🙂 I’m adding the 365 string block challenge to my bucket list for next year. I absolutely love making string quilt blocks and no doubt, I have plenty of strings that really need to make that leap from storage bin to finished quilt.
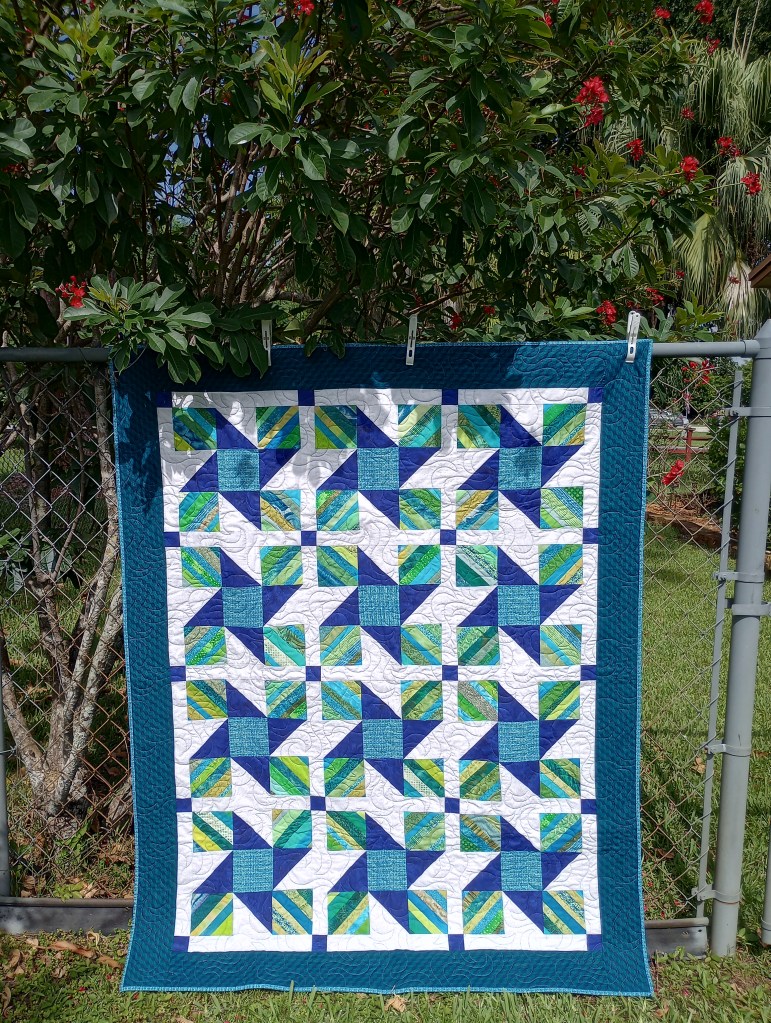
There’s a separate page of my string quilts but, the one below made from batik strings is probably my favorite (so far).
I realized a couple of weeks ago that I need to really focus on using my strings and scraps to make space for new ones as they accumulate. I know from experience that having a plan is essential for success so that’s what I’ve been busy doing.
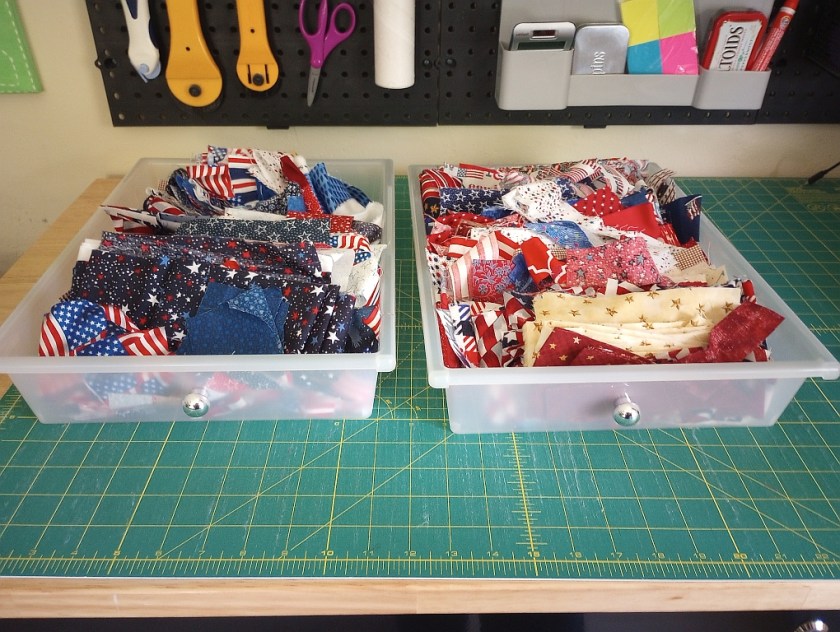
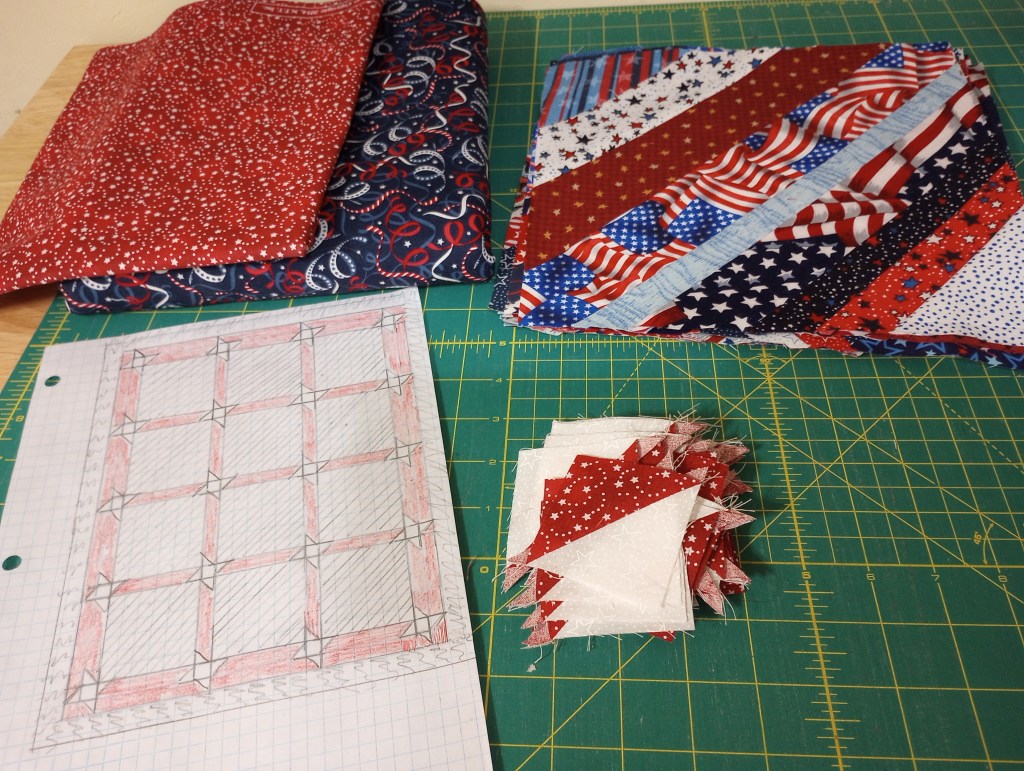
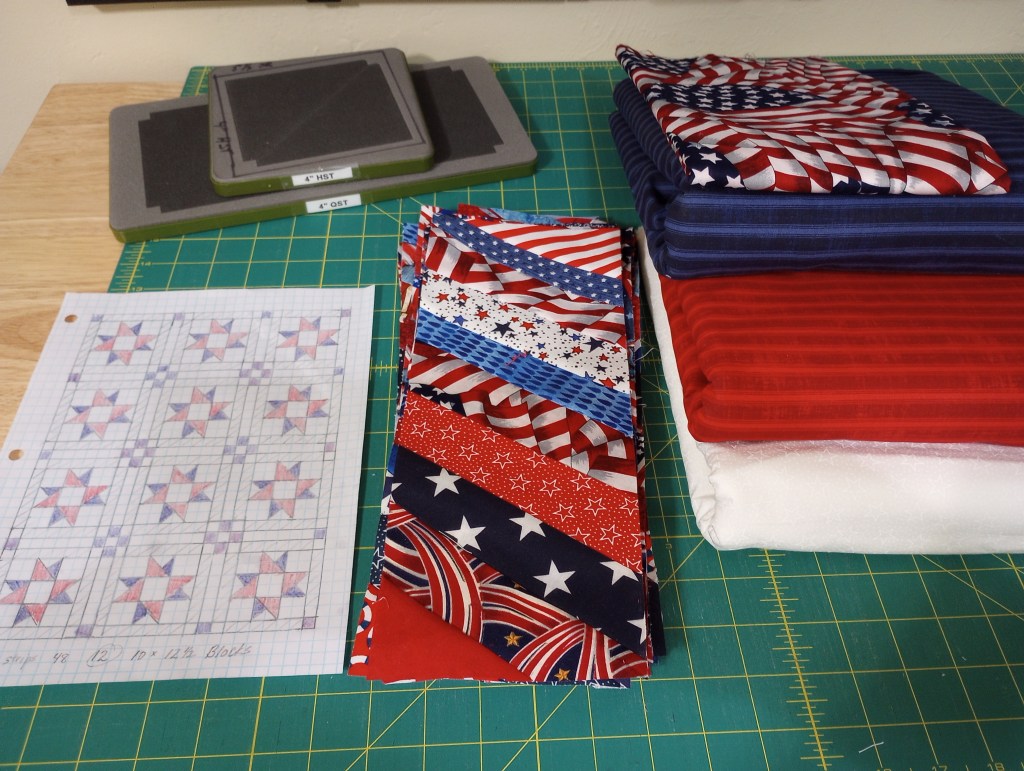
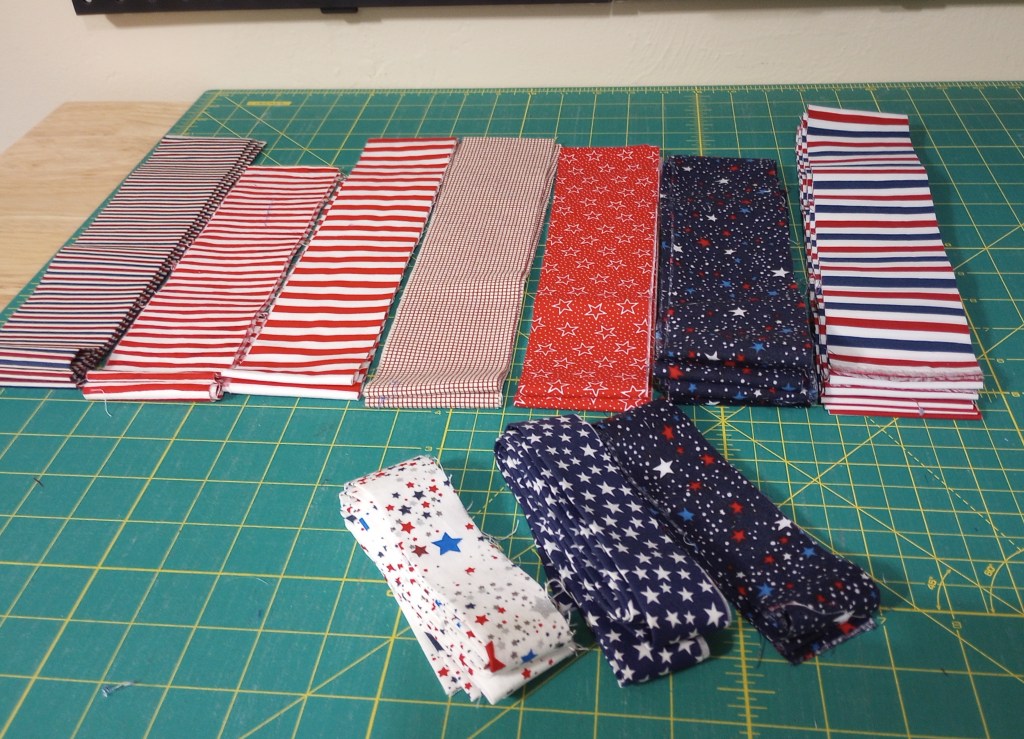
I decided patriotic fabrics would be my first target. In this post on August 18th, I wondered how many string blocks I could create from two small drawers. I decided to clear out a bin of patriotic scraps in my cart at the same time as that was also pretty full.
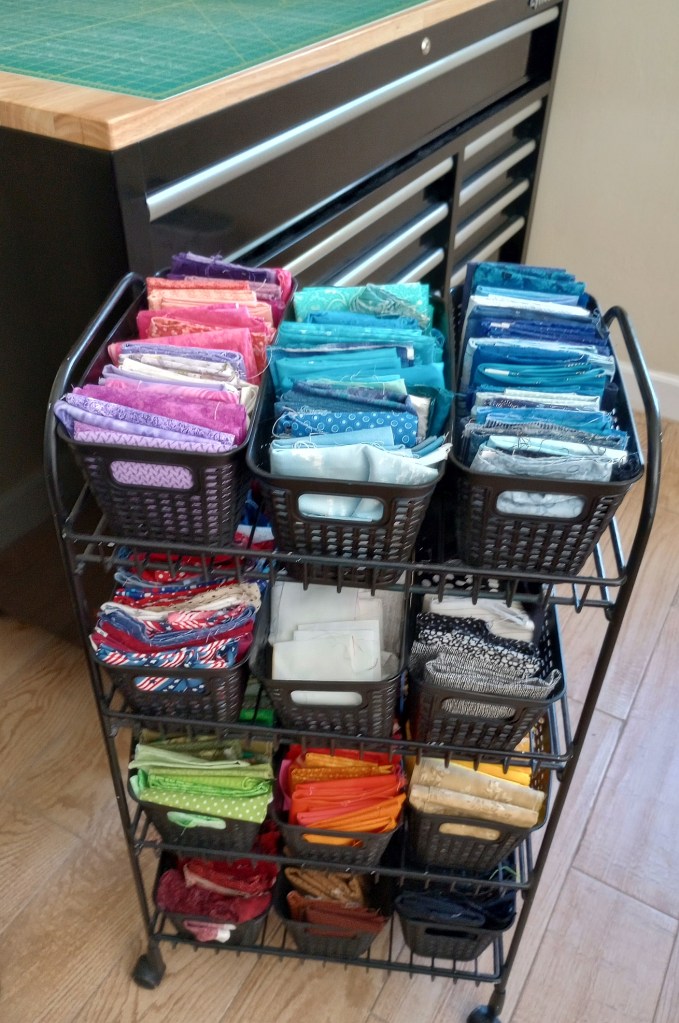
You can see the full little patriotic scrap bin in the cart, second shelf down – on the left.
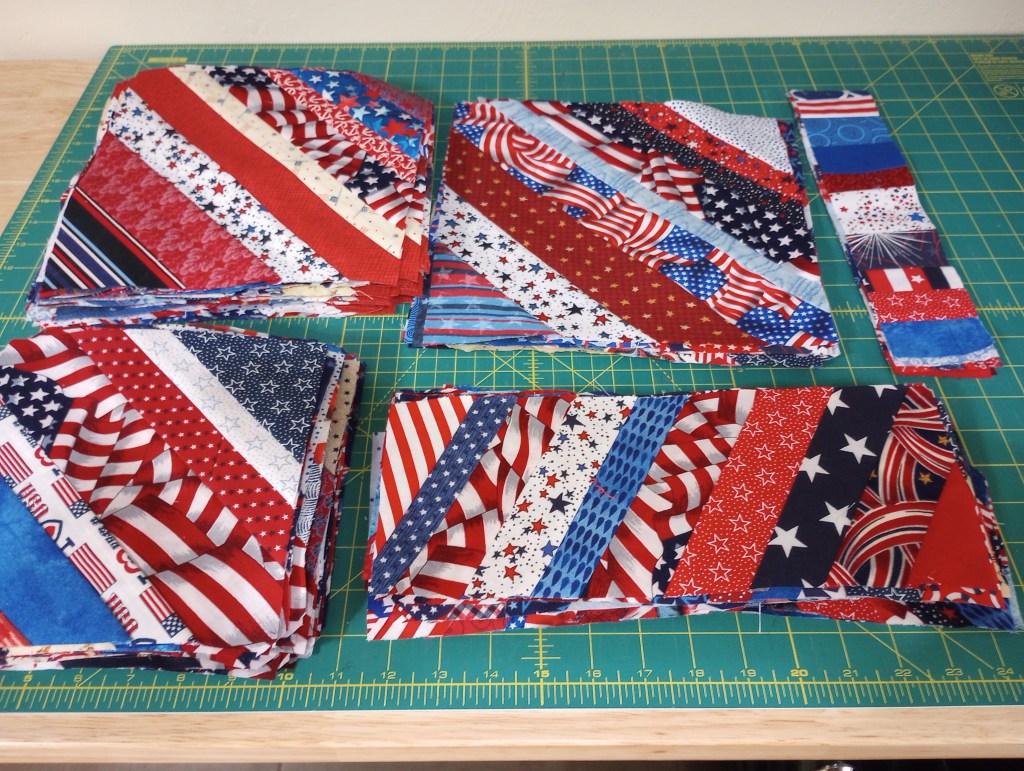
As of tonight, the patriotic strings and scraps are both empty. Yay!
It doesn’t mean the quilts are finished. Not yet anyway but, the hardest part is done, sorting, planning, and cutting up chunks and pieces.
I feel good about the progress and I’m looking forward to putting these together so I can tackle the next group of fabrics. Here are the 130 string blocks I made from those two drawers with just a little added from the scrap bin as I was cutting those up.
I have more of the adding machine tape strings to stitch but the last remaining pieces have all been cut to width and are ready to go. I’ll be adding bits and pieces as I finish the other quilts so this one be the last of the group finished.
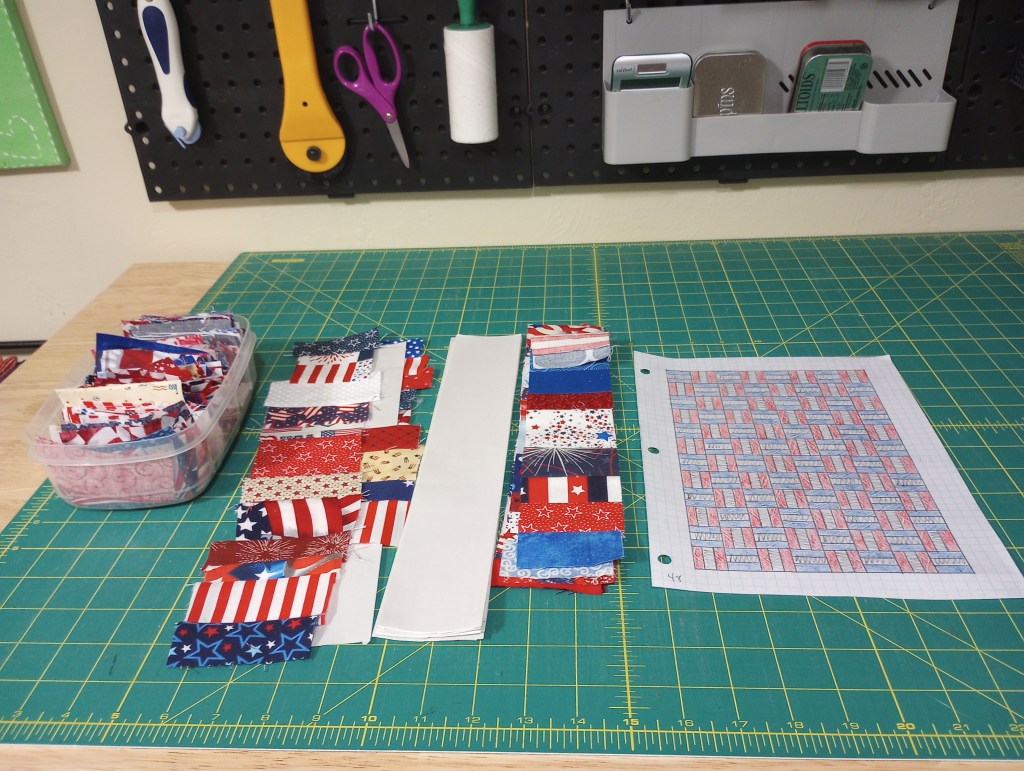
You can see the plans I made in the photos below. Each “kit” is bagged up minus the large pieces of fabric I’ll need to go with them. Those are labeled and in a separate pile on one of my fabric shelves. These photos will help me remember what I was planning too!
The string blocks for this layout are 12.5″. In the scrap bin were the 32 waste triangles leftover from the patriotic round robin I finished last month.I decided to set the blocks with a friendship star type sashing to use them. Most will end up in the outside border. I’ll need a few more than what I have but, I’ll use the sew & flip corners on the sashing pieces to make them rather than making separate HSTs.
These 60 string blocks measure 7.5″. They’ll be used to piece 120 large half square triangles for this setting. I made this quilt last year from thrifted men’s shirts using the same layout. I like how that quilt turned out so I decided to try it again with string blocks.
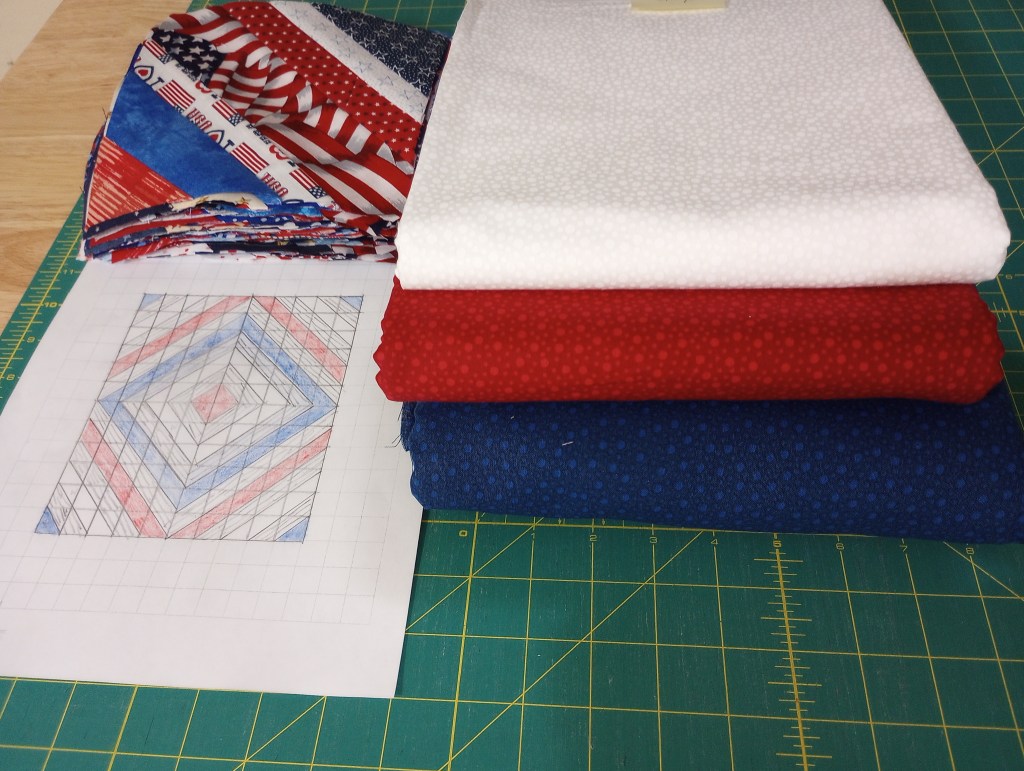
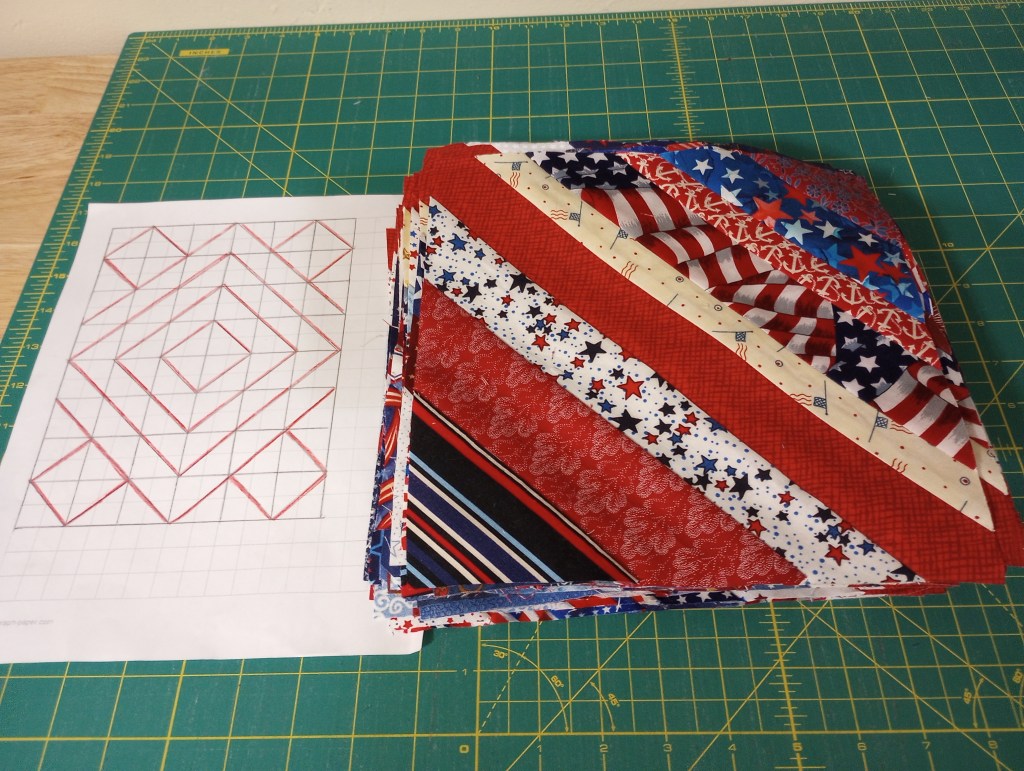
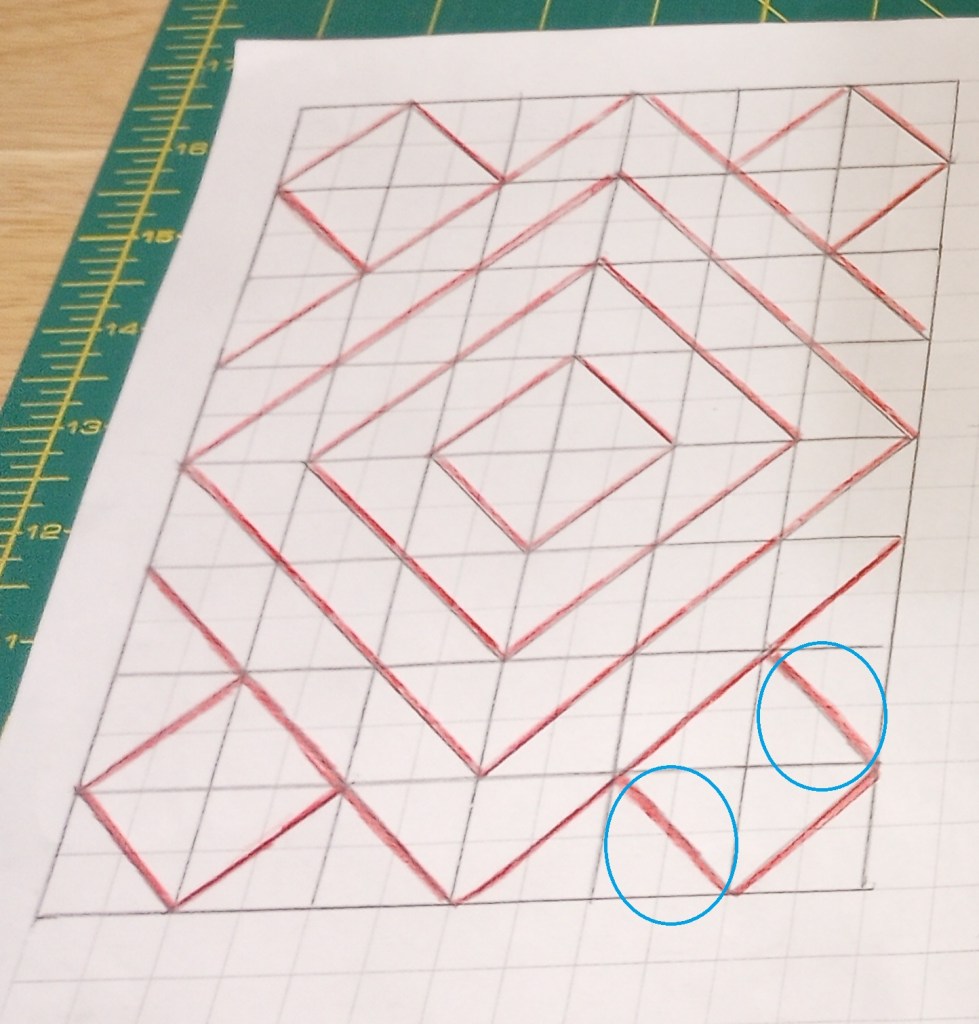
This set of 48 blocks measuring 9.5″. All of them were made with the same red center strip. When I was looking at the diagram I drew for the HST quilt above, I got an idea to try a similar layout for these blocks. I’ve probably seen it before but I don’t remember when or where.
The diagram was changed by rotating these two blocks in each corner.
Stephanie (who lives in western Australia) is a member of one of the online groups I’m in. At the beginning of each month, she pulls a paper out of the hat to chose a type of fabric for us to target using that month. They’re usually things like strips, fQs, charms, scraps, strings, orphan blocks, etc. It’s meant to encourage us to use stash that may we may otherwise tend to overlook. I don’t always play along but this month is “shapes” so I decided I’ll use my Go Cutter to cut 3/4 square triangles. I’ll be making 12″ red /blue stars to use with my string pieced units. I can work on my string project and play along with the “shapes” suggestion this month. 🙂
These string units measure 5″ x 12.5″. I plan to cut them in half so they’ll be 2.5″ x 12.5″. I want to use them to frame my blocks.
I’ll then add white sashing with cornerstones so they’ll end up forming 9 patches between the columns and rows. I’m really anxious to see how this one turns out!
My final string quilt will use those adding machine tape units made with the tiniest strings. They measure 13″ long and 2.5″ wide.
I’ll cut them in half to 2.5″ x 6 .5″. I’m trying to use wide pieces in the center of the adding machine tape where I’ll have to cut the strip in half. It seemed it might be easier to make 48 long strips than 96 short ones!
The string units will be center strip in a rail fence block. Half will be flanked with blue strips for the horizontal blocks and the other half with red strips for vertical blocks. I want to use a consistent red and blue for the blocks to showcase the string units better. I have plenty of red and blue choices from that big Joann haul just for times like this.
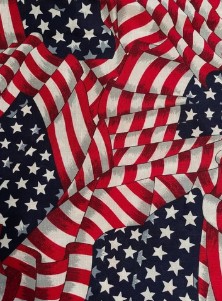
This project will need a border to reach my preferred size, and I have several pieces of American flag fabric leftover from backing cutoffs to use.
I purchased a bolt of flag fabric on eBay last year. The seller asked me what my plans were for it and whether or not I might be able to use a second bolt. I told her I make quilts to donate and I definitely would be able to use it for backings, if the price was right. She didn’t want to be paid for it and even covered the extra postage. She said her father was killed in the Vietnam war and she wanted to donate it to honor him.
I paid $25 and ended up with 30 yards. I’ve used it to back all my patriotic quilts and I remember her kindness every time I use it.❤️
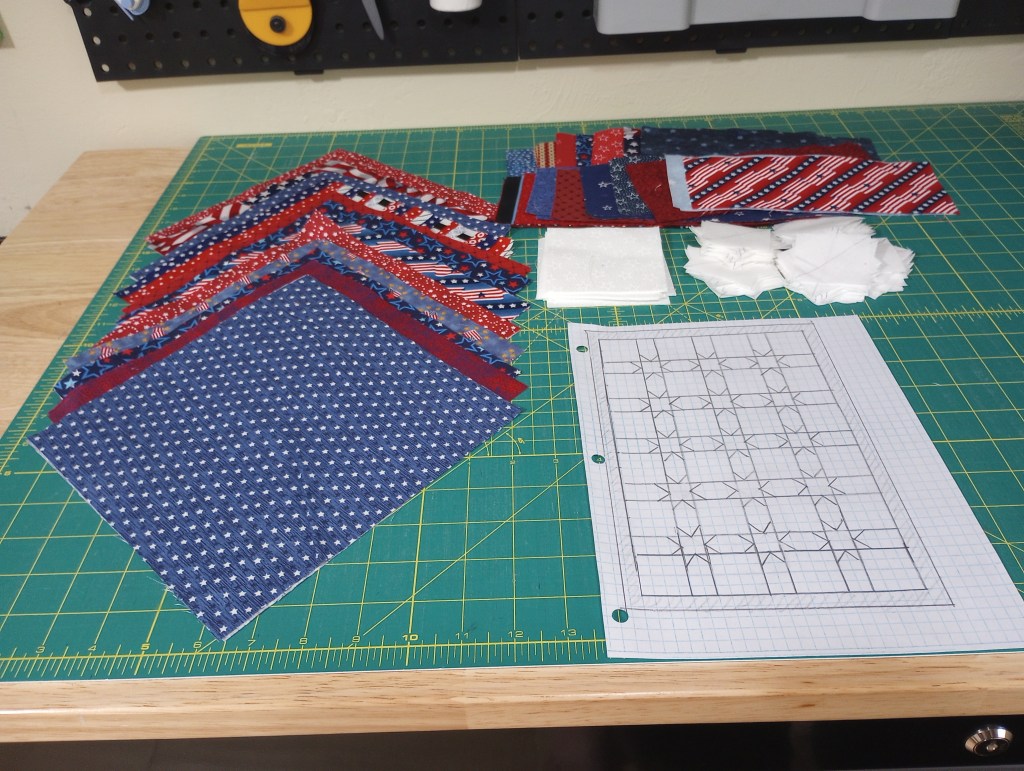
Once I decided to use the patriotic scraps up too, I put aside the pieces that were large enough for the Evening star quilt until I was ready to cut the fabrics for it. I did need to add a couple of pieces from the red and blue scrap bins but, not many.
The squares are cut 8.5″ and the sashing 3.5″x 8.5″. To bring it to size, I’ll add a border because not only did I not have enough pieces to make more blocks but, I didn’t need to increase the size by 11″ in length or width.
I know what I’ll be using for the border but forgot to add it to the photo, however; it is labeled on on the stack with the other fabrics I’ll be using to finish all these quilts.
This will be the other scrap quilt. I was inspired by Robin Pickens’ Showering Stars pattern. I don’t own the pattern but I can tell from the description that the quilt would end up much larger than I wanted make. I didn’t see a viable way to downsize it and keep the original design elements so I decided to try something a bit different for the “showers” – French braid piecing.
I love the dark background in the pattern photo so I’m going to use a deep blue. My big 16″ stars will be red rather than white in order to use up several 4.5″ HSTs leftover from making the Transport pattern.
I have enough scrap pieces to extend the braid both over and below the star blocks. I’m not sure if I will make braid columns with the stars floating in them or, just use the braid either above some or below the stars. I’ll decide once I get the quilt the blocks on the design wall and see how it will look.
Photo from Kate Colleran Designs
The braids need to have white center squares (like the gold ones in the photo above). Most of the scrap pieces I had to use wouldn’t result in wide enough braid sections unless I use the squares to lengthen them. I hope it doesn’t ruin the effect.
At the end of the day, the only thing left of these scraps and strings were a few partial binding bits and some 2.5″ wide strips I’d set aside for scrappy bindings. I’ve added them to the bin of kits to bind one or two of the quilts.
If you were keeping count, that’s a total of 7 patriotic quilts. I’ll have to remember when a drawer is even half full, it’s probably enough fabric to make a quilt top!
I have a few other commitments to work on in the next couple of months but, I’ll work on fitting in time for these too. Until they’re all finished, the bin of kits will live on my long arm table so they’re not “out of sight, out of mind”. 😉
I completed another string quilt last week, and I’m really happy with the result.
I do need to make few quilts that are almost entirely strings to use more of them. I’d have been able to use double the amount of strings had I just pieced the 9″ blocks together. I used 12 blocks rather than 24 that I would have otherwise.
It is fun looking for ways to incorporate string sections into other patterns! I figure as long as I’m being intentional about using them often, rather than let them accumulate it’s all good. 😉
I took some photos while making the blocks using grocery store ads on newsprint paper.
Once the blocks were trimmed and the paper removed, I cut each 9″ block into 4 1/2″ squares. I forgot to take a photo of that step.
Each time I sew a string to the blocks I stop and iron them before adding the next string. Not everyone bothers to iron as they go but the extra step seems to make my blocks lie flatter than I think they might otherwise. It’s also a good opportunity to make sure the paper is easier to remove later. I to that by folding it back, sliding my thumbnail across the crease to sharpen it, then folding it back in place so it’s ready to add the next string.
Rocky (our cat) has his own little piece of batting to lie on and nap, watch me, or look out the window. I know people have cat allergies so I’m careful to keep the rest of my batting covered.
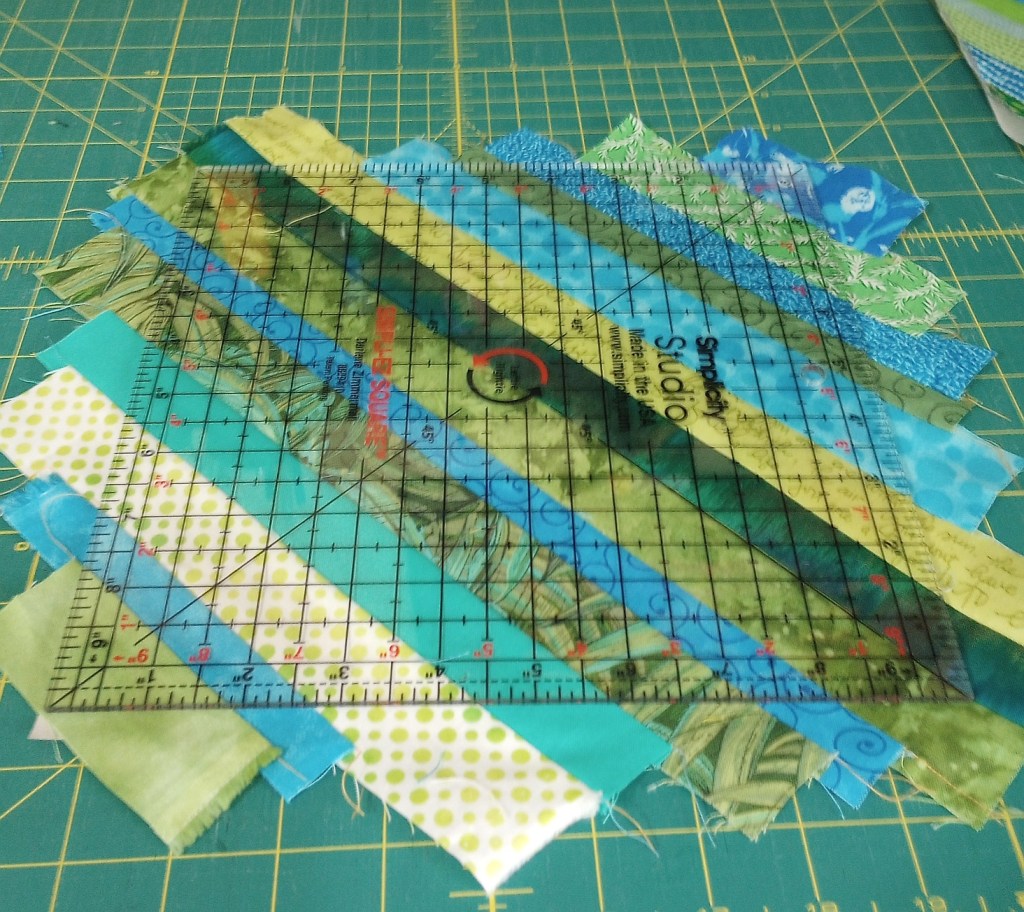
Today I’m cutting 2 1/2″ strips from Kaffe Fassett scraps for my next quilt. I didn’t think I had enough until I laid them out!
Any leftovers and narrow pieces will go into my next string quilt. It’s better to use them now than save them for Ron. (Late R On ;-))
That’s the name of the Fabric Cafe pattern I used for this string quilt. It’s from the book Easy Does It. The pattern requires three one-yard pieces of fabric but I chose to substitute string blocks for the 6″ x 9″ rectangles in the design.
I love browsing patterns and thinking, “I can add a string block here!”
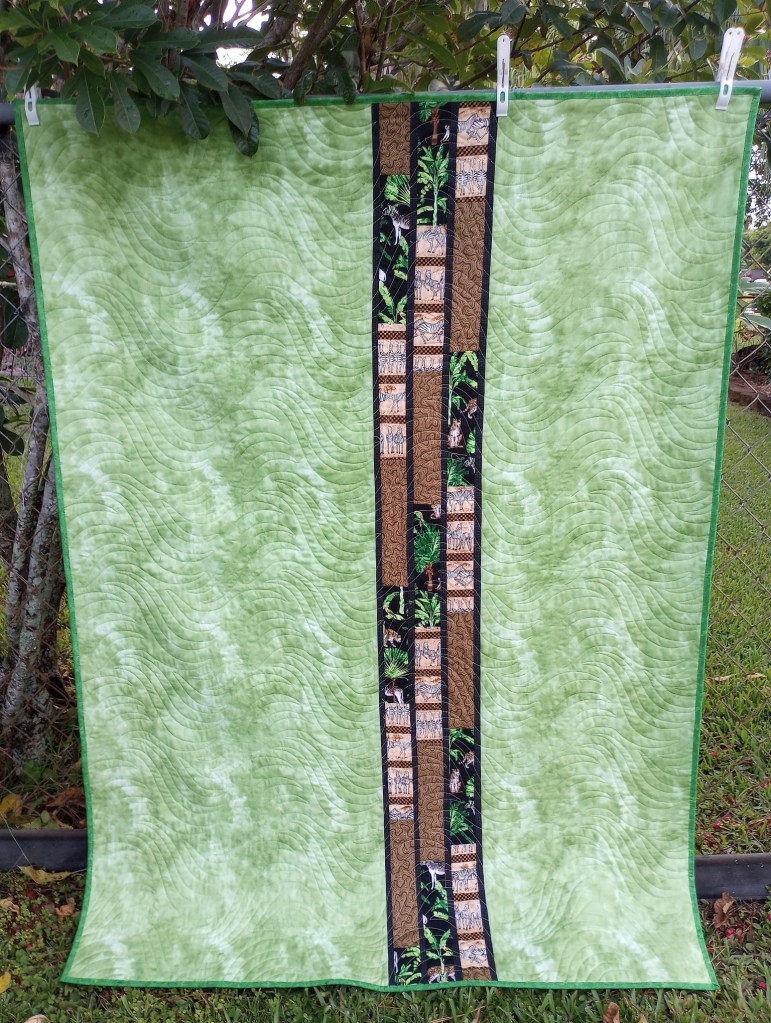
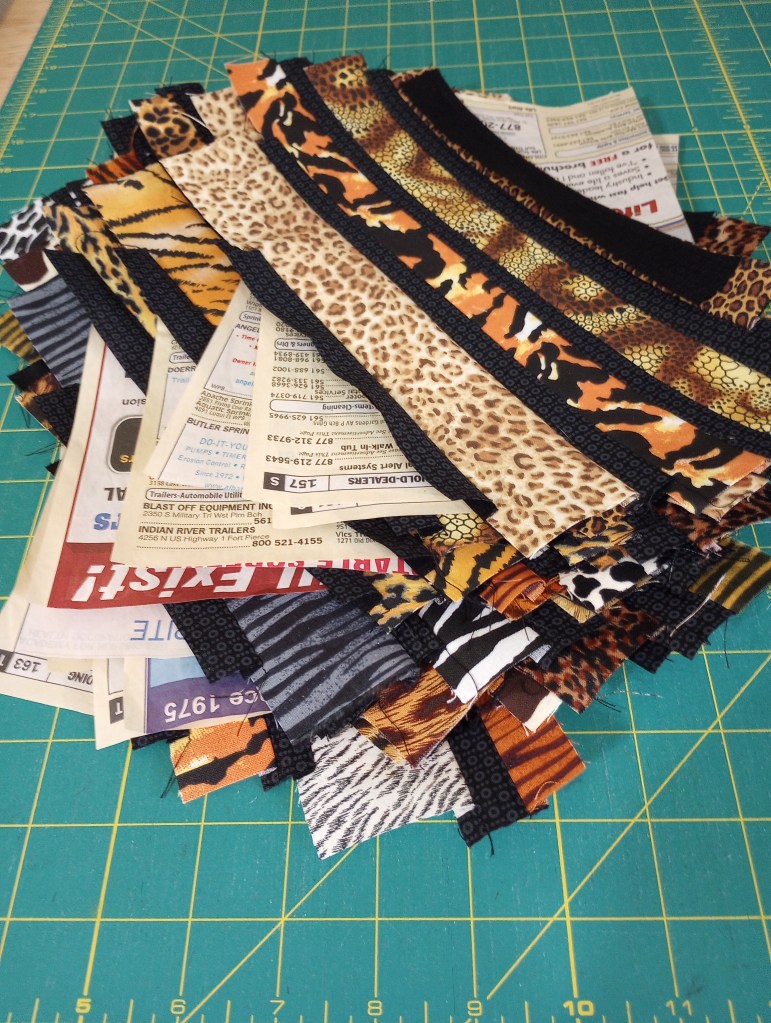
These strings came from several jungle animal quilts I’ve made in the last year or two and you can see those quilts here.
The print used for the snowballs (octagon shapes) is one I picked up on the de-stash table at the guild’s June meeting . It was just what I needed to use with this strings.
I had a couple of coordinating 2 1/2″ strips so I used those to make an offset insert for the back.
When I need to increase the width or length of the backing fabric, my goal is to start being a little more creative rather than just stitching an extra piece of fabric on.
The goal will be to use a design element that coordinates with the front whenever possible. For this quilt, I used the same narrow black strips that were also placed between the animal print strings on the front.
I originally used this fabric for the border. The design matched the jungle print, but it did absolutely nothing for the quilt. I decided to replace it with the green border and I’m happy now that I did.
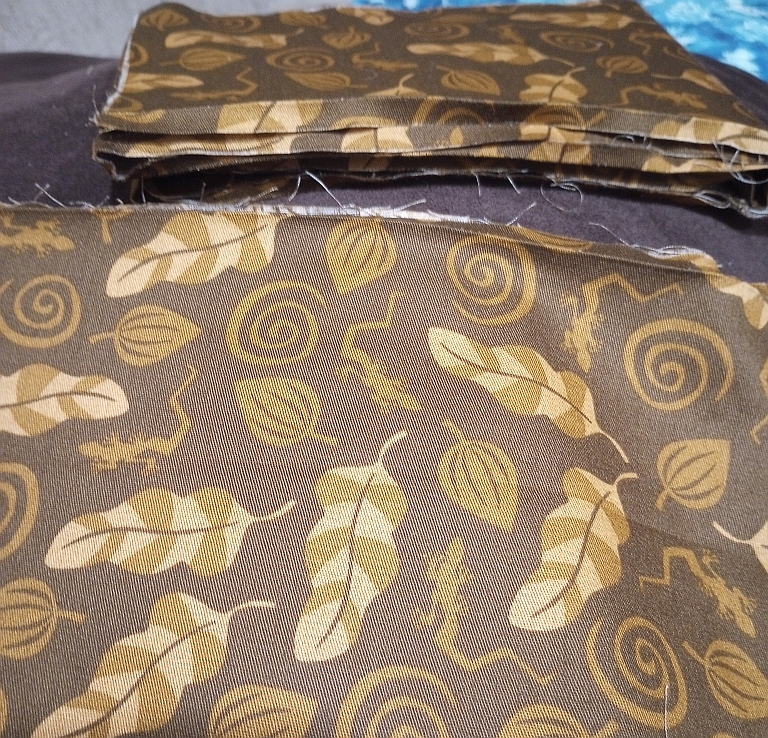
The brown pieces will get tossed in the binding drawer for a future quilt.
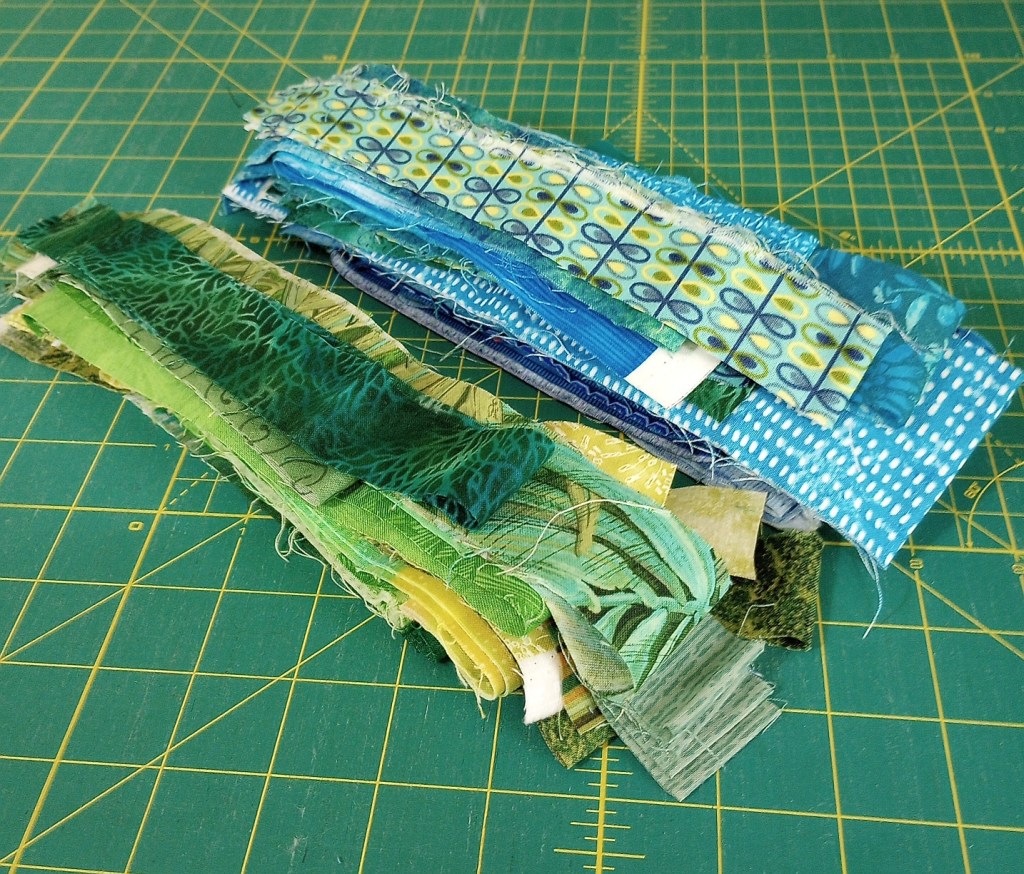
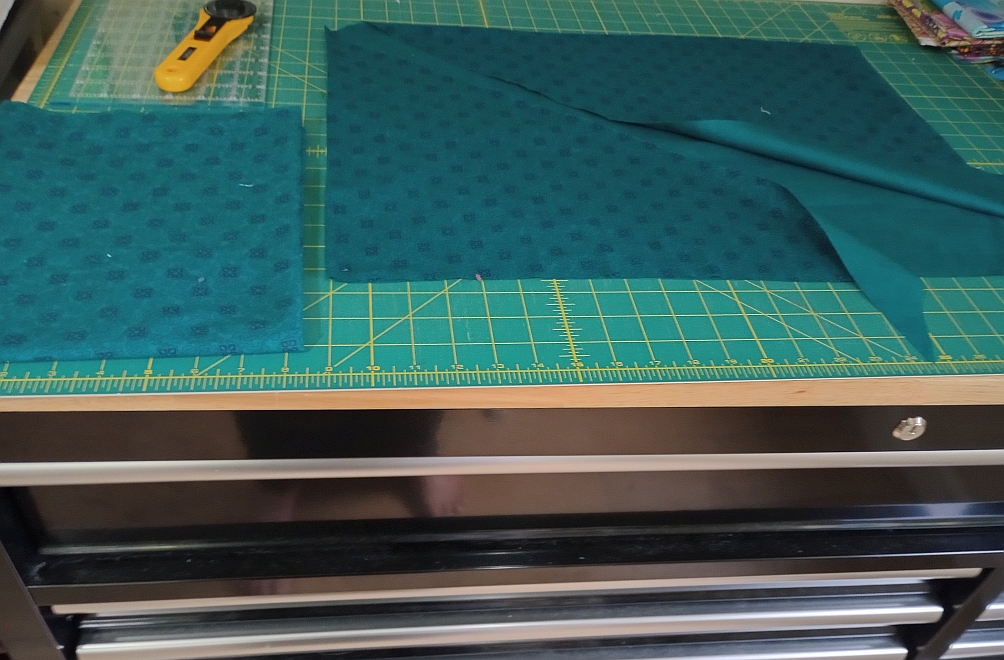
These are the beginnings of the next string project. A year or so ago someone gave me the teal fabric on the right. If you look closely, you’ll see she had cut it diagonally to make a bias binding. She was going to toss the leftovers away when I spoke up and said, “if you’re going to throw it out, can I have it?”.
Bias cut fabric is tricky to work with but, it won’t be a problem here. I’ll be able to cut around it for the pieces I need.
Teal, aqua, and turquoise are my favorite colors. I used to prefer green but somewhere along the way that changed and I was drawn to the cooler coastal colors. I’ll be using shades of green and teal together in this quilt..
We’re had rainy weather here this afternoon. A perfect day for either napping or sewing. (Yep! As tempting as a nap sounds… I think I’ll go sew a while. 😁)
I’m working on my latest string quilt today. I plan to hand-stitch the binding, so it might be a day or two before I can take a photo of the finished quilt, along with five other string quilts needing photos.
It’s made with animal skin prints leftover from quilts I made in 2023 and 2024.
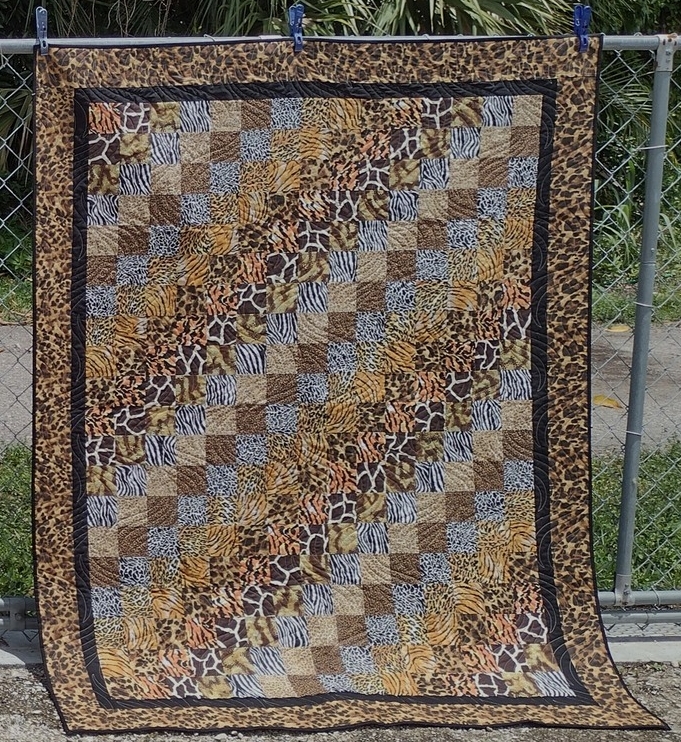
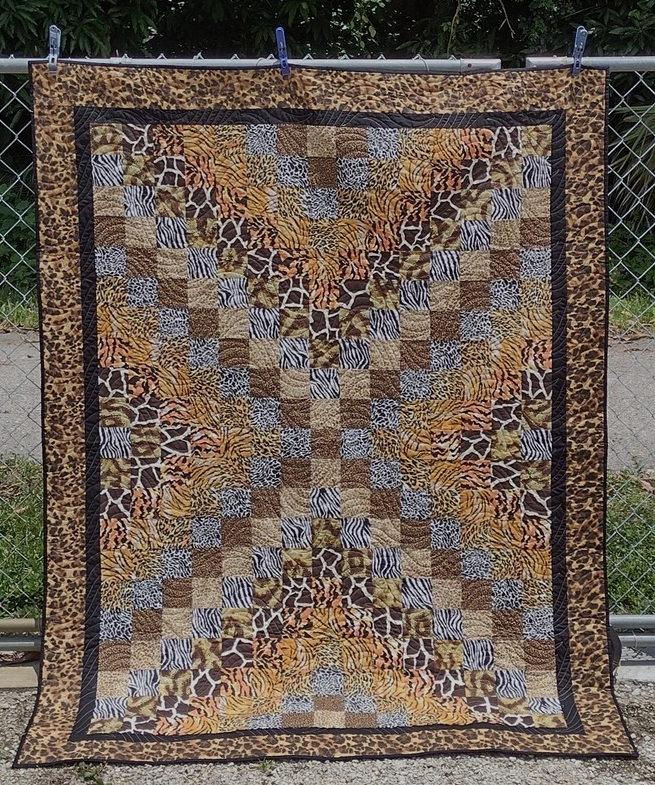
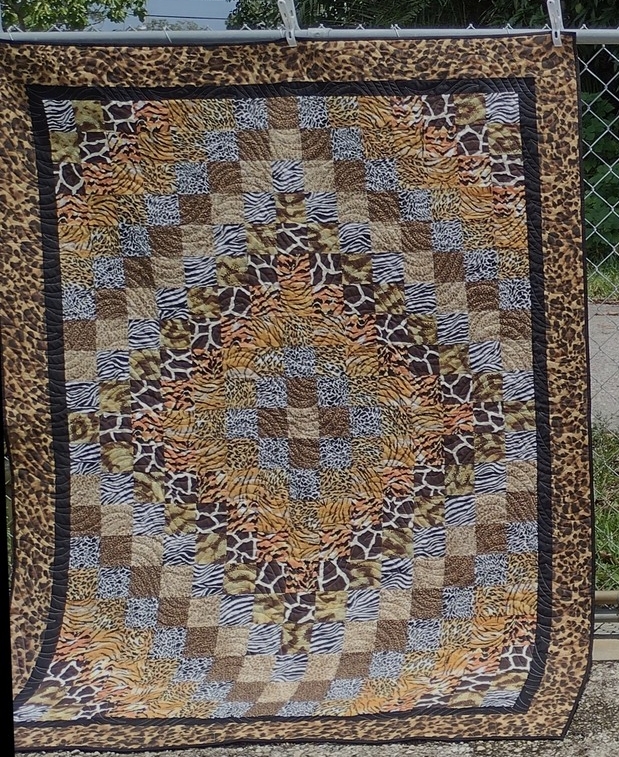
I wanted to try making these first 3 quilts after seeing photos from a blog where the quilter had made similar ones in a class. (I’m sorry but I don’t remember the blog.) The method was to use the same strip strata in 3 different layouts. I never saw the last quilt, so I had to guess. It’s the first quilt below. While the class made smaller baby sized quilts, I decided to make adult lap-sized quilts instead. She had chosen animal skin prints for the class. I fell in love with her quilts the minute I saw the photos and remembered I had a yard each of these prints still on my fabric shelves. I gave them to my 3 step-grandsons: Robert, Matthew, and Joseph.
I had extra fabric, so I tried the pattern Simply Serene from Pleasant Valley Creations based on a photo of the pattern. The pattern description suggests using a charm pack or 5″ squares, but I used 3 1/2″ squares, making my quilt a bit smaller. I like this one so much I’ve kept it – for now. 😉
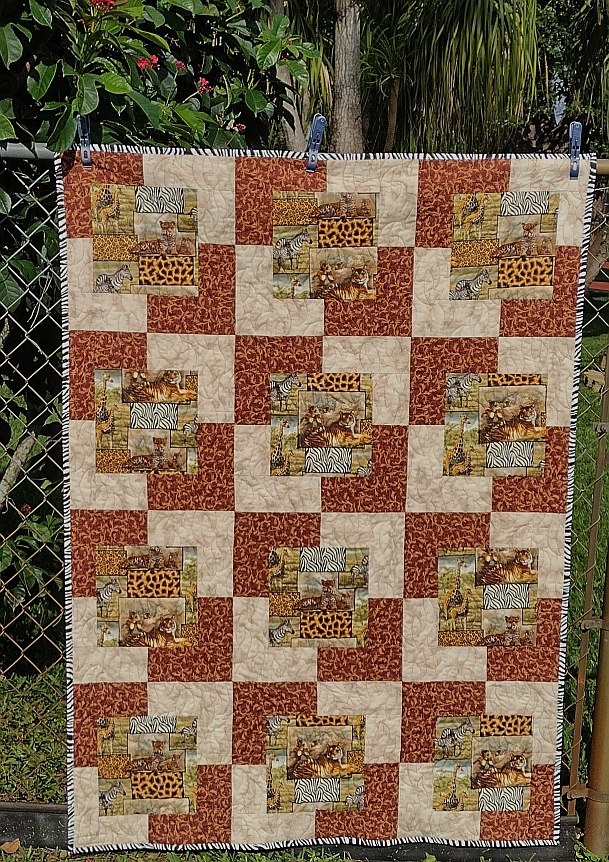
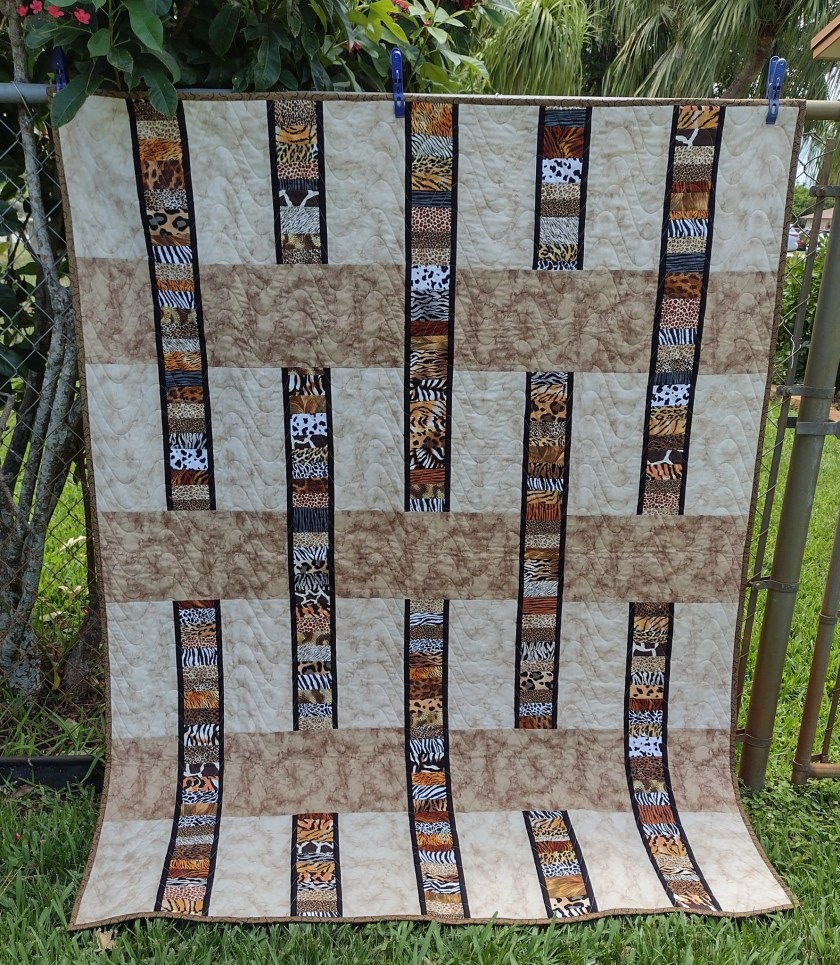
I obviously like working with jungle animals prints because I came across photos of these quilts I also made in 2023 & 2024.
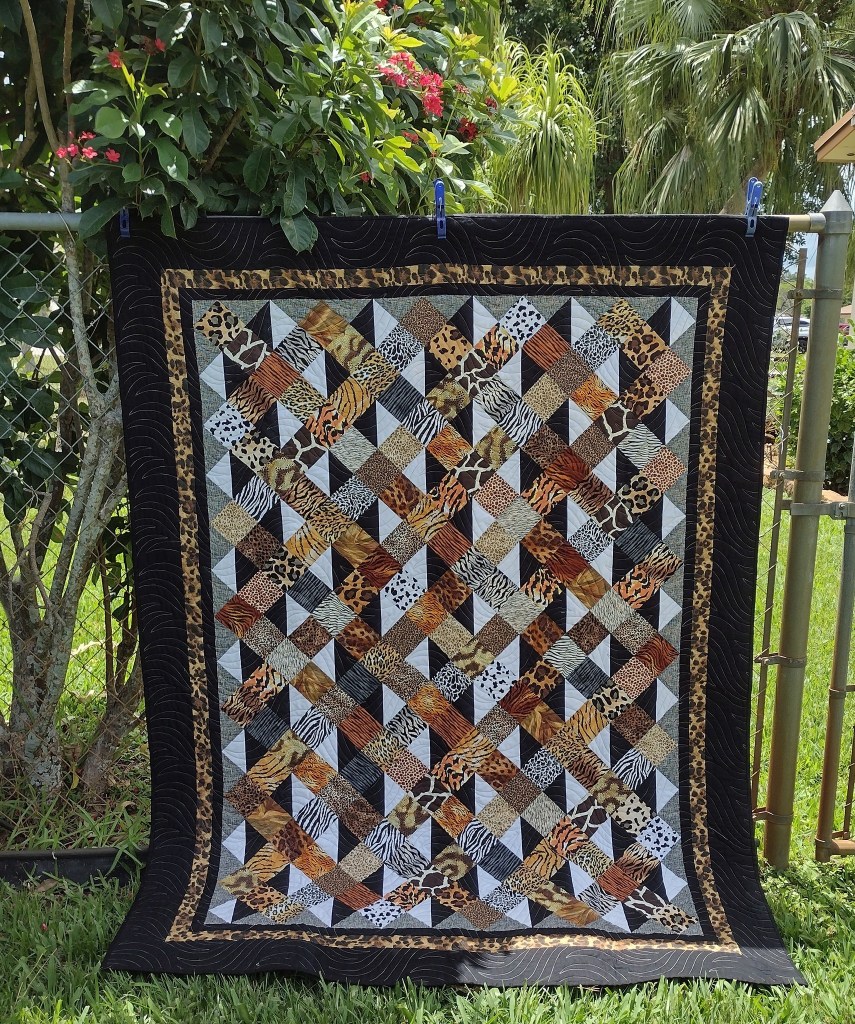
The pattern I used for the panel is called Call of the Wild Leopards by eQuilter.com. It was free when I downloaded it, but I searched and it seems that it no longer exists.
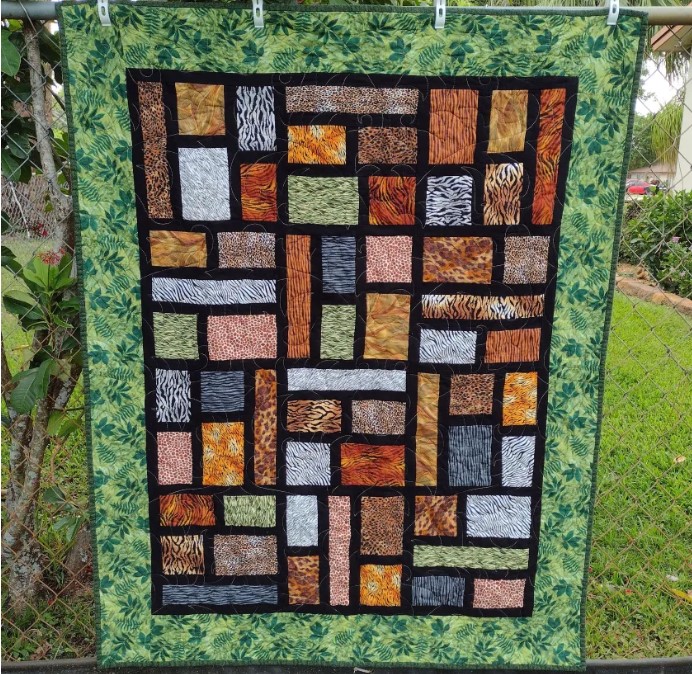
Someone gave me a yard of this animal print. It took a while to decide how to use it. I decided to go with one of my favorite 3 Yard Quilt patterns called Town Square by Fabric Cafe. It’s a great one for showcasing large prints that you don’t want to chop up too small.
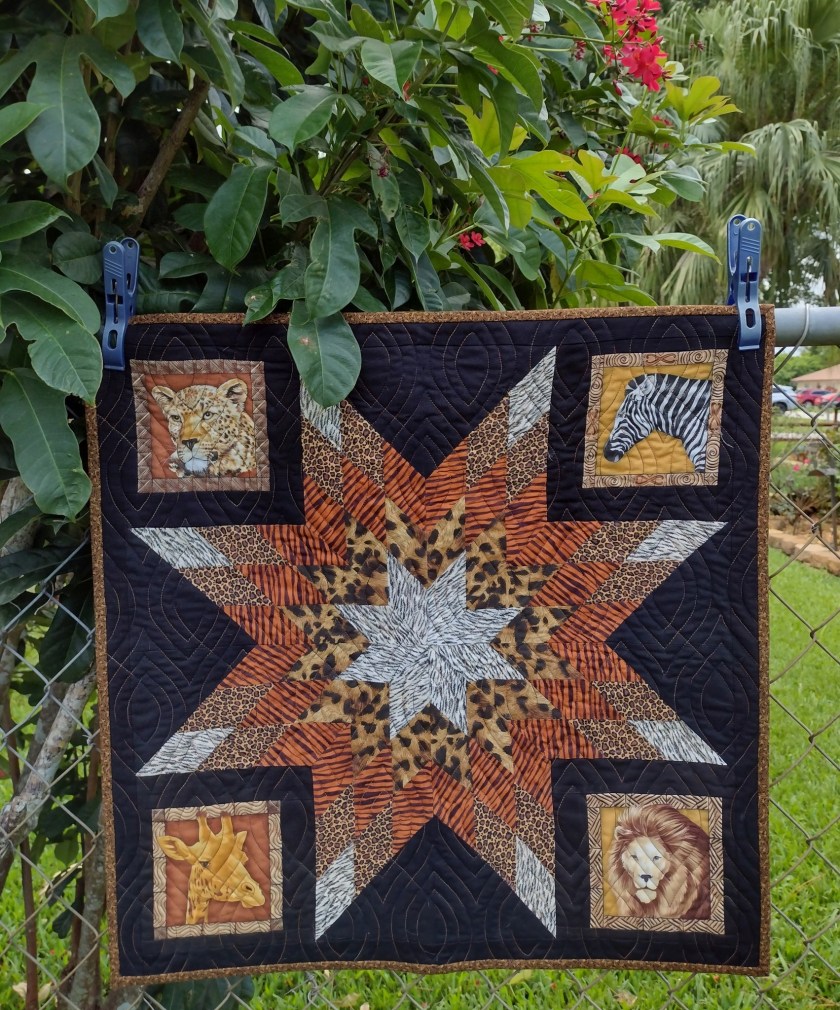
I followed this block tutorial to create my lone star wall hanging, but I used 2 1/2″ strips instead of 1 1/2″ it shows in the tutorial. I wanted mine to be a bit larger in order to qualify for a little quilt swap..
I had a lot of short pieces in the little drawer of animal skin prints. I usually save the shortest ones to use last, but not this time. I had an idea I wanted to try and two pieces of leftover backing that would work to get the woven effect I wanted.
After sketching it on graph paper, I used 3 1/2″ wide adding machine tape to create the needed string lengths. The tape was from our local Resource Depot, a non-profit that sells donated office and craft supplies. I used partial seams to avoid cutting and matching sections. Despite being a simple quilt, it took longer than I thought.
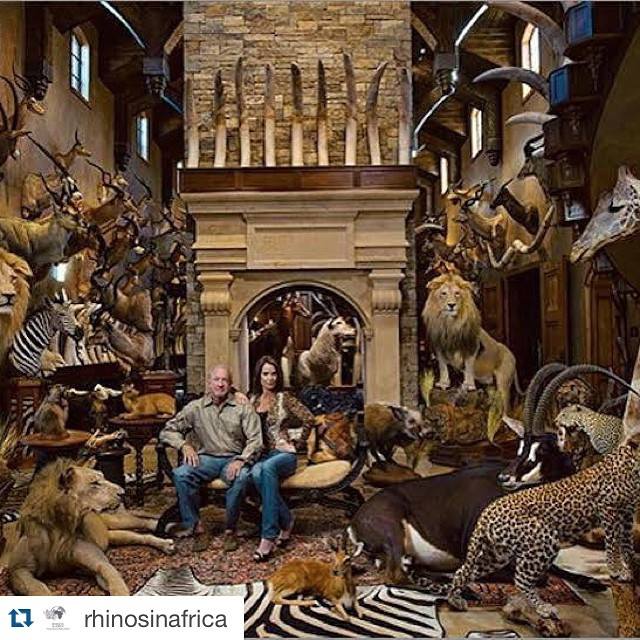
My first animal print quilt was the one above. I made it several years ago when feeling angry after seeing the disturbing barbaric photo on the right that was all over the news. Creating quilts have always helped me find calm amid anger or sadness. Although to this day, that photo still stirs a revulsion that I’ll probably never shake completely.
This is what I’ve been working on this week. I hope to have the finished quilt photo ready to share by Friday or Saturday.
Most of my animal skin prints came from Marshalls Dry Goods. You don’t need a wholesale account to shop that section of their website so I often buy wide backing by the bolt there too. I’m a fan of their great prices, big selection and good customer service.


