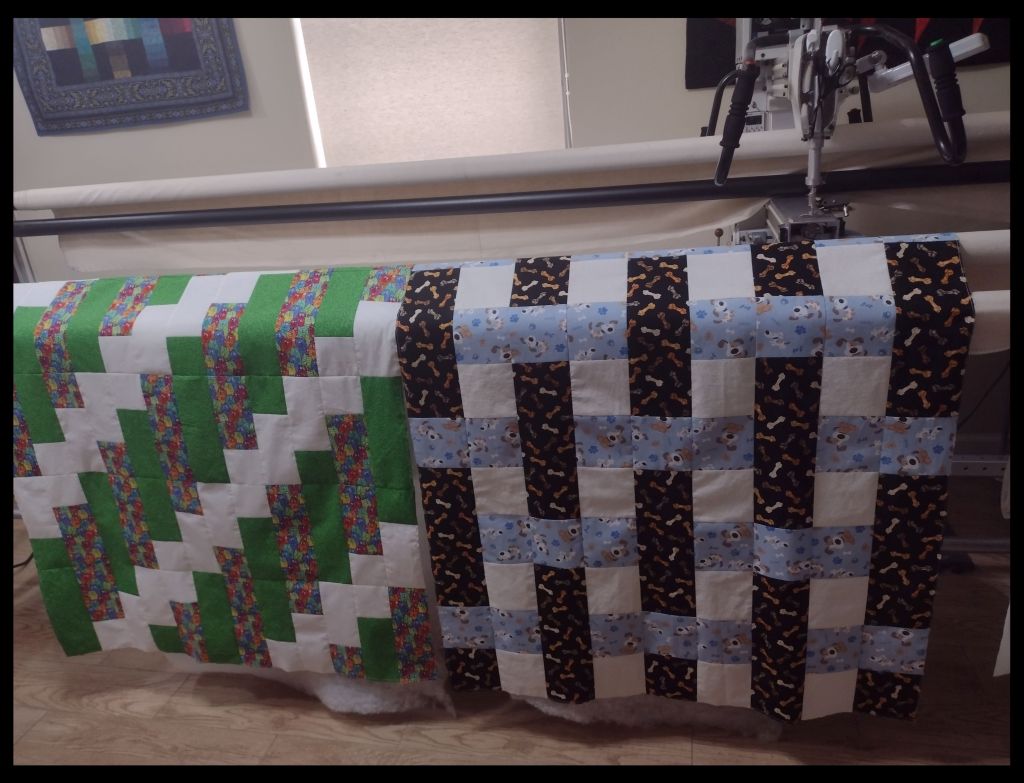
I finished two more little 3-Yard quilt tops today. I’ve decided to leave the narrow borders off the quilts I’m making with children’s novelty prints. I’d much prefer not having to piece backings for an extra one inch.
These simple quilts are so much fun to make and a nice break from working on getting those old UFOs finished!
I’ve decided to donate some of the quilts I’ve finished this year to a local nursing home. Specifically, the quilts will be given by the staff at Christmas to folks who have no visitors (hippa regulations prevent me from knowing anything about the residents).
I also want to add some additional quilts to the pile. I have a fabrics pulled to make quilts from the Fabric Cafe 3 Yard Quilt books. Before I start those I’m taking a look at my remaining UFOs to see if any of them can be completed quickly. Most are large quilts. Well, larger than I enjoy making that is.
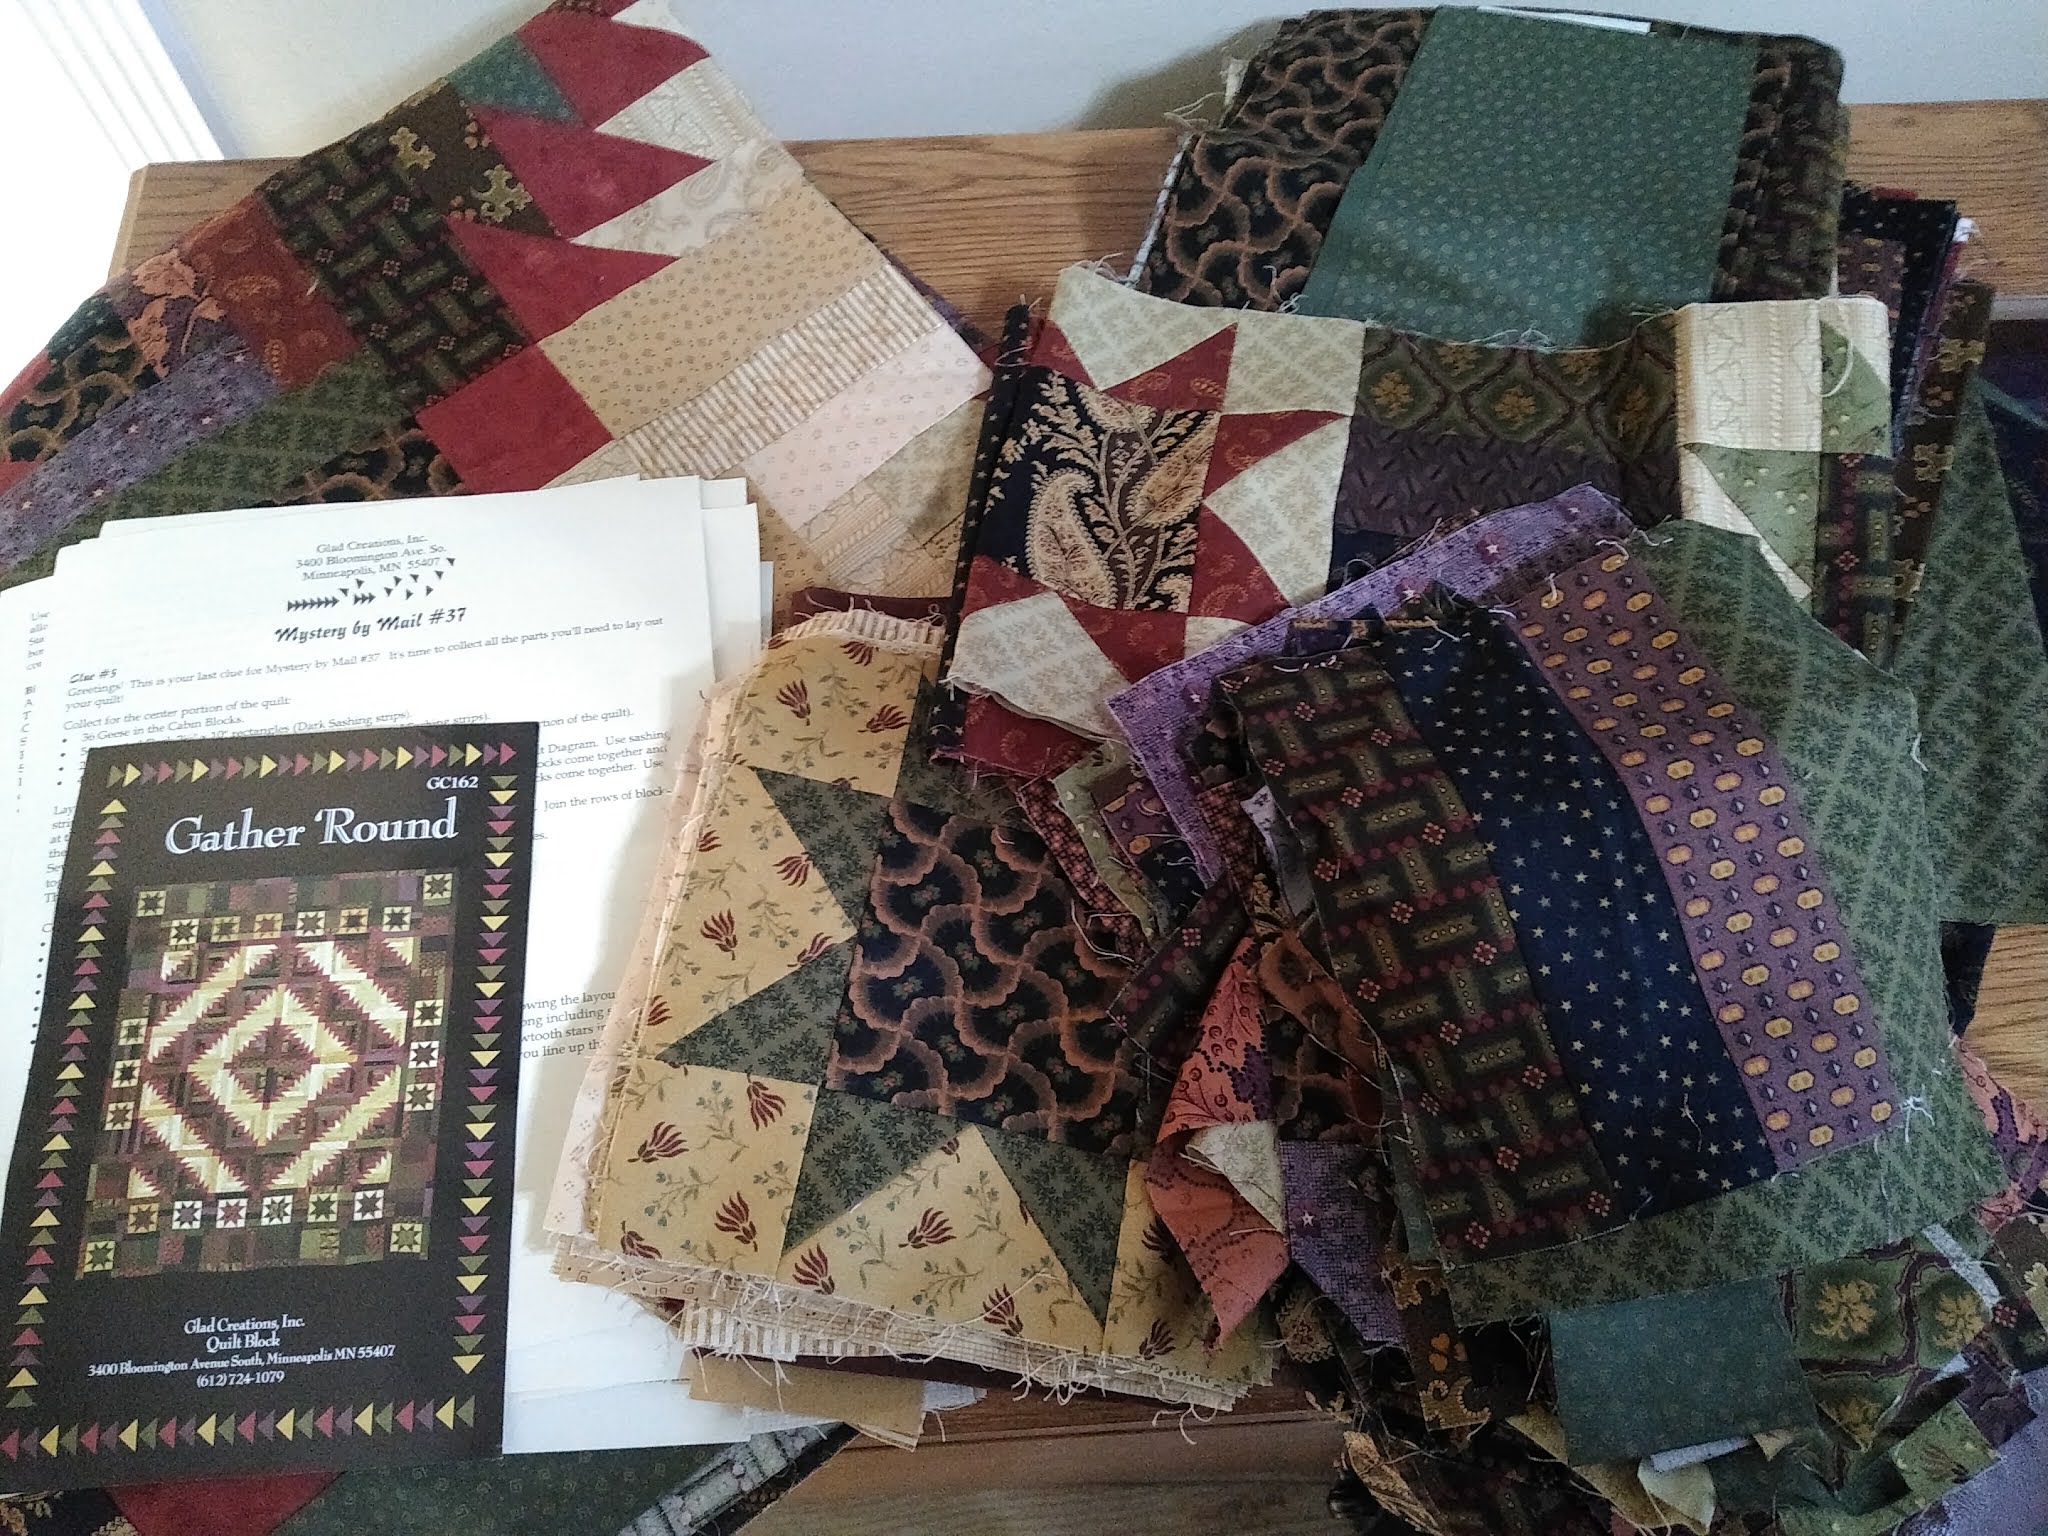
I should be able to get two quilts out of several of them. This is the one I began with today. It was a “Mystery by Mail” project from the Glad Creations Quilt Shop (which closed it’s doors in 2019 after being in business for 43 years). UFO #14 was one of those mysteries and, I finished many of the steps until the last couple of clues with the photo came in the mail. I wasn’t crazy about the pieced border.
My tastes have changed and I’m no longer enjoy working with Civil War style fabrics. (This is a good reminder why I rarely buy fabric if it’s not for a current project. The only exception is backing & background when there on sale.)
The center of this quilt top was 71″ square. I’m not a fan of square quilts and that size doesn’t work well for a nursing home quilt. I’ll do some reverse sewing to bring the top to a functional size.
I also have the 22 stars made that were intended for the border and a lot of strips cut that were to be used with them. I’m hoping I’ll have enough bits and pieces to make another quilt top. It’ll be good to get this project finished and the quilts off where they’ll be used.
I finished another UFO. It was a mystery by mail kit from Glad Creations Quilt Shop in Minnesota (now closed).
The sashing in the original pattern was substituted. I decided to try a technique I’d want to do for quite a while. It’s called “Seminole Patchwork”.
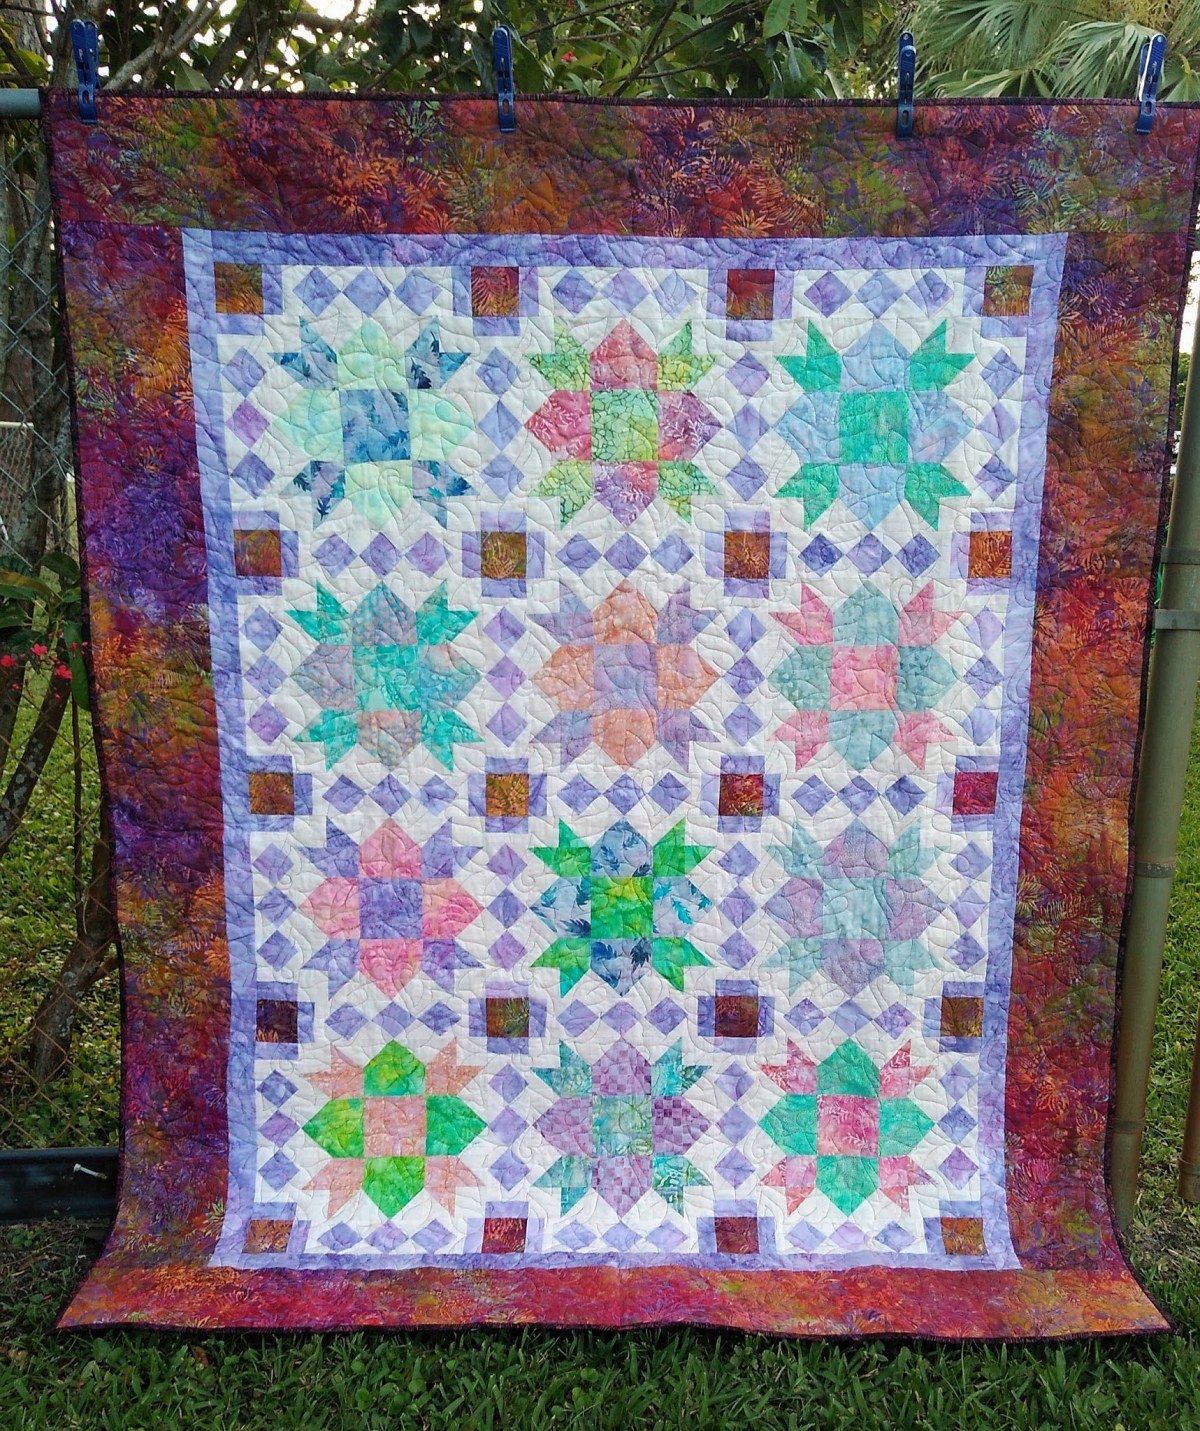
The batik fabrics are a light airy colors. The combination of breezy colors and the Seminole patchwork sashing prompted me to name this one Seminole Wind.
It reminds me of my favorite John Anderson song. I used to blast it through my speakers and sing my heart out every time it came on the radio. And, if you’re into trivia, here’s a little known fact: The Florida Seminoles are the only American Indian tribe never to have signed a formal peace treaty with the United States.
Back to the quilt details… I had to take two of the finished blocks apart in order to have just enough of the off-white batik. The purple was intended to be binding fabric in the original kit.
The outer border and setting stones are a little darker than I would have preferred but, I was determined to use fabrics I already own. My husband looked over my shoulder and watched the video while I was writing about the quilt. Out of nowhere is asked “does the border make you think of the campfire in the video?”. Ummmm… yep! That’s exactly the reason I chose it. <wink, wink>.
The backing, also from stash, is a purple & dark teal batik. It finishes at 58″ x 68″.
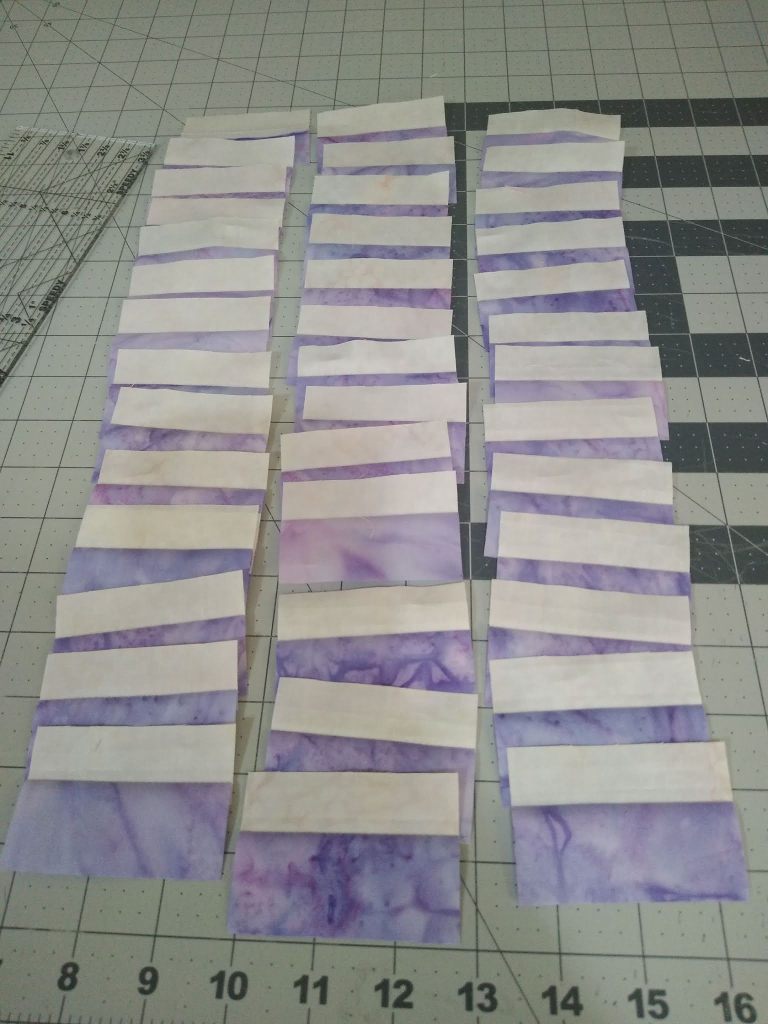
I followed the excellent tutorial for making Seminole Patchwork from Geta’s Quilting Studio. My blocks finished at an odd 11 1/2″ unfinished size so I won’t bore you with a lot of measurements you’ll never use but, I did take a few photos during the piecing.
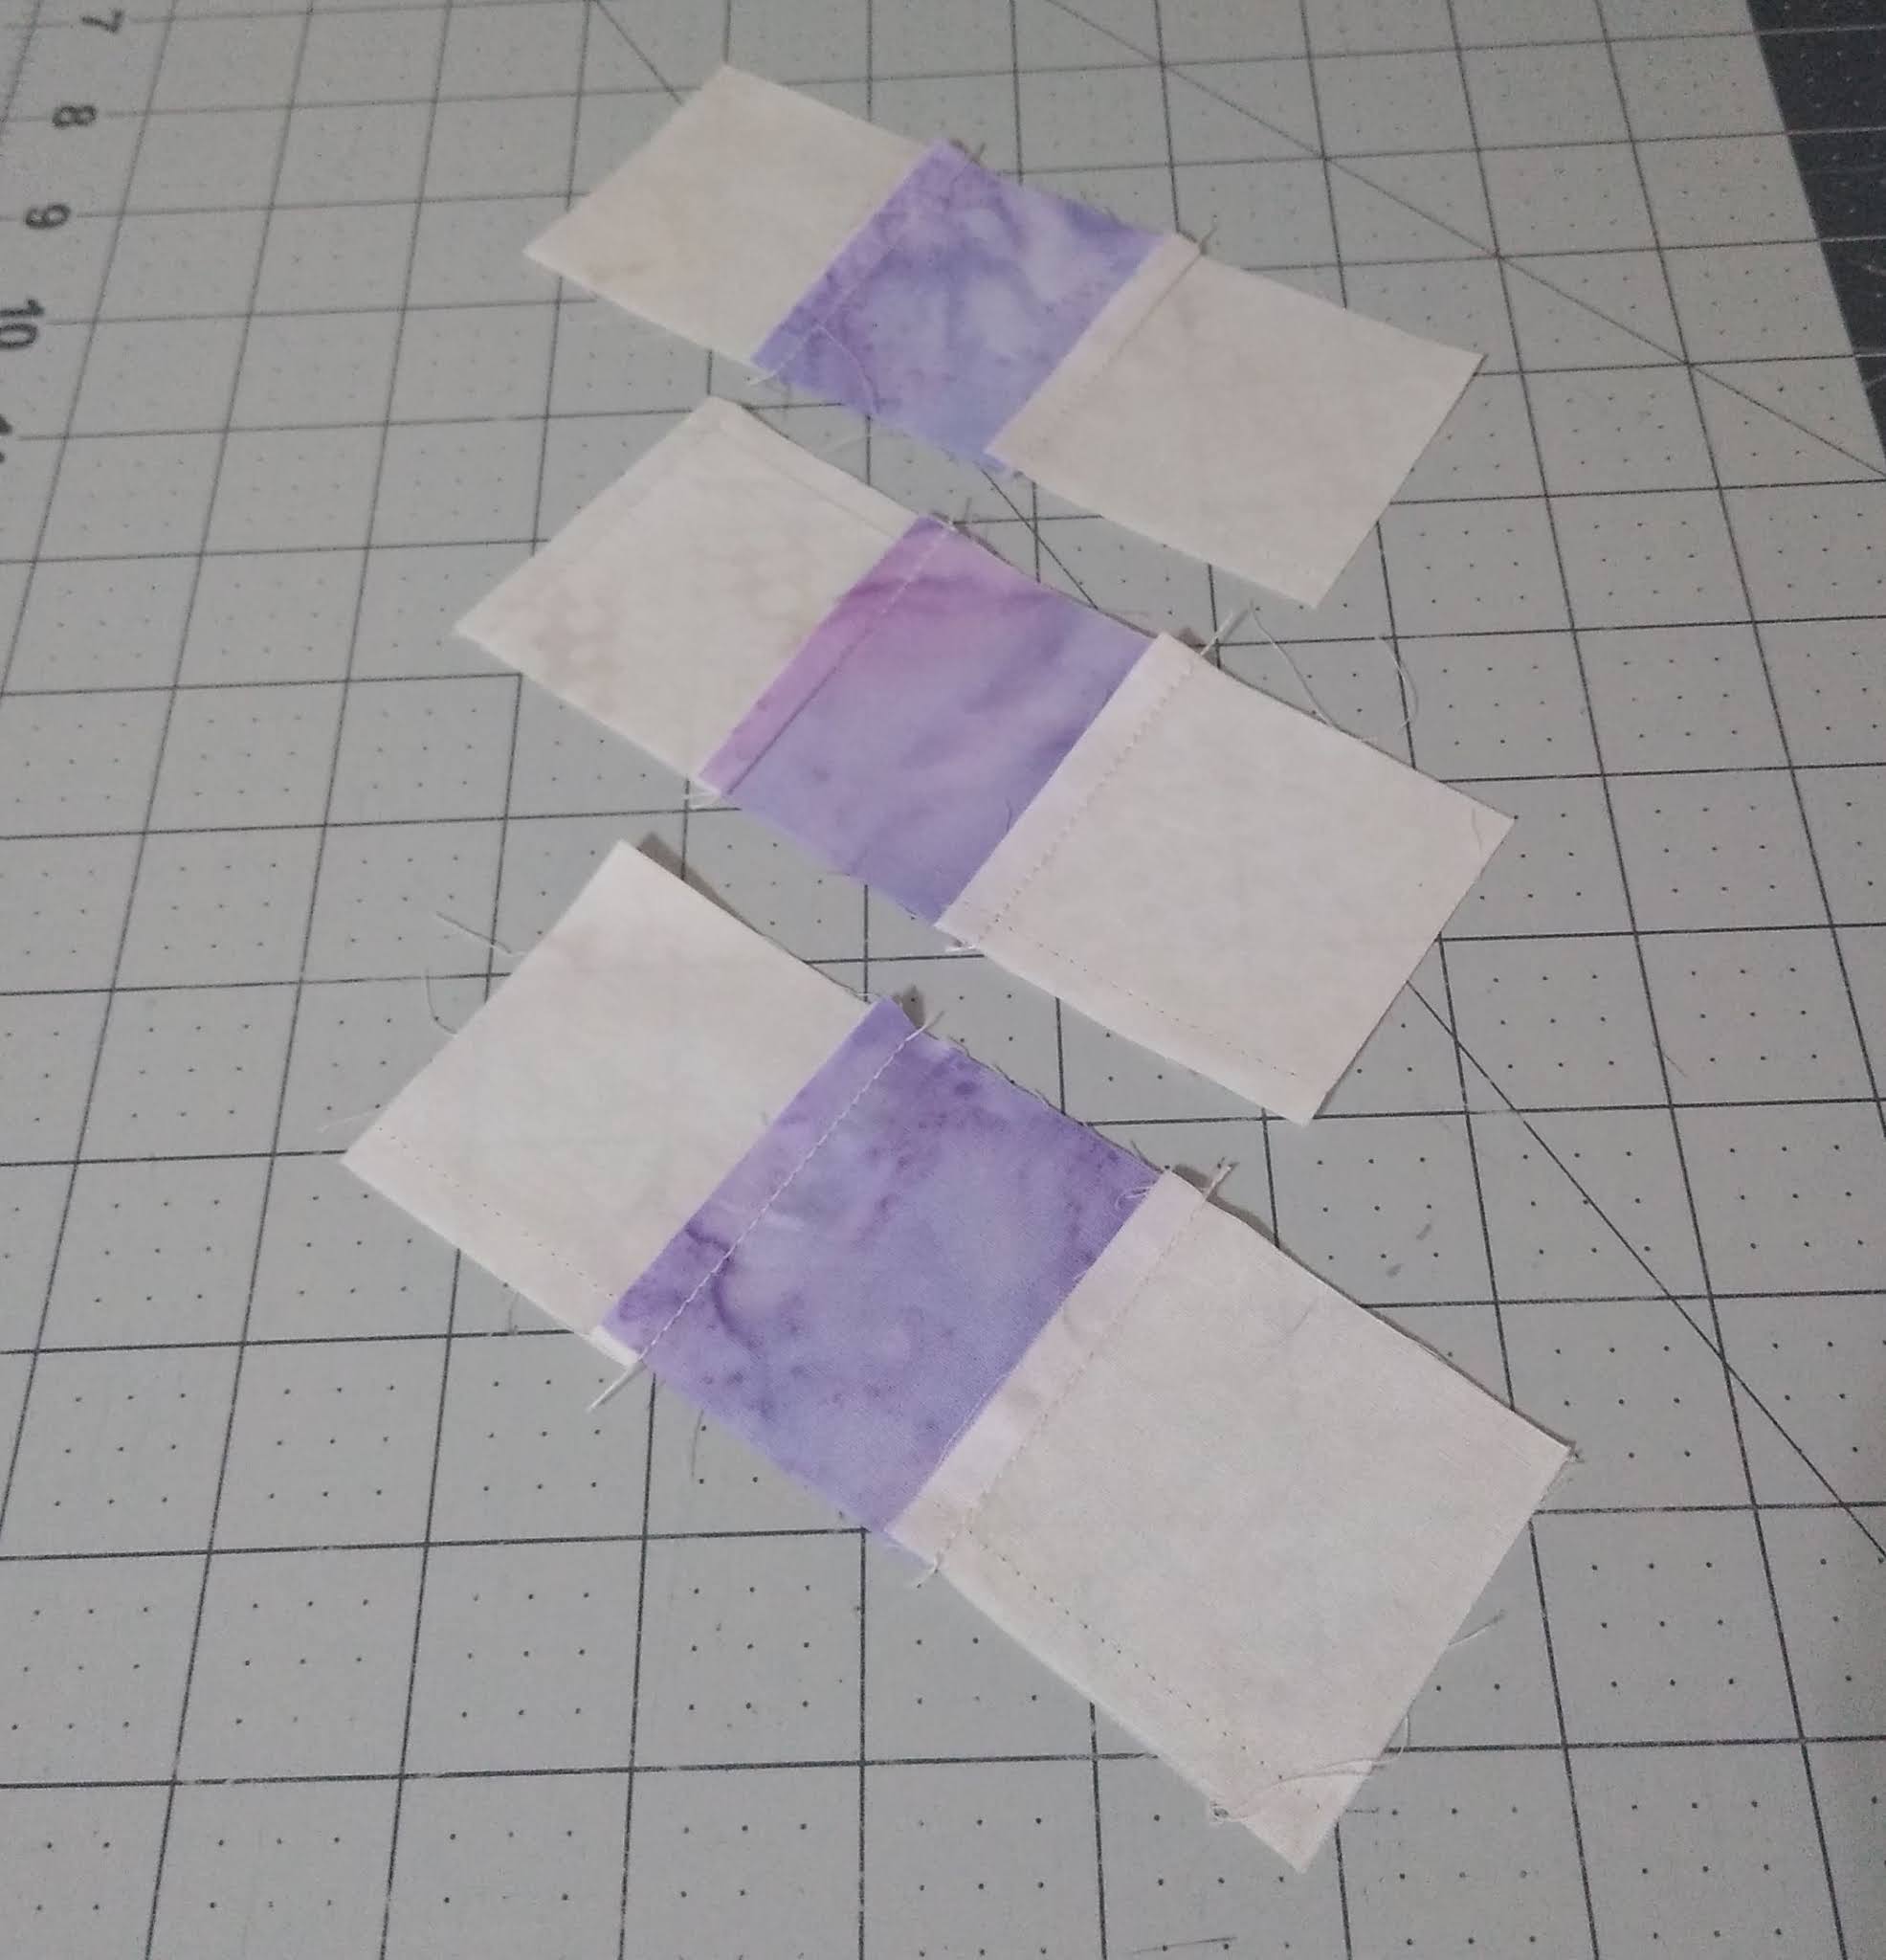
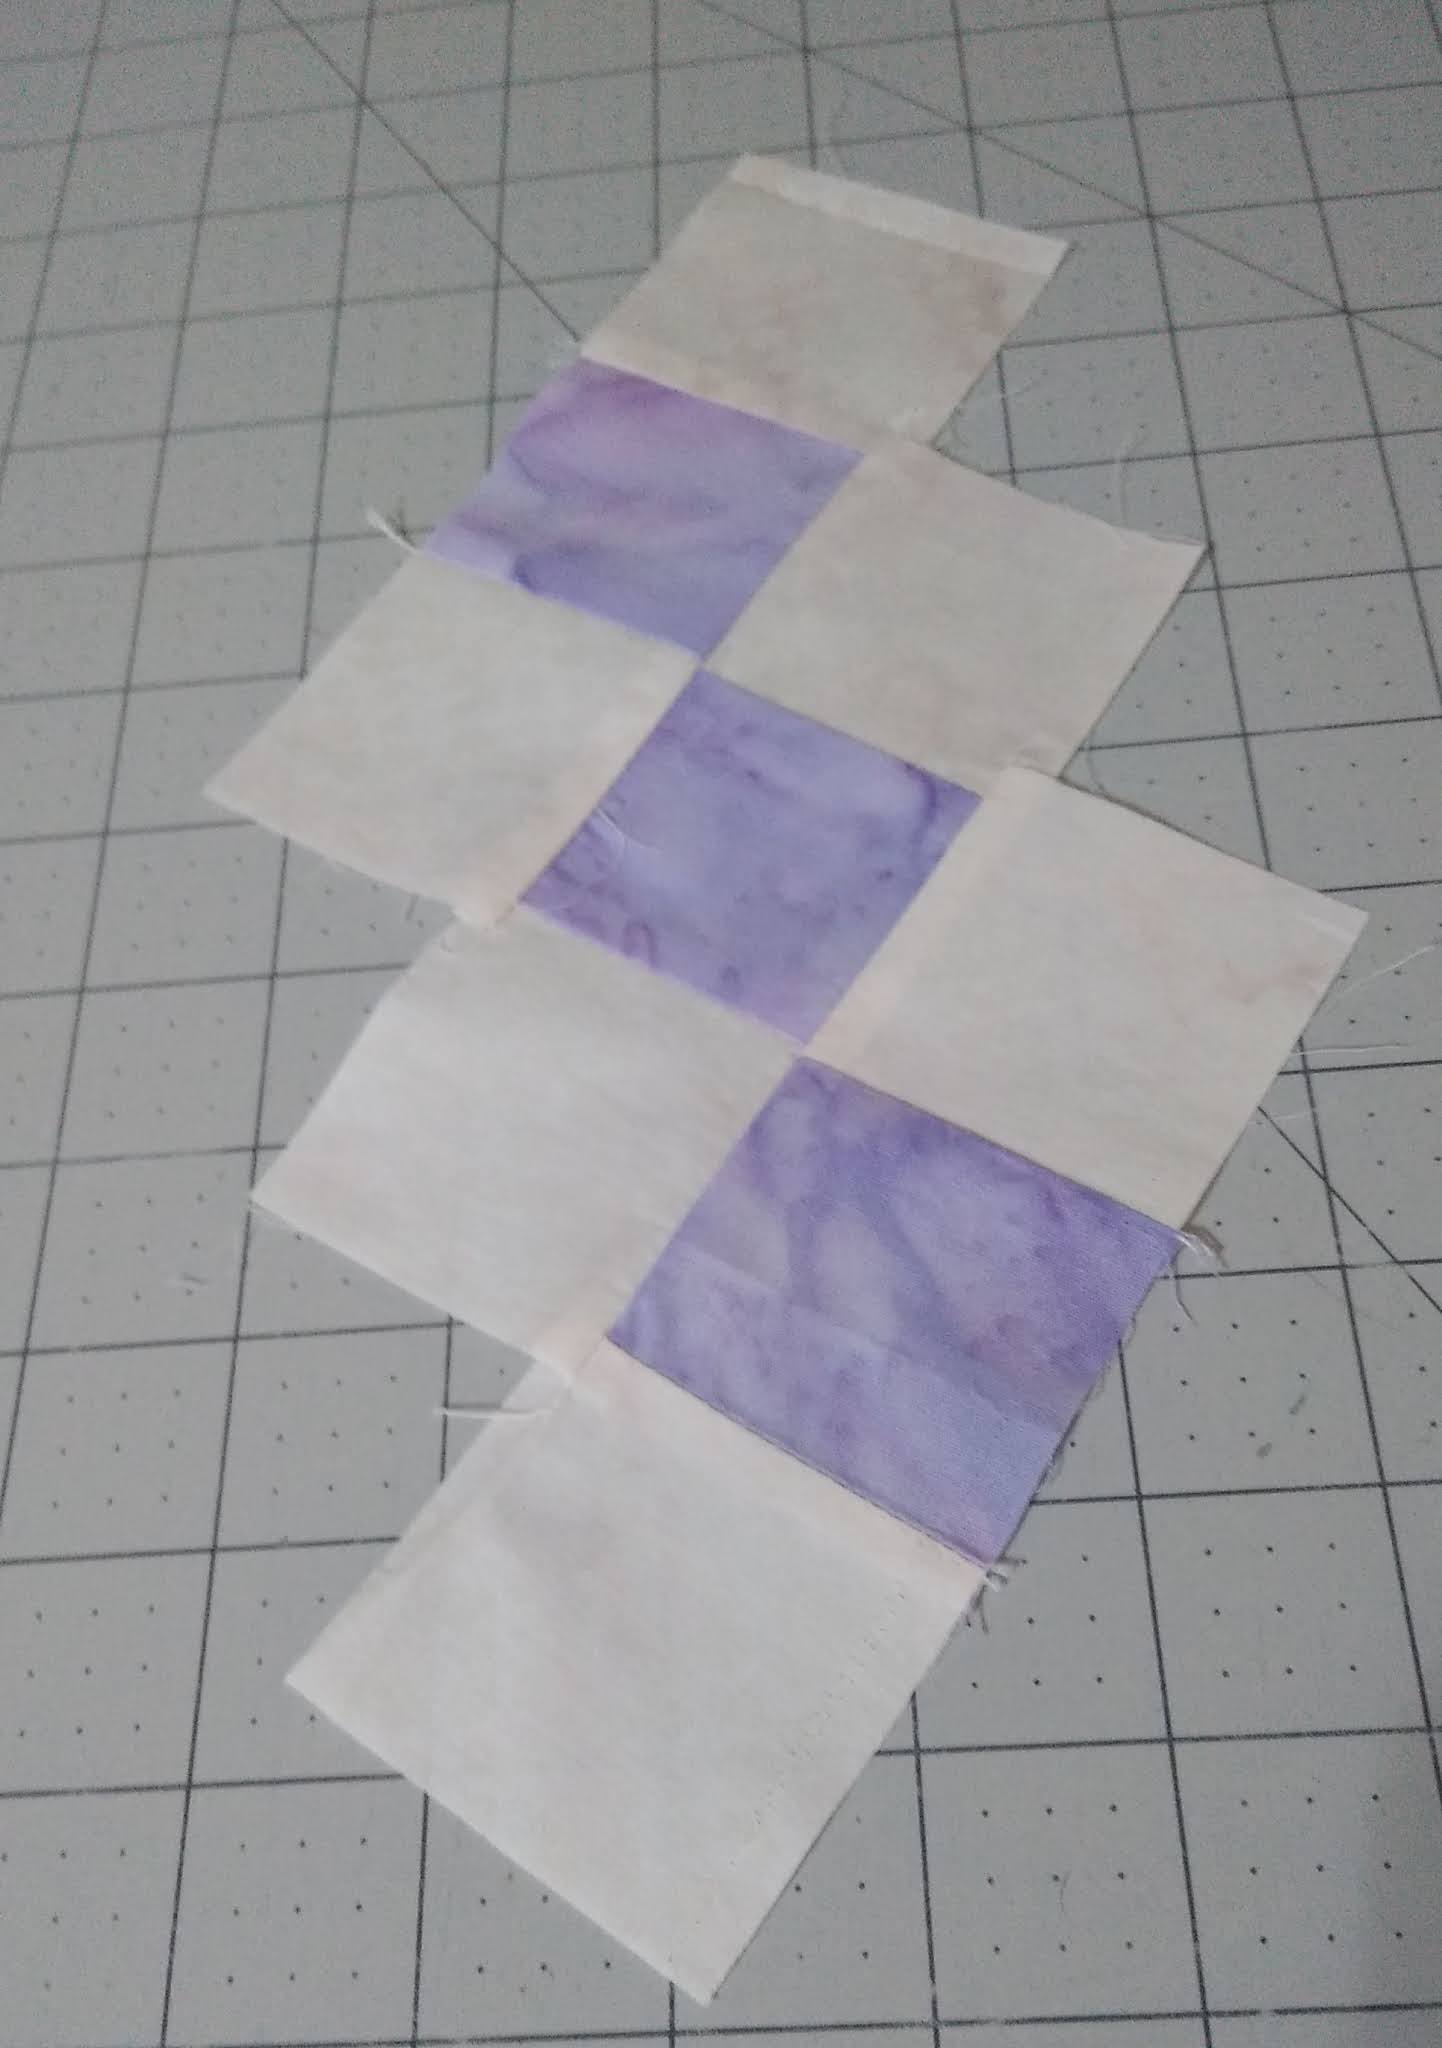
Sew 3 squares together, light – dark – light.
Stitch the units together staggering the pieces as shown.
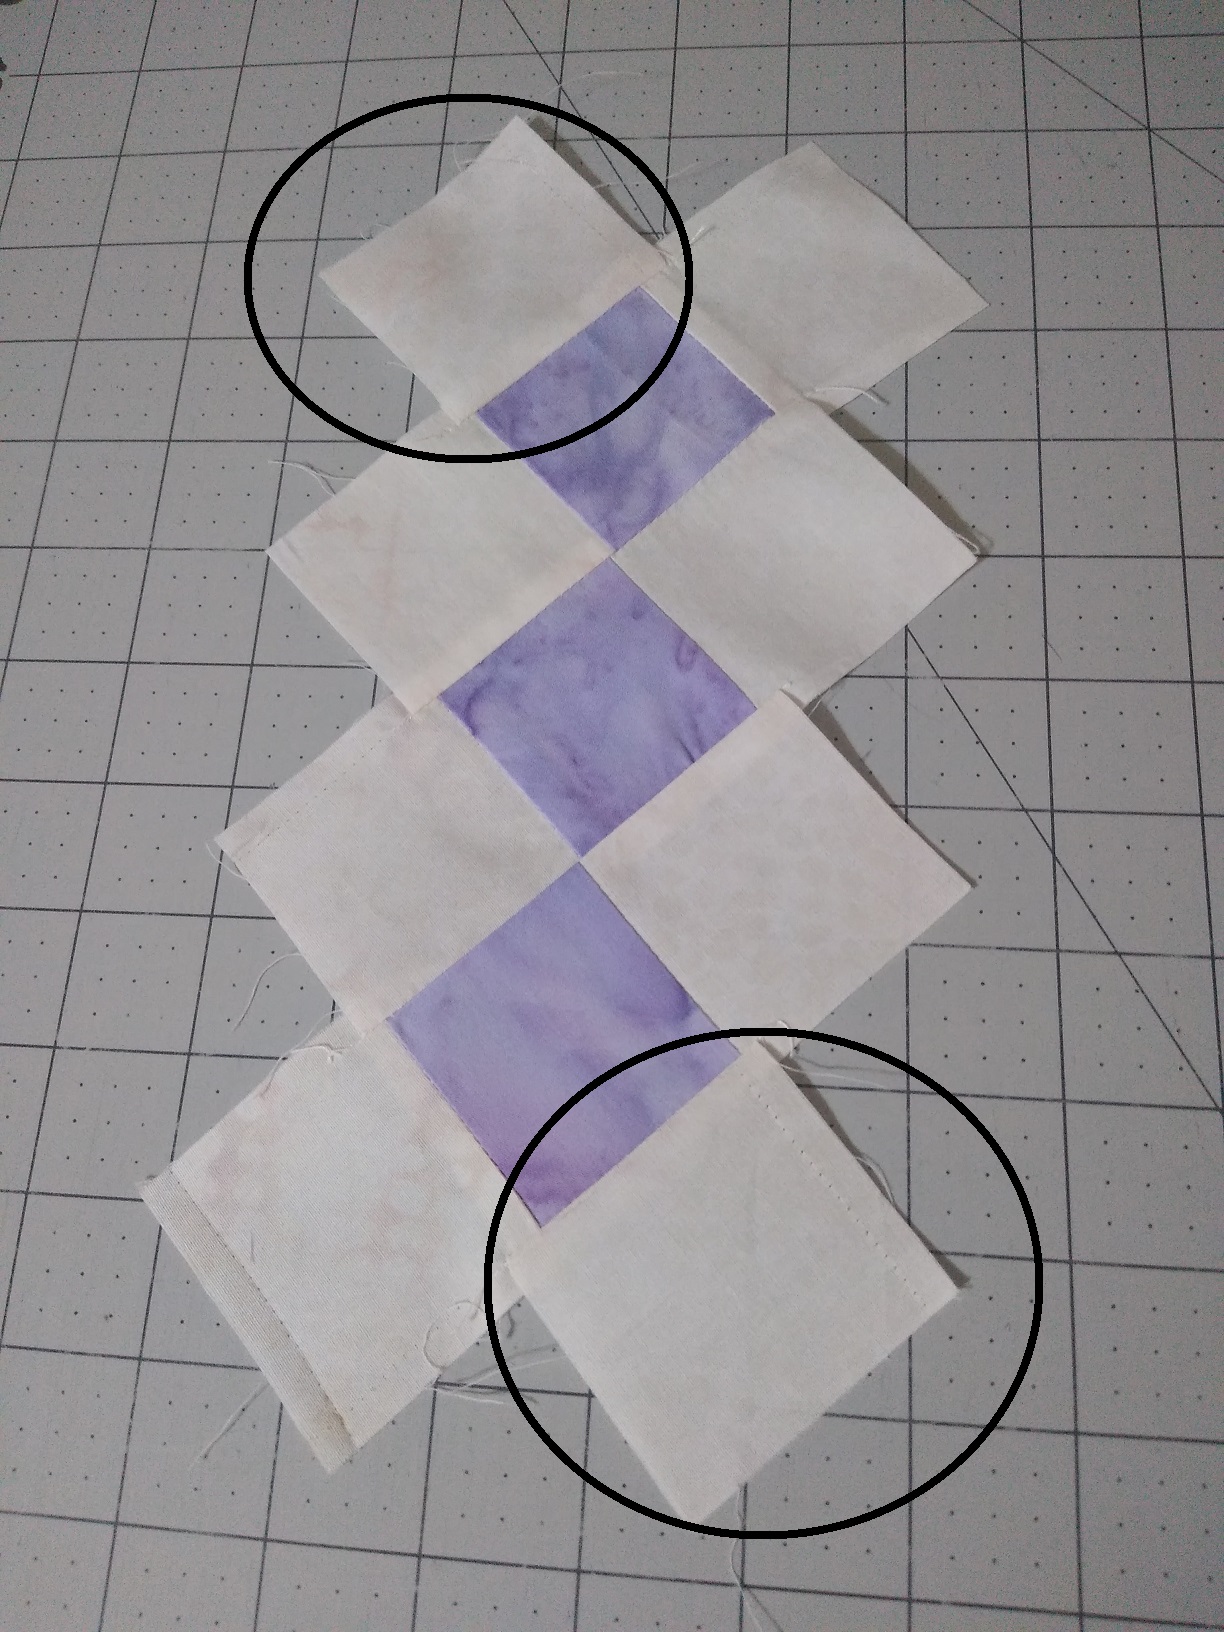
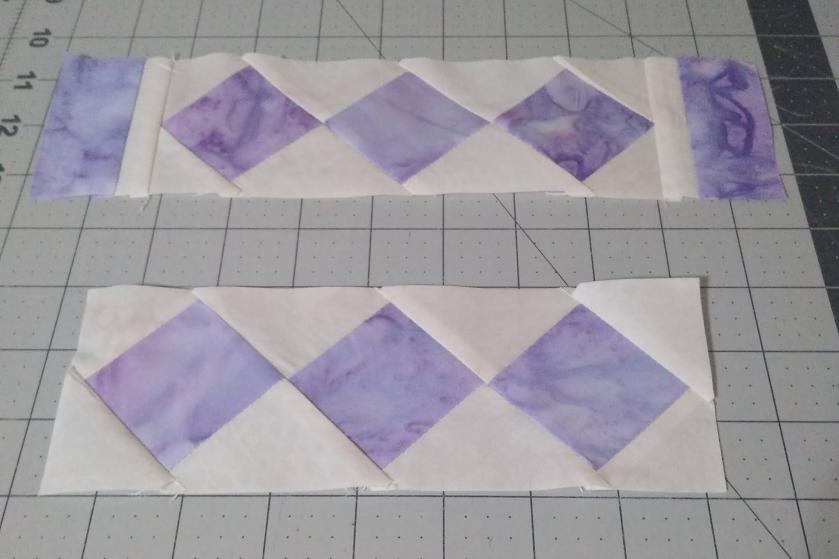
Add an additional square to both the top left and bottom right corners. This allows you to trim the piece into a rectangle shape in the next step.
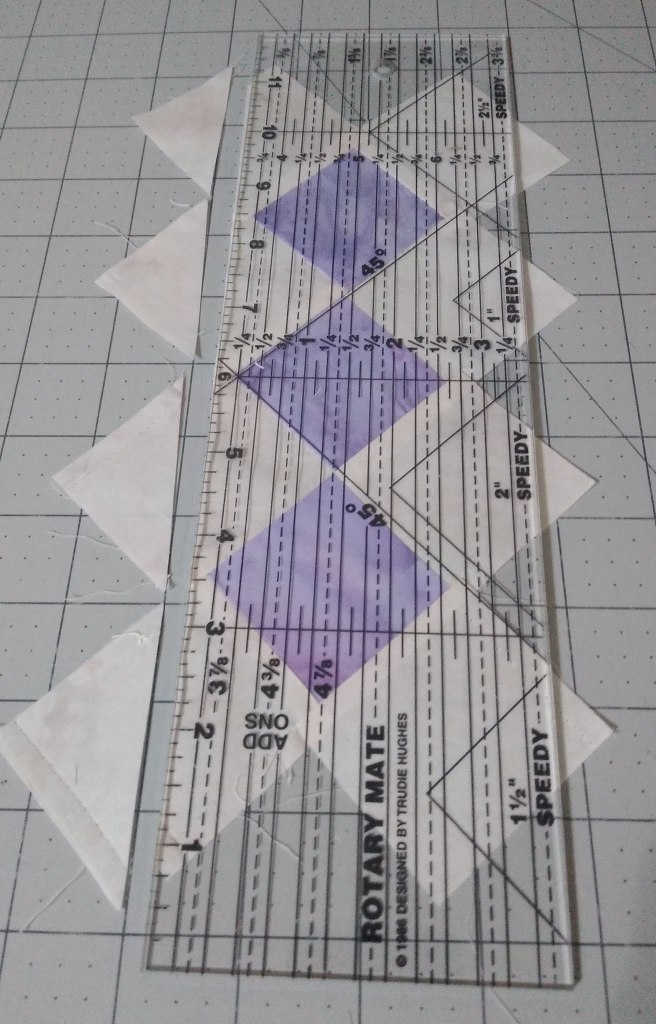
Important! Make sure to trim 1/4″ away from the center (purple) square to leave a seam allowance.
Trim each end 1/4″ away from the center (purple) square.
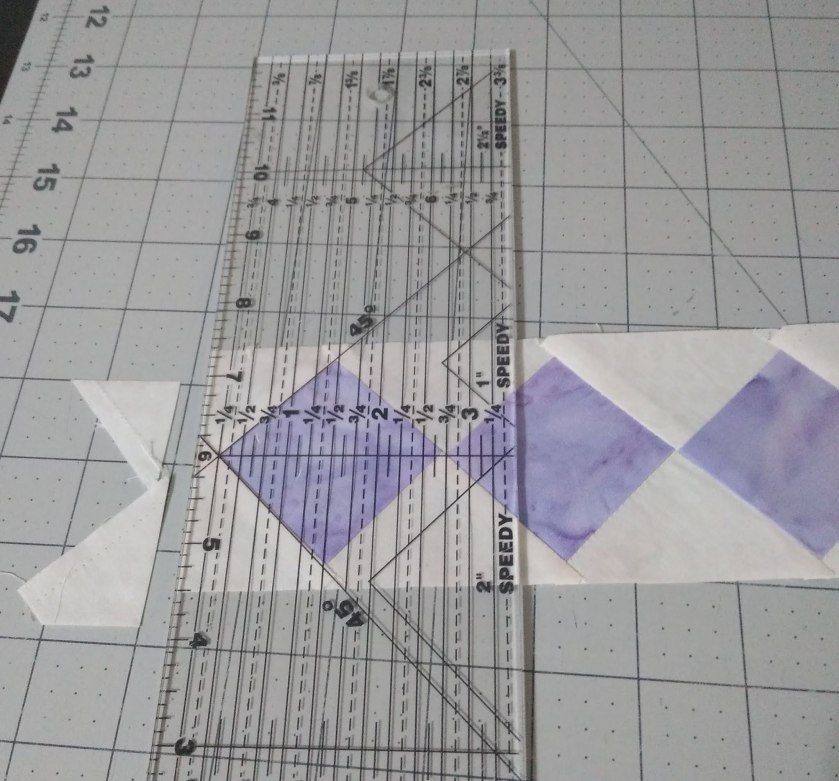
I needed to add to each end of my patchwork unit to bring it up to the 11 1/2″ block size. I sub-cut them so the were the same width as my Seminole patchwork unit.
This photo shows the Seminole piecing rectangle, and one with the strip sets added to each end. I then added cornerstone squares cut the same measurement as the width of the rectangle. (I think mine ended up an odd 2 7/8″.)
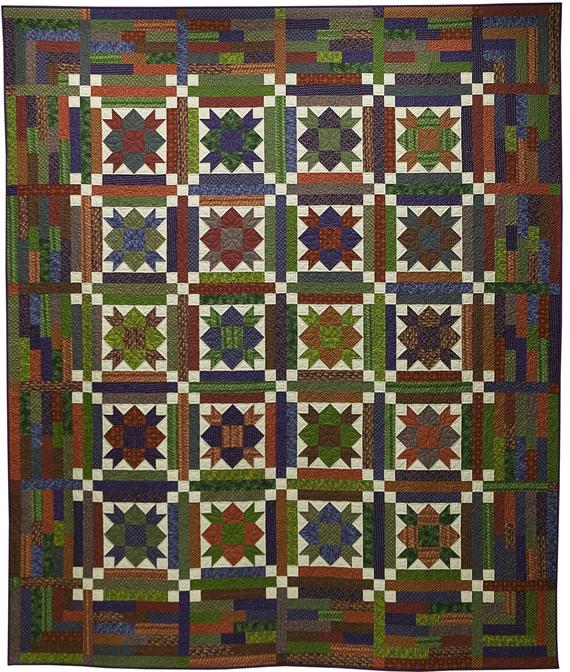
Here’s what the quilt quilt pattern looked like once the mystery was revealed. We had a choice of three colorways and I chose the batik. I already owned so many dark reproduction type fabrics I wanted something different for a change. I was a little disappointed that the fabrics all blended in with each other so much. Not to my taste but, it was time to get this one finished. No only did I change the setting but even with the wide border, my quilt ended up quite a bit smaller than the original designed. I’ll use the leftover fabrics in another quilt someday as I’m sure there is enough for a second quilt. As you can imagine, because the border pieces were cut before I saw the reveal, I know have lots and lots of small unused cut pieces that I’ll eventually have to figure out a way to use in another quilt.
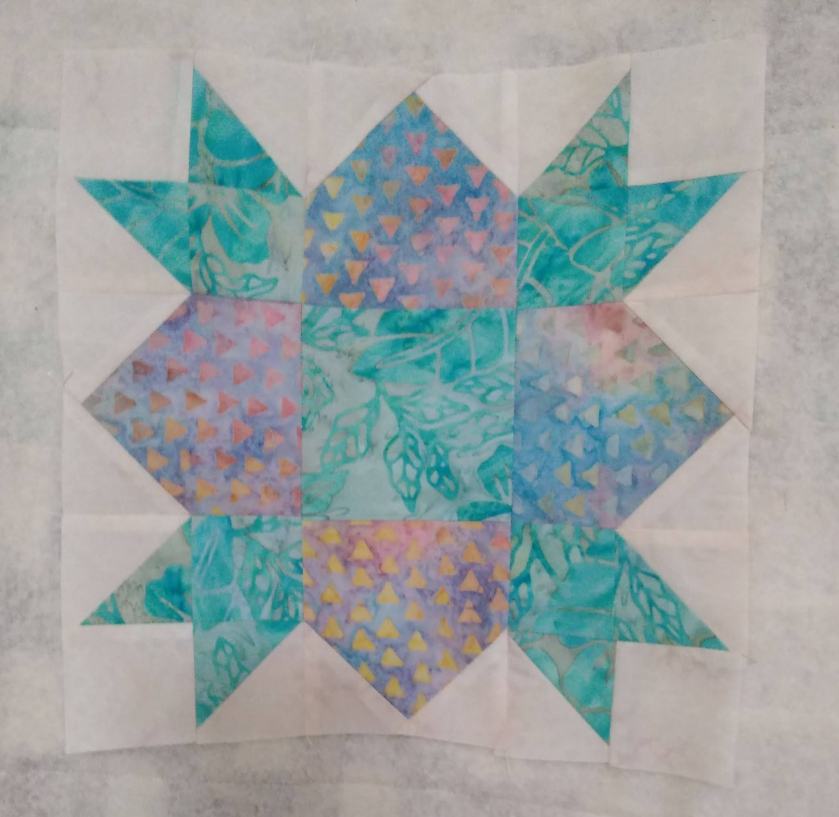
Here’s another look at one of the blocks. I still don’t LOVE this quilt but I was happy to have a chance to try the Seminole Patchwork. I’ve been wanting to try it for a while and also, it’s great to strike another UFO striked off the list!
Here’s what the quilt pattern looked like (in a different colorway) once it was revealed. I chose the batik colorway. The fabrics just all blended into each other (in my opinion). No only did I change the setting but I also made the quilt quite a bit smaller than originally designed. I’ll use the left over fabrics in another quilt someday as I’m sure there is enough for a second quilt. As you can imagine, lots of unused cut pieces intended for that original mystery outer border. Had I seen the photo of the quilt first, I’d have never cut all these fabric pieces! Lesson learned. No more mystery quilts for me.
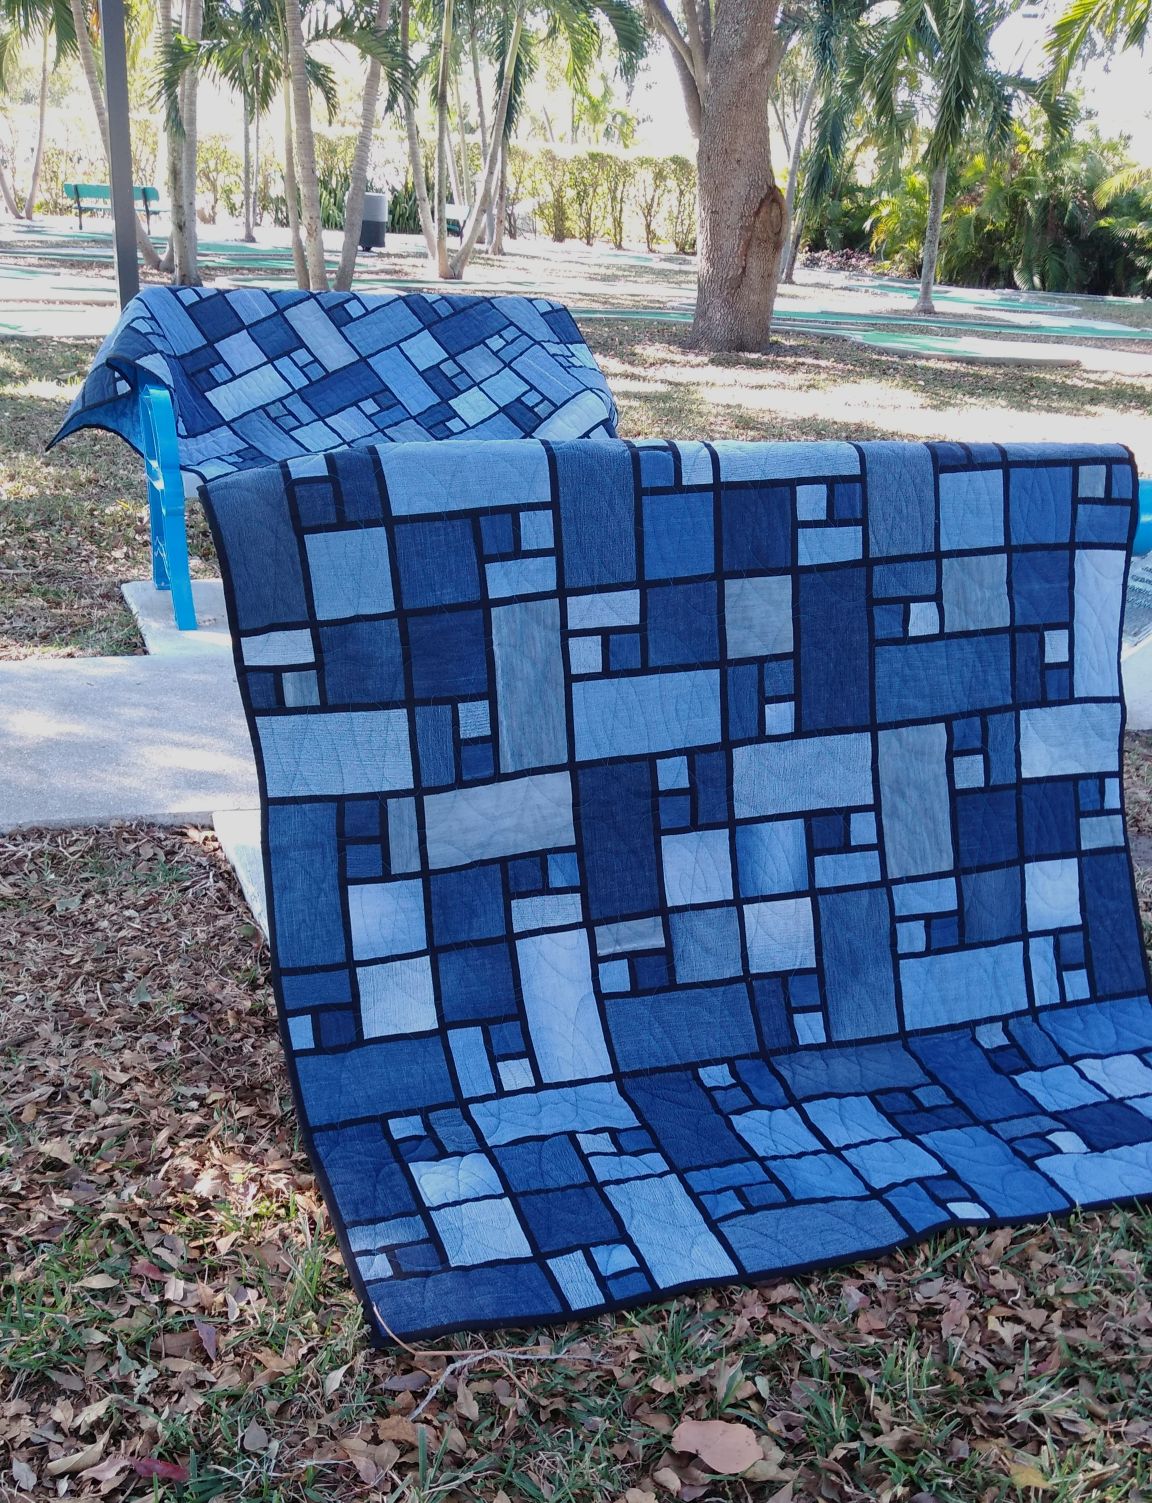
I originally had another denim stained glass pattern in mind but, our friend was small so I wouldn’t have been able to cut any 12″ squares (unless I left some leg seams in them which I thought might make the quilt even heavier and not as comfortable to use).
I saw the idea for this quilt on The Flemings Nine blog. There doesn’t seem to be a pattern for it. Stained glass quilts are pretty popular these days so a quick search will give you plenty of free blocks patterns to choose from. Just make sure you look the pattern over before you begin cutting the pieces so you can adapt it to the size pieces you’re able to cut.
Alternately, you can just check out the cutting info below for the quilts I made. I deliberately chose a stained glass design so none of the denim pieces are sewn together. Having that strip of regular black quilting cotton between them made would make the seams less bulky and the quilt more comfortable to use.
These quilts were composed of 48 blocks each and measure 60″ x 80″ finished.
I’m included photos I took as I was constructing the second one along with a breakdown of the size pieces I used.
Press all seams toward the black fabric.
Each block denim:
5″ x 10″
5″ square
5″ x 2 1/2″
(2) 2 1/2″ squares
Each block black:
1″ x 10″
(2) 1″ x 5″
1″ x 2 1/2″
Sashing:
1″ x 10″ between blocks (40 pieces for this quilt) and 1″ x length of finished rows. The blocks should measure 10″. Because several of the jeans I used were stretch denim, I did have to square the blocks up a bit before joining them.
If you’re using women’s jeans which often have a little stretch in them, measure the completed rows and use the average measurement before you cut the sashing strips to sew between the rows.
I used 3 1/2″ binding strips so the outside edge would be the same 1/2″ finish as the rest of the black pieces in the quilt.
Click on the photos to view a larger image.
Begin by sewing black strips to the block pieces but, only sew them on half of the 2 1/2″ squares.
Sew 2 1/2″ squares with the black strip to a 2 1/2″ without the black.
Sew the black edge of the 2 1/2″ x 5″ strip to the squares.
Sew the black edge of the 5″ square to the previous unit.
Add the black edge of the 10″ x 5″ square to the side of the previous unit. Construct all of your blocks with the pieces positioned in the same way.
Next, lay your blocks out in pairs rotating one block 90°. You can see the top block has been rotated one clockwise turn to the right.
Sew a 10″ black strip to the lower edge of the top block. Sew the bottom block to the top unit.
My rows are 6 blocks across (3 pairs of blocks laid end to end).
Add a 10″ black strip between each pair of blocks.
DO NOT add a black strip to the beginning or to the end of each row. The wide black binding will complete the design.
The two quilts for the sons of our friend that passed away in November are finished. I’m happy with the way they turned out and so grateful to her best friend for bringing the jeans to me and helping to prepare them to sew into quilts. (Well, one of her best friends… Patti was a best friend to everyone that knew her.)
She loved to repurpose things and find creative uses for them, long before HGTV made it cool. I think she’d have loved seeing her jeans get made into quilts for her boys. ♥
I posted the instructions on how to make this quilt here.