This post was set to publish on July 4, 2024. I plan to share updates each Friday night if I have something to share. During the week, I’ll review previous posts, make edits if necessary, and republish them. I had another patriotic string quilt to add to the original post. It’s the first one you see below.
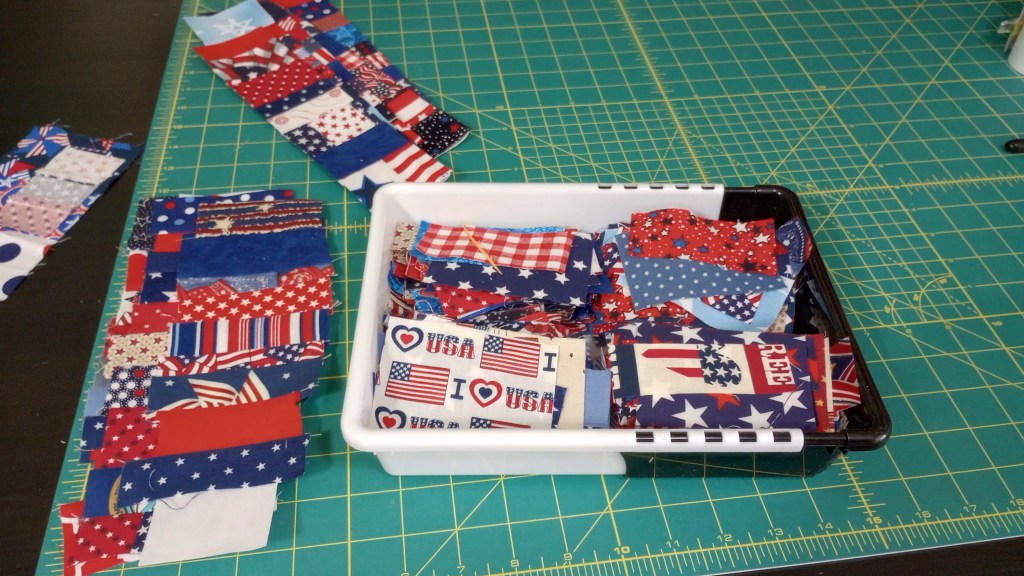
String quilts are among my favorite type of quilt to create. I enjoy transforming leftover fabrics that many quilters discard into something useful and beautiful.
I have several friends online who have been making them for years. My interest sparked when a local friend claimed, “string quilts are ugly!” Gauntlet dropped. Challenge accepted! In the process I discovered how much fun they are to make and unlocked a new realm of creativity. I’ll let you be the judge on whether or not she was proven wrong. 😉
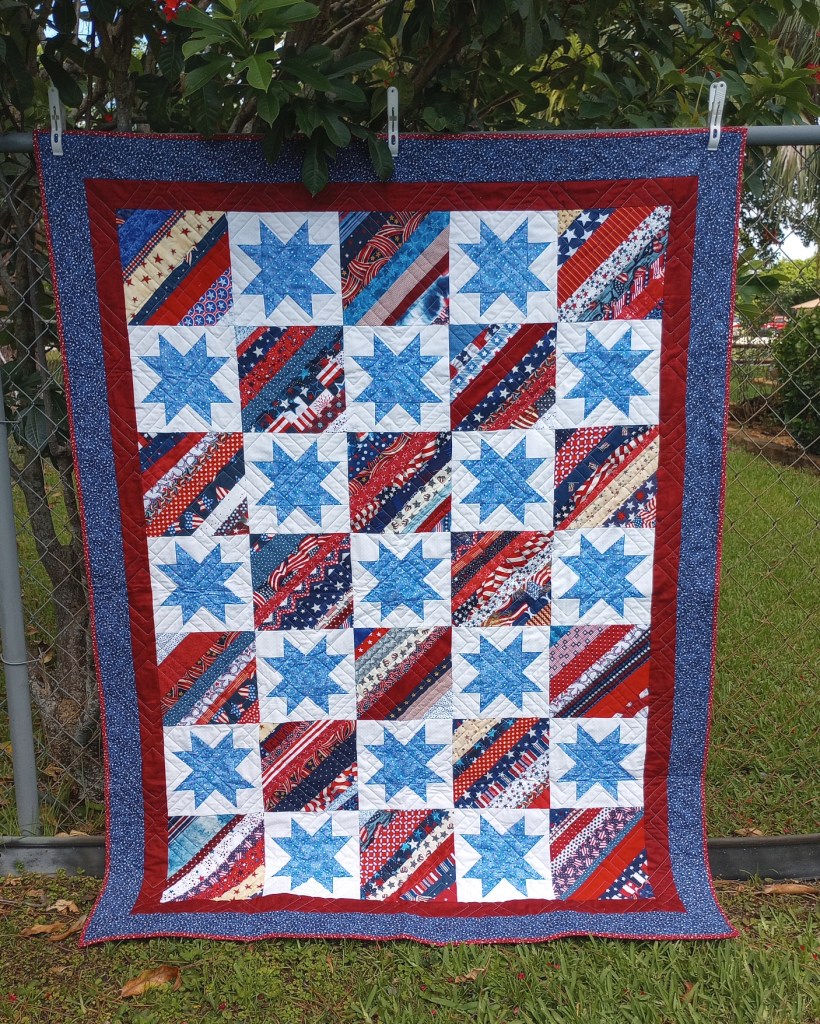
My latest string quilt features blocks that finish at 8″. I use old phone book pages as a foundation for stitching the strings when I have them. For this quilt, I used our local grocery store (Publix) ads, as they provide large newsprint pages that allow for various shapes and sizes. The strings often aren’t straight or even, and often cut on the bias. Paper foundation helps stabilize them.
The stars were made using a free pattern from Urban Elementz called Fast No Match Stars. I like how easy it makes piecing the rows without worrying about clipping off the star points.
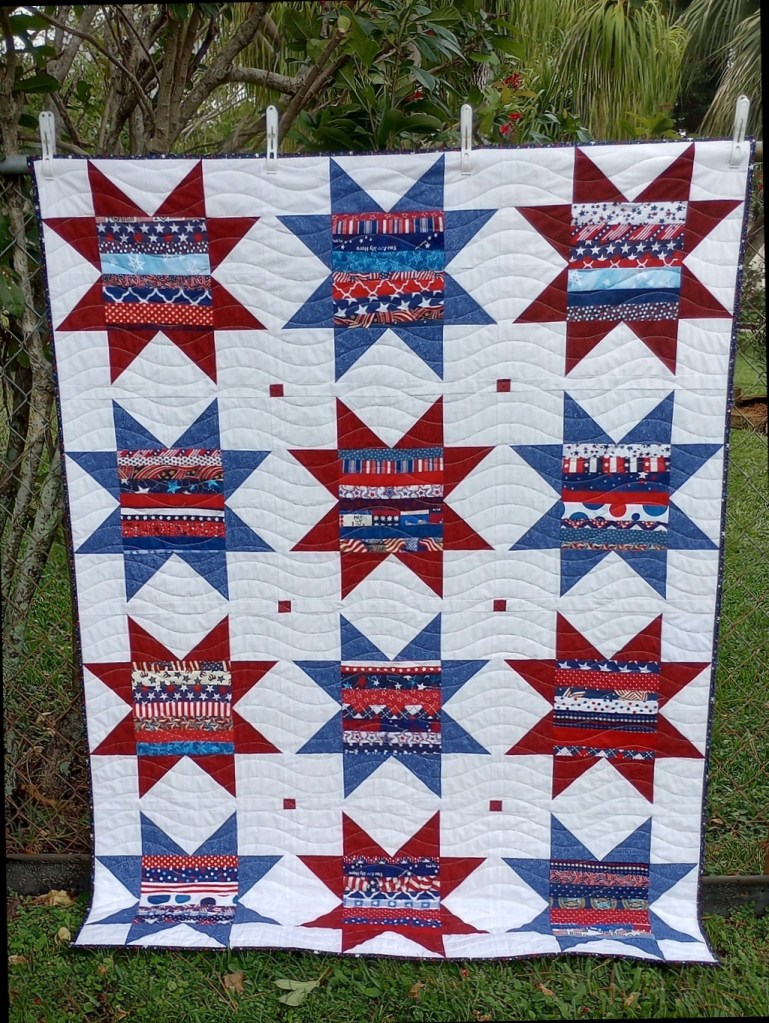
This star quilt was made by piecing 8″ string sections for the centers, stitched horizontally rather than on a diagonal. The finished block is 16″, with 1″ sashing and cornerstones.
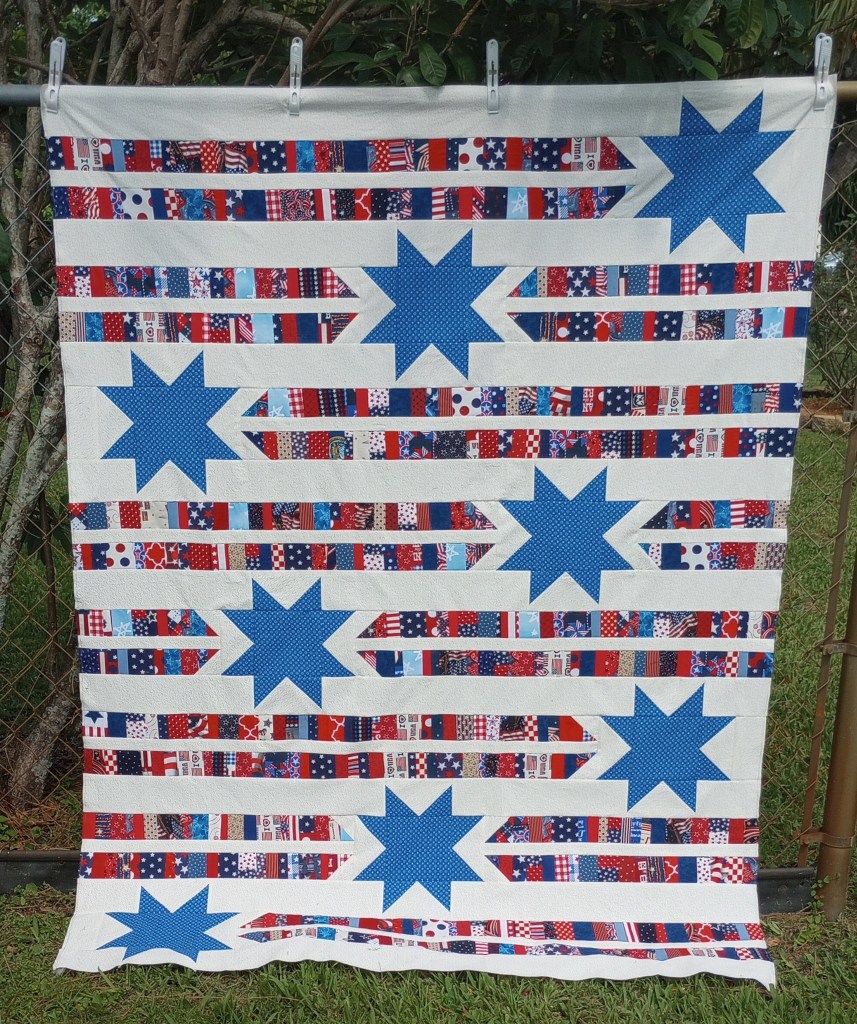
My smallest strings are stitched to adding machine tape and trimmed to 2.5″ wide. I replaced the pieced squares in the pattern Star Trails by A Bright Corner with strips of strings.
I have friends who avoid paper foundations because they don’t like removing them. I prefer paper because fabric left in the block makes the quilt too heavy for our warm South Florida climate.
I actually enjoy removing the paper while watching TV in the evenings. It’s not a bother for me and keeps my hands busy when I’m not stitching a binding by hand.
I’m really happy with how the three quilts turned out. I still have many patriotic strings left, so I’ll look for my next idea to use them after I finish the million other projects on my quilt bucket list!
My current project is a group of ten “Second Chance Quilts”. I first read the term coined on the Wedding Dress Blue blog. It’s always so much fun to see what Deanna begins with and then fall in love with her finished quilt.
I never really considered trying it until I found myself looking at quilt tops on a guild de-stash table. Eventually they’d have been donated to a craft resource center if they continued to be passed over. As soon as I saw them, I remembered Wedding Dress Blue and asked myself “why not?”. If I wasn’t willing to give them a second chance, who would? I took two that day and the other eight that were still available a week later.
I’ll show you the five I’ve already finished in a future post.
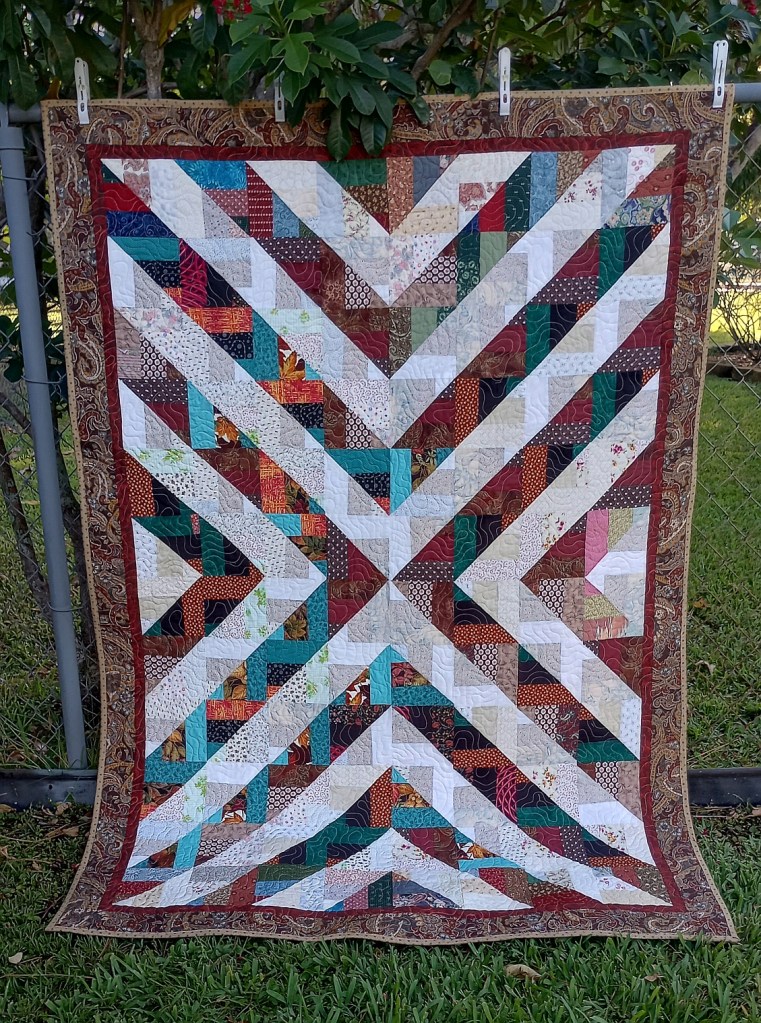
This is top #6.
It was a nice top but a bit small at 44″ x 53″.
My goal for adult lap quilts is 50″ x 70″. I’ve followed Mary’s blog for years, Making Scrap Quilts From Stash and noticed most of her quilts are in that range. (I’ve tested different size lap quilts myself and I can’t get comfortable laying on the couch with a quilt shorter than 70″.)
If you make an adult quilt any smaller, you really need to know in advance where it’s going., likely a place where a senior might use it while in a recliner or to someone who’s in a wheelchair.
I added a row of blocks to the top and bottom of the quilt and then borders. It finished at 52″ x 72″. It would have hit my target size exactly if I hadn’t added the narrow burgundy inner border that I decided it needed at the last minute.
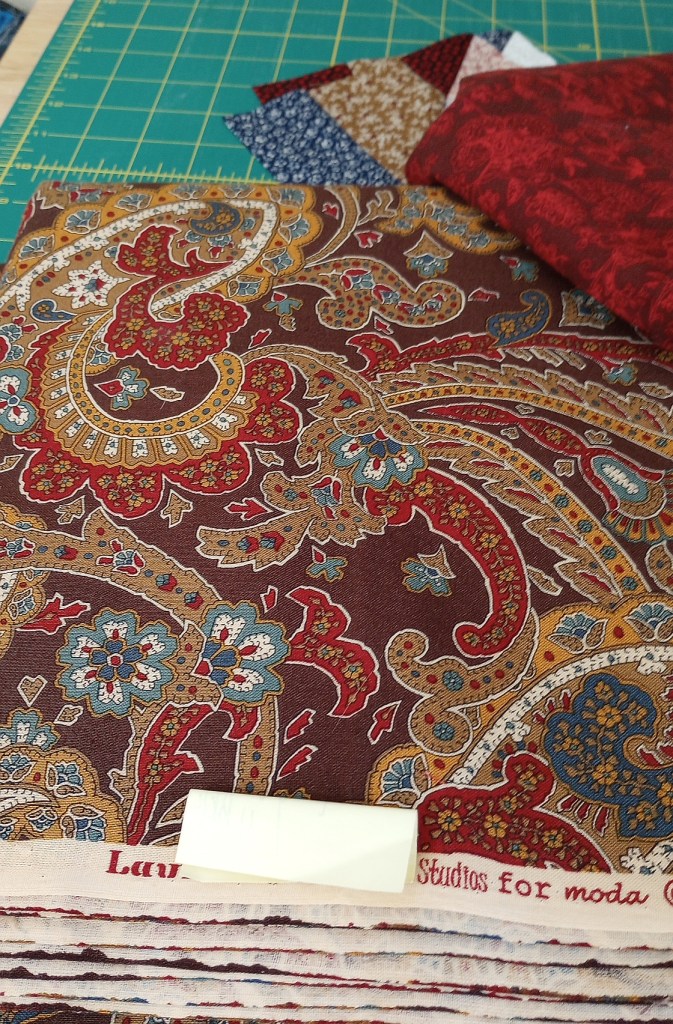
Luckily, I had the perfect fabric for the border. I can’t remember when or why I bought it, and it’s been on a shelf waiting for the right quilt top. I’m glad one finally came along, and it’s now part of a finished quilt!
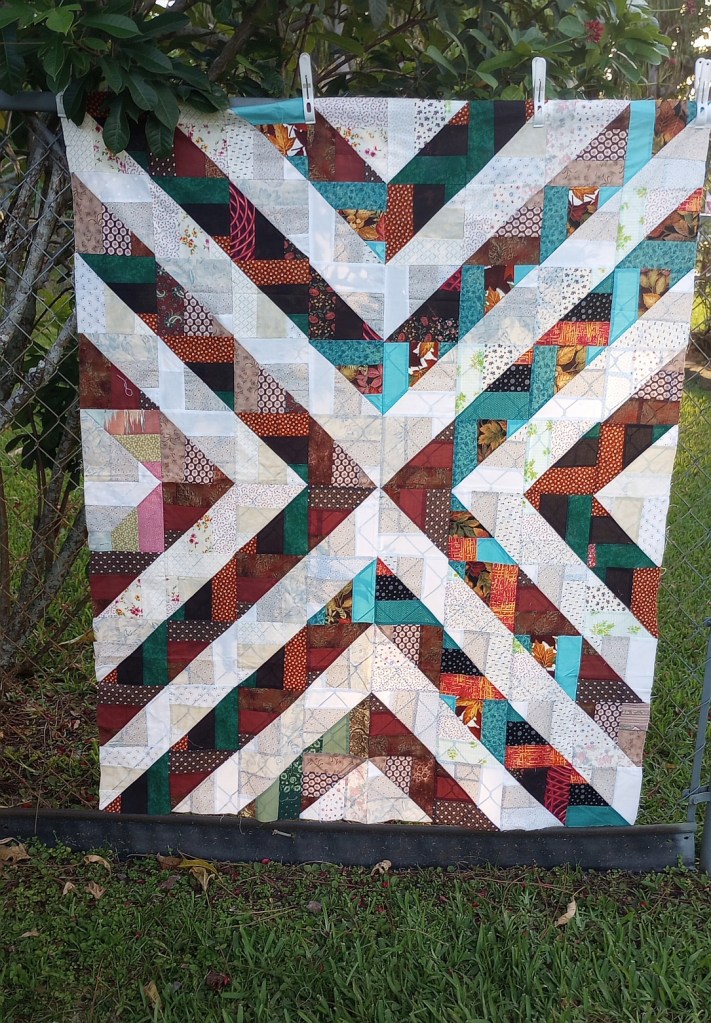
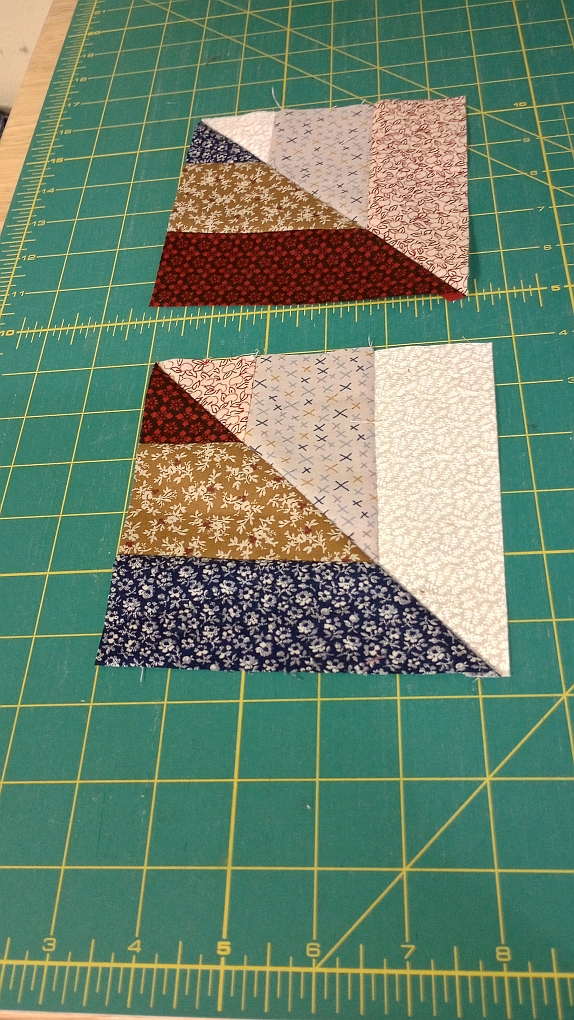
Figuring out how to make the quilt blocks was fairly simple. You begin with a pair of 6 1/2″ (unfinished) rail fence blocks. One is made with dark strips and the other with lights. Draw a diagonal line on the back of the light blocks. Next, with right sides of the dark and light blocks together, nest the seams and sew on each side of the line. When you cut them apart and press open, voila! You’ve created two blocks at the same time!
I’m really having fun with these second chance quilts! Although I’m in no hurry to see it end, I’m sure I’ll be ready to get back to my own projects before too long.
This is how I found myself at a table looking at orphaned quilt tops… I apologize for the length of this story but I know one day I’ll want to come back to this post and remember how it all started. So, here goes…
A member and past president of the guild I belong to several years ago works at our local quilt shop. When I was there last month she told me how much the guild had changed, and in particular the Community Outreach program.
She told me just enough to rouse my curiosity before getting busy with a customer. As I was leaving, she said “you should come to the next meeting”. I did and was immediately inspired.
I met Vivian, the committee chairwoman and she told me about her mission with bins of quilt tops that had been in storage when she took over. I later learned that “a lot” meant 390. Yep, that’s a lot! She’d also been working simultaneously to completely empty the storage unit because the high rental expense had been such a drain on the guild and was getting close to finishing it.
By the time Vivian stepped up to be the new chairwoman of the Outreach committee, it hadn’t been active in several years. With a vision, a lot of hard work, and a knack for inspiring quilters she brought it back to life!
Other members have since told me about her accomplishments. She figured out a way to get many of the quilts finished and donated by using both traditional and non-traditional ideas. It was obvious how much the respected her and the pride the felt. I can see why! Inspiring volunteers for a committee that had none, meeting the challenge of dealing with an overwhelming number of unfinished quilt tops and figuring out how to completely empty a storage unit too? I’m not sure if she’s a quilt whisperer or a miracle worker – maybe she’s both!
Several volunteers had worked with her to evaluate the many bins of quilt tops after they were sorted into categories for donation (adult, teen/preteen, child/baby). Together as a group, they decided which ones they would be able to keep and finish and which they had to let go. I can only imagine the amount of determination and perseverance it took to get this far. I knew that under the surface there had probably been many hard moments and doubts but it was obvious she had kept those to herself and never gave up.
There are still plenty of tops that need to be finished but they’ve made an unbelievable amount of progress. It’s rare to find a leader who not only possesses the ability to organize, problem solve, and implement a plan but also has the insight to inspire and involve others in the decision making process.
There will be challenges ahead as the Outreach program evolves and members work with their own stash and fabrics as they’re donated. But, where there’s a will, there’s a way” and this group definitely has the will. There is nothing more uplifting than witnessing faith in action.
I look forward to working with them to “make do” with what they have just as the generations of quilters before us did. And, like those woman many years ago, find joy in the process and the fellowship with other quilters.
Before I edited this post, I’d gone into great detail about the reasons that I’m no longer active in the other local guild. The frustrations and disappointments that had me questioning if I even still wanted to quilt. Little did I know.. it wouldn’t take long for me to stumble onto the answer to that question.
I removed all the incidents that I knew I no longer felt like I belonged at the other guild from this post because I’m looking forward, not behind me. I guess I needed to get it out of my system when I first wrote it.
I hope the other guild is able to eventually make a few changes because they’re all nice women. But, change is only possible when you want it enough to work for it and so far, no one does. They may not be ready for change, but I am.. and I did.
While I was editing the post, this popped up in my email… at the very moment I needed to read it.
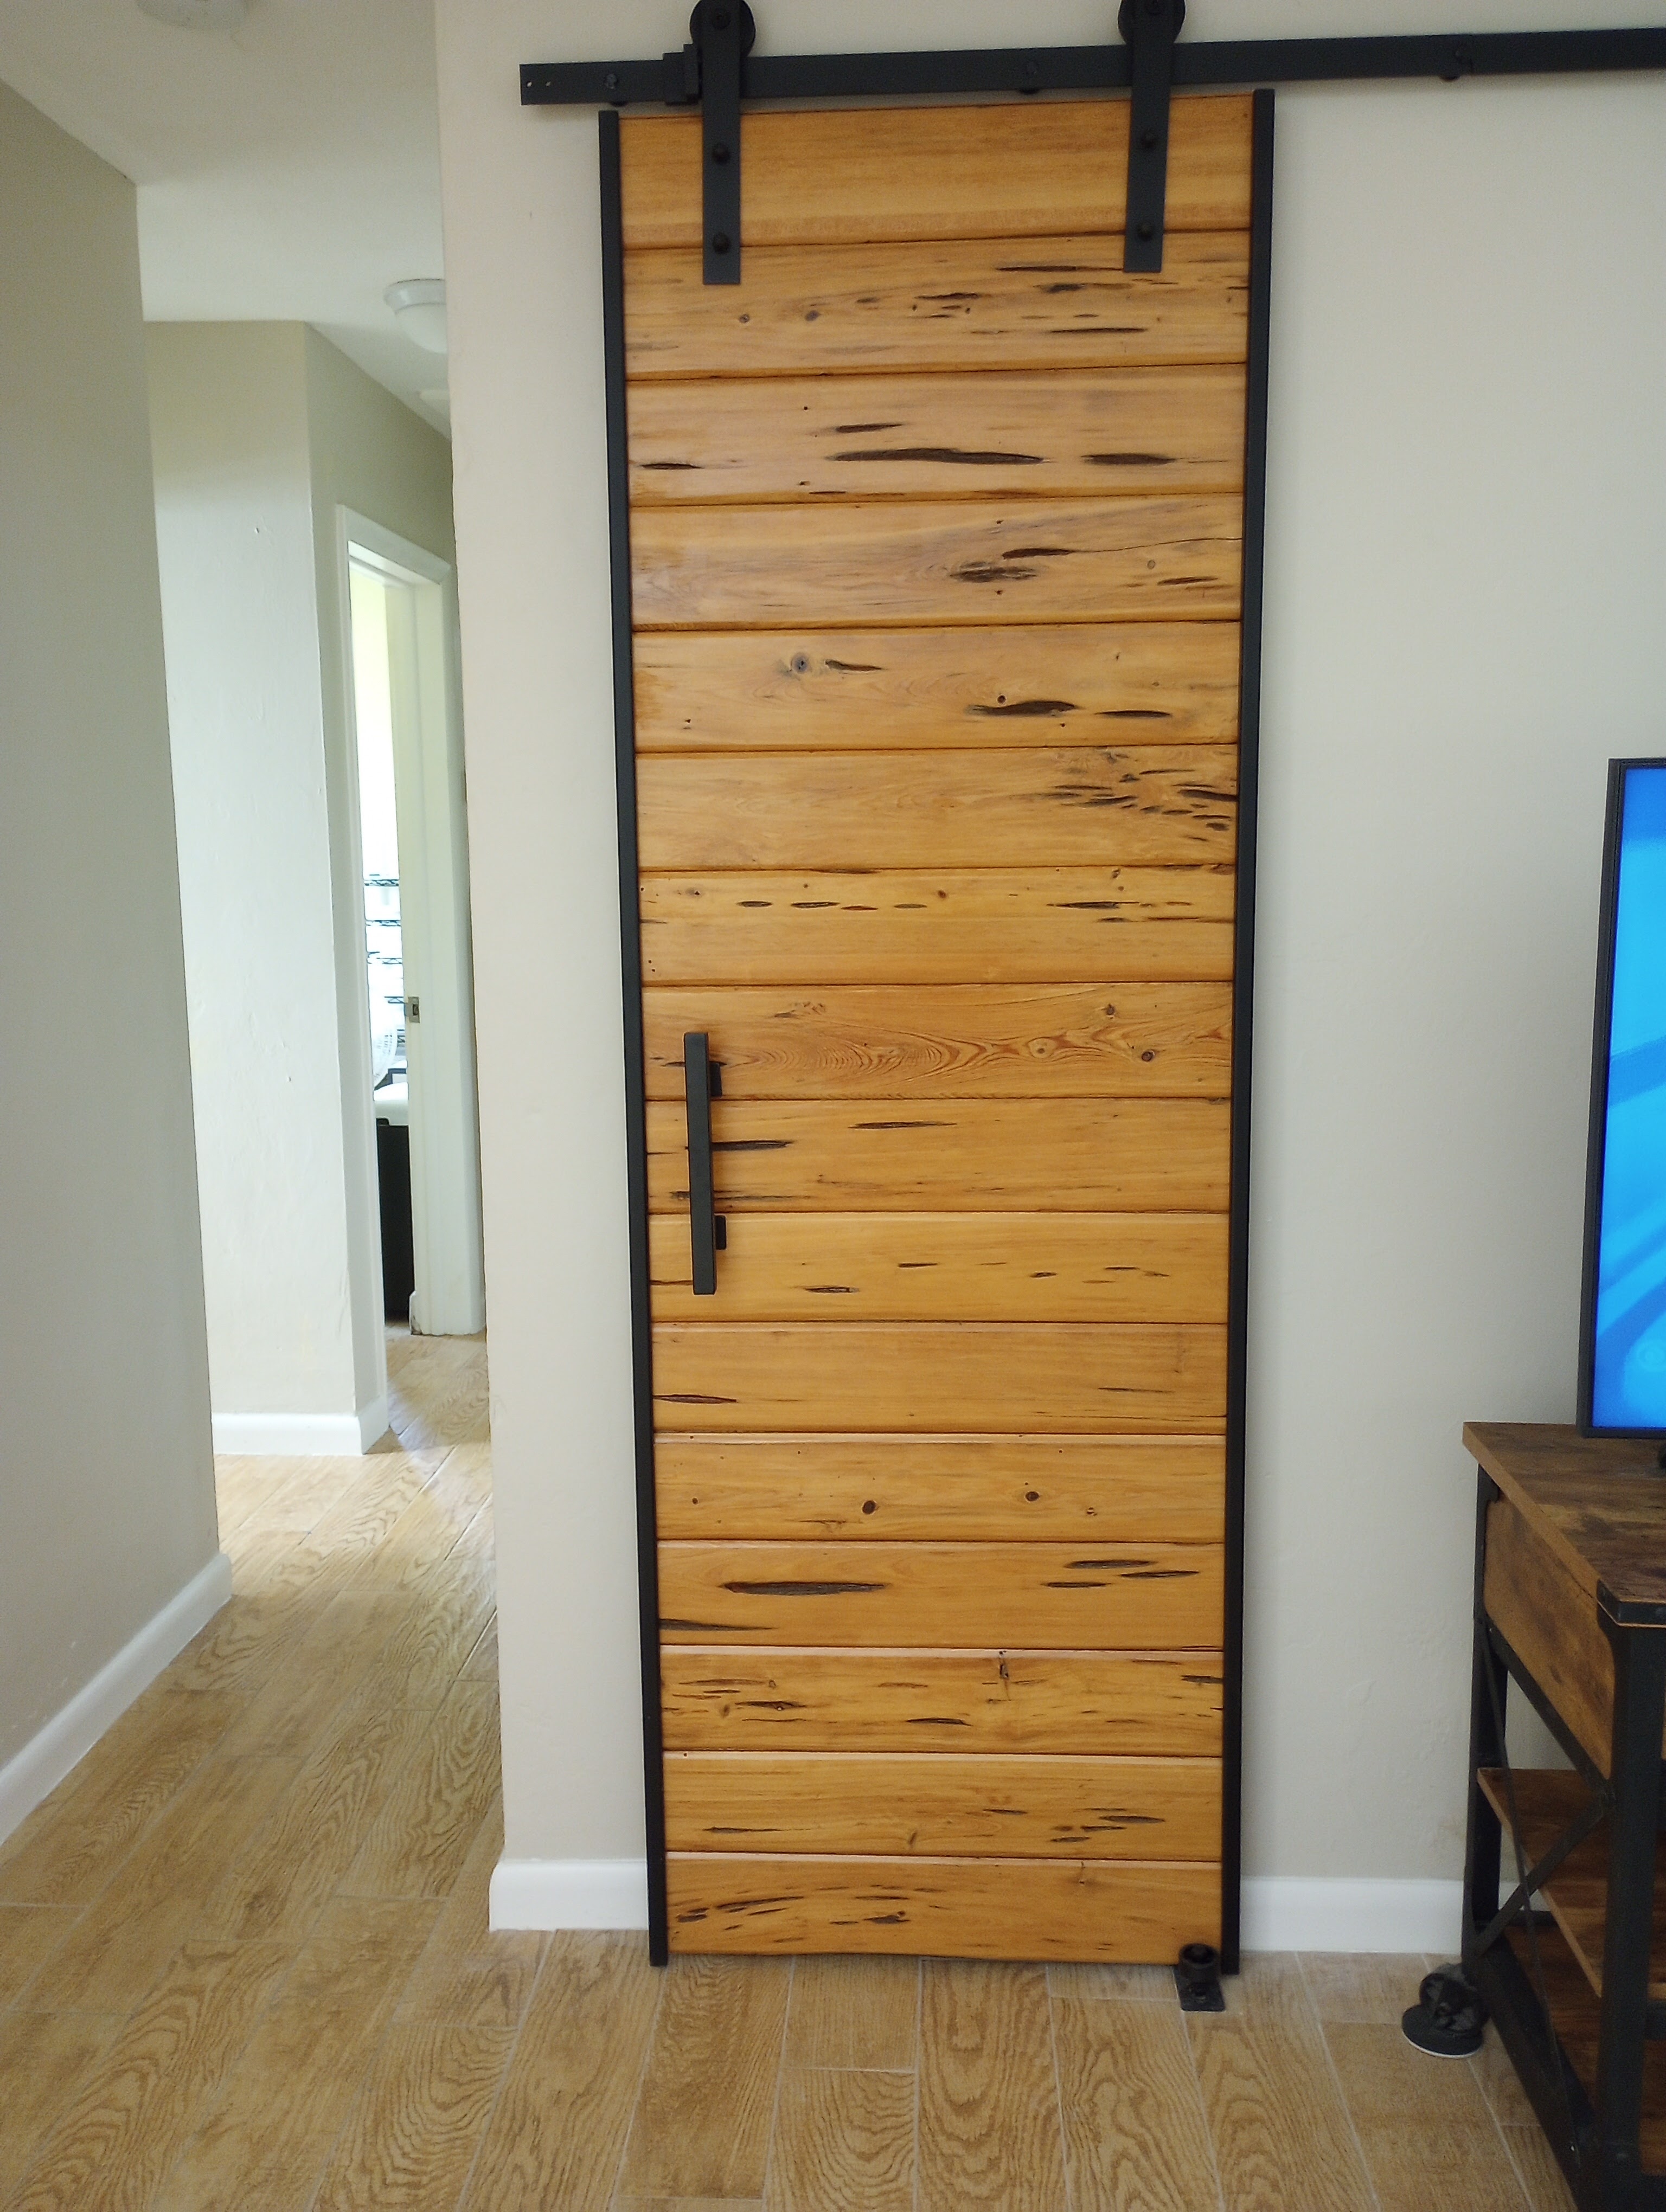
. My husband made this sliding barn door for my birthday. He used tongue & groove reclaimed pecky cypress wood a relative had removed from their home during a remodel. I located the frame at a website called Rustica. I absolutely love it! This photo doesn’t really show the beauty of the wood.
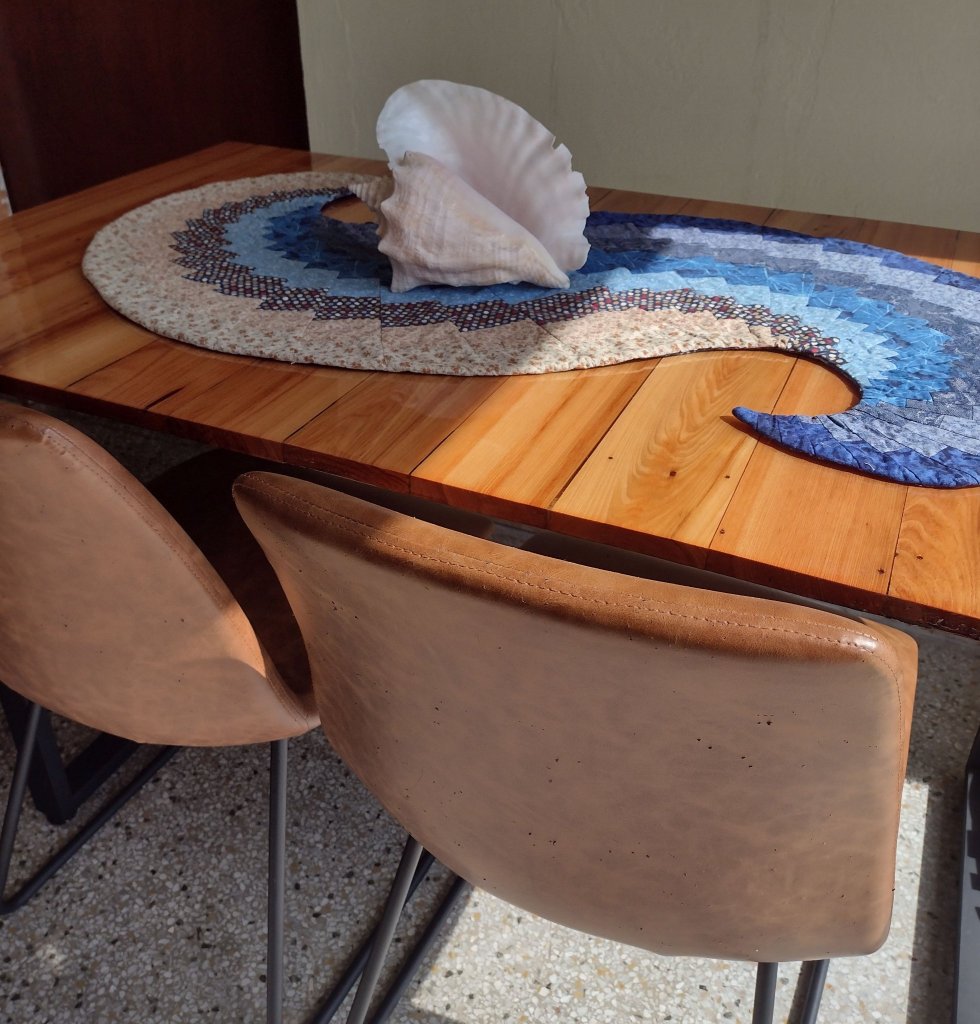
He also made a new, much smaller table that I really wanted after I saw how well the door turned out. The photo of the table below is a better depiction of the wood’s actual color.
I like the industrial look and you can see touches of black iron in our home, though it’s far from an industrial interior design.
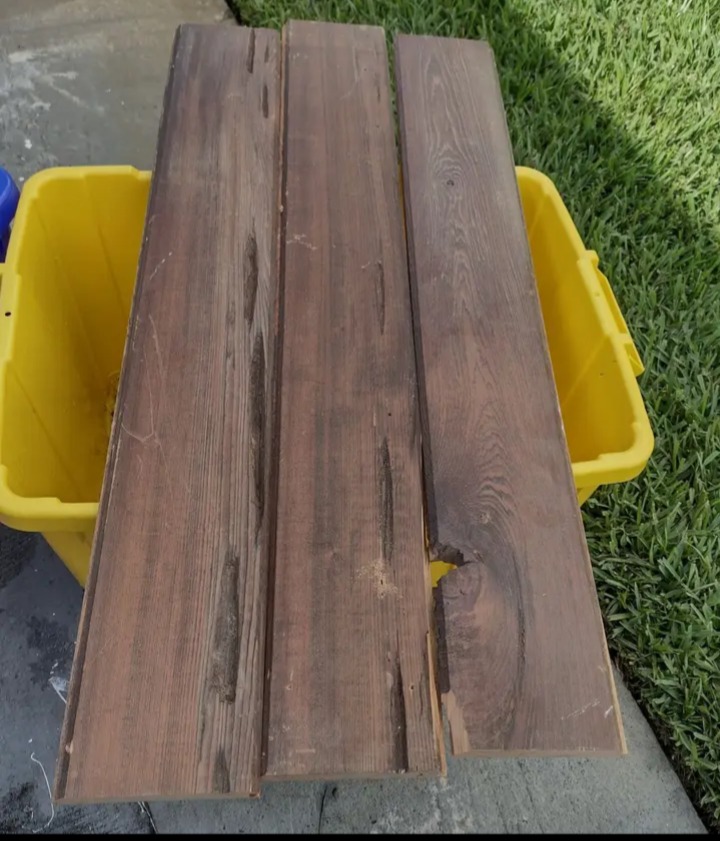
This is what the wood looked like when he began. Luckily, there were plenty of planks to choose from so he was able to find enough that didn’t have serious knot hole damage. The planks were originally used as a half wall. They were stained a deep, dark brown so he did quite a bit of work to bring back their natural beauty.
When we were asked if we wanted the wood, I shouted a loud “Yes!” before my husband even had time to think about it. The previous owner had a mirrored wall and door in the living room. (That was the style back then.) The mirrors came off years ago and I had always wanted a barn door in that location. Now I have one that I absolutely love! ♥
This is the table he made me for Christmas from the same wood. He removed the tongue and groove sections from the planks used for the table top. I located the iron table legs on Amazon. The only problem was, they were only legs and there was nowhere to attach the wood. My husband came up with a great solution. He built a support from parts on an old bed frame.
I’m all over the place when it comes to interior design. 🙂 I like some antiques but not all of them, at least for our home.
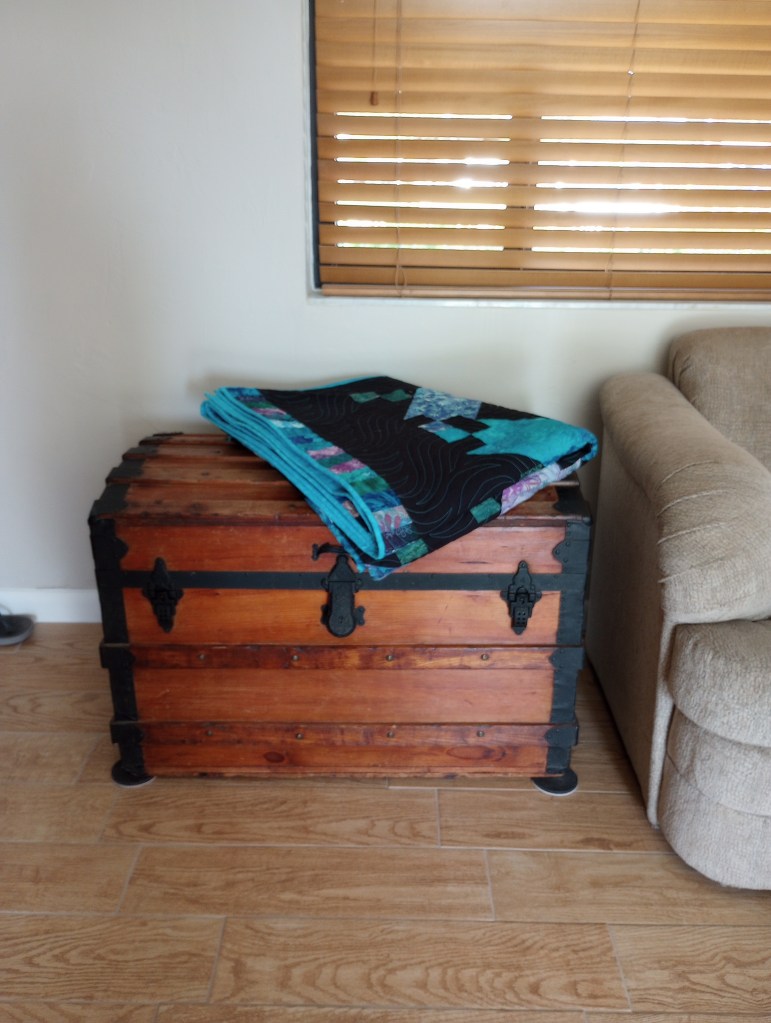
I have an antique humpback trunk that I love and and antique hand made ladder I use to display a few quilts. I nearly had a heart attack when my husband offered to sand it down and remove all the old touches of paint adorning it from it’s previous life. Thank goodness I didn’t just wake up one morning and see him already busy working on it!!
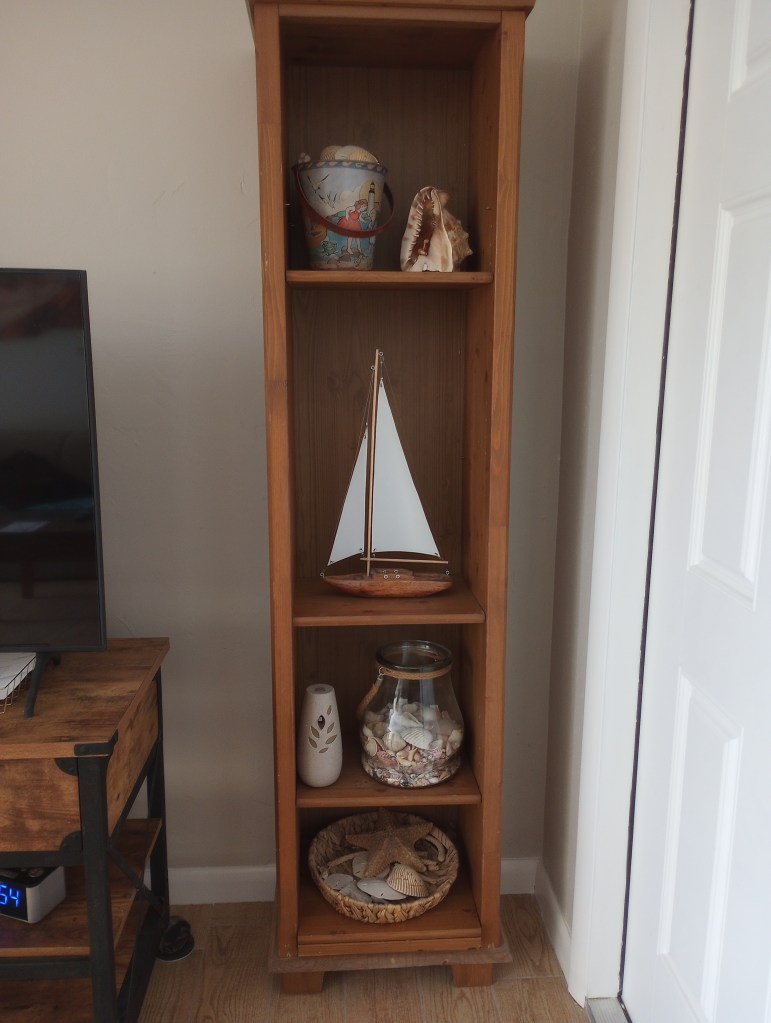
I like minimalism so I have very few photos or knick knacks around.
Living in a coastal area we have accumulated many, many seashells on family vacations. I believe if you love them enough to keep them, you should love them enough to display them!
I prefer to think my style is what they call “eclectic” though a professional designer might get a chuckle out of that description.
See that sailboat on the shelf in the center photo above? There’s a rather interesting story about how it came to be too.
A few years ago, we rented a beach house in Ormond Beach. It’s a few hours north of us, also on the east coast of Florida. Ormond Beach is the next city north of Daytona Beach. I love the small quaint feeling of Ormond, OBC (Ormond by the Sea) as it’s referred to by the locals. If I could choose a place to own a vacation home, that would be it!
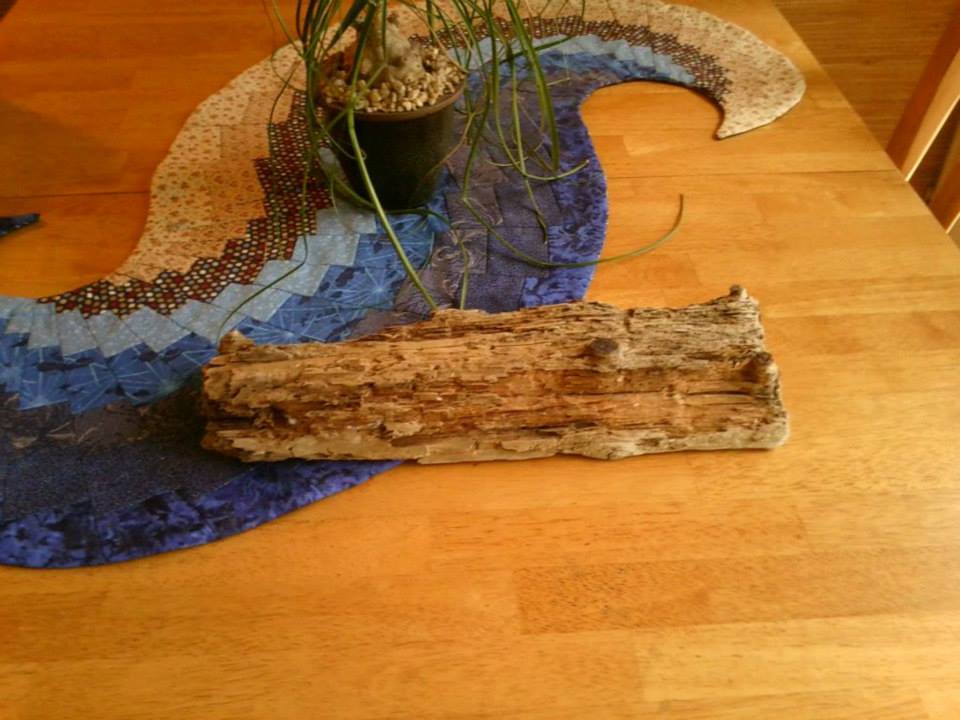
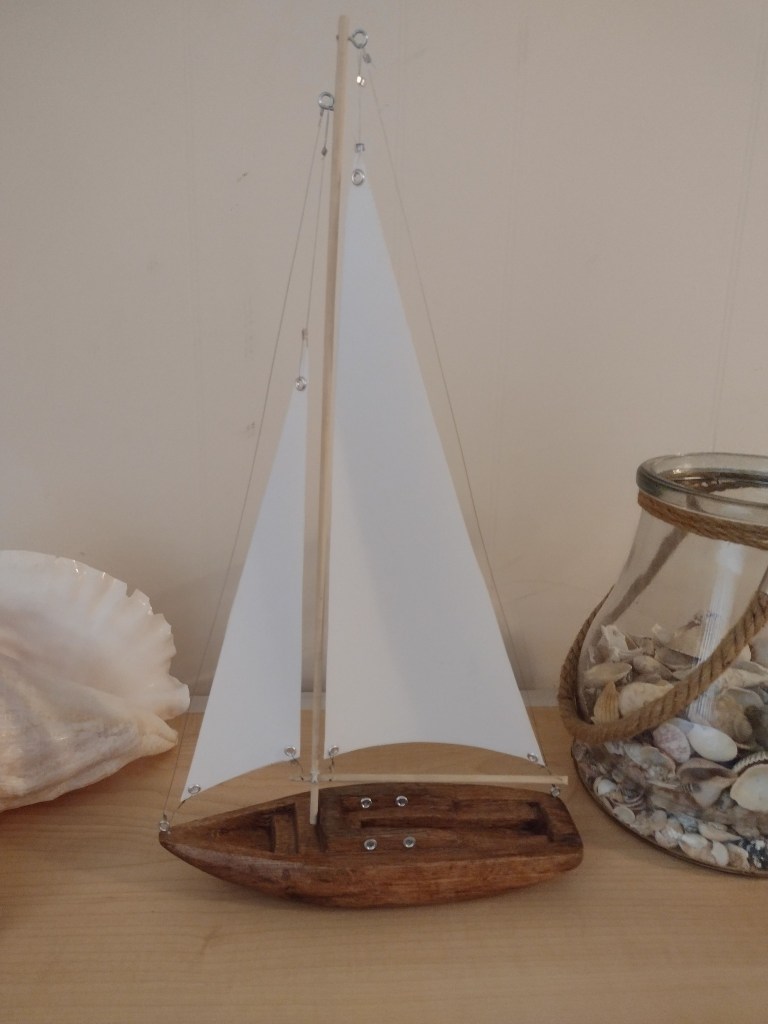
One day when we were walking on the beach I found this piece of driftwood in the sand. I thought I could make it into a sailboat. I’m glad I kept it but never attempted to use my DIY skills on it. A few years later, I met someone who’s son lived in Maine used to carve and sell handmade sailboats from driftwood. (He’s long since retired.) I practically begged her to ask him if he’d do just one more. Okay… who am I kidding? I actually did beg! LOL
She talked him into doing for HER in exchange for my quilting her top. I think I got the better half of that deal.
You can see the before and after below. He even rigged the sails for me.
We have even more seashells outside. My husband found this plastic boat (originally a kid’s bed) being thrown away in front of a neighbor’s home.
We used bags of sea shells and some blue tumbled glass we drove over to Tampa Bay on the west coast of Florida to purchase. Here it is just before planting flowers in it.
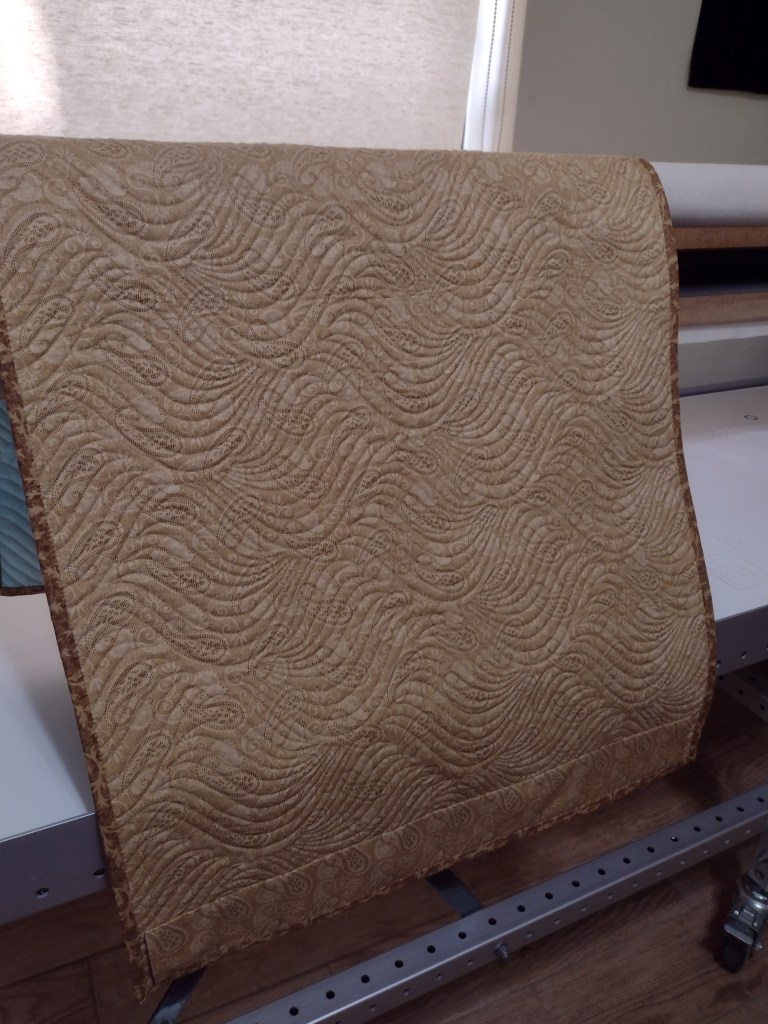
I finished a special gift to commemorate a sobriety anniversary. I’m happy with how well the quilting on it turned out so I hope they like it.
I also read a book! 🙂 My 8 year old granddaughter does well in math but, her parents struggle to get her to do her nightly reading. I’ve been telling her to pay attention to how the adults around her speak and try to pick out the ones who are articulate and have interesting things to say. They’re usually the people who read a lot. Ask them if they do and let me know what you find out. 🙂
Last week while they were on vacation, her mom texted me that she’d bought “Charlotte’s Web” because Emma was really enjoying it and had asked for her own copy. She read it in the car on the long drive to the cabin they rented in North Carolina.
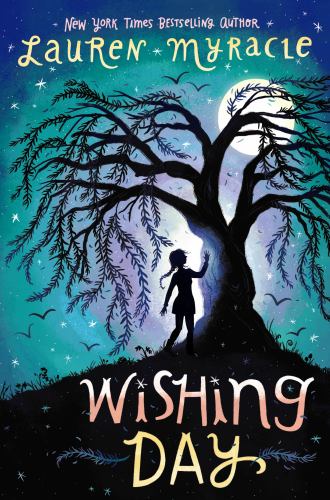
I remember reading the book as a child and decided I should probably re-read it. When I see her again next week, I’ll be prepared to talk to her about what she’s read. She texted me that she’s reading a book now called “Wishing Day”. She was curious about why it had that title instead of “Wishing Tree” after seeing the cover. I got curious too. 🙂 I checked the book out from the library today.
I’m not sure if it’s lead by example or practice what you preach but, in any case, I hope it helps. I’ve always been more into math than language arts too but I’m hoping seeing me read might help encourage her to love books as much as I do!
(Re -published. Original post dated March 14, 2023)
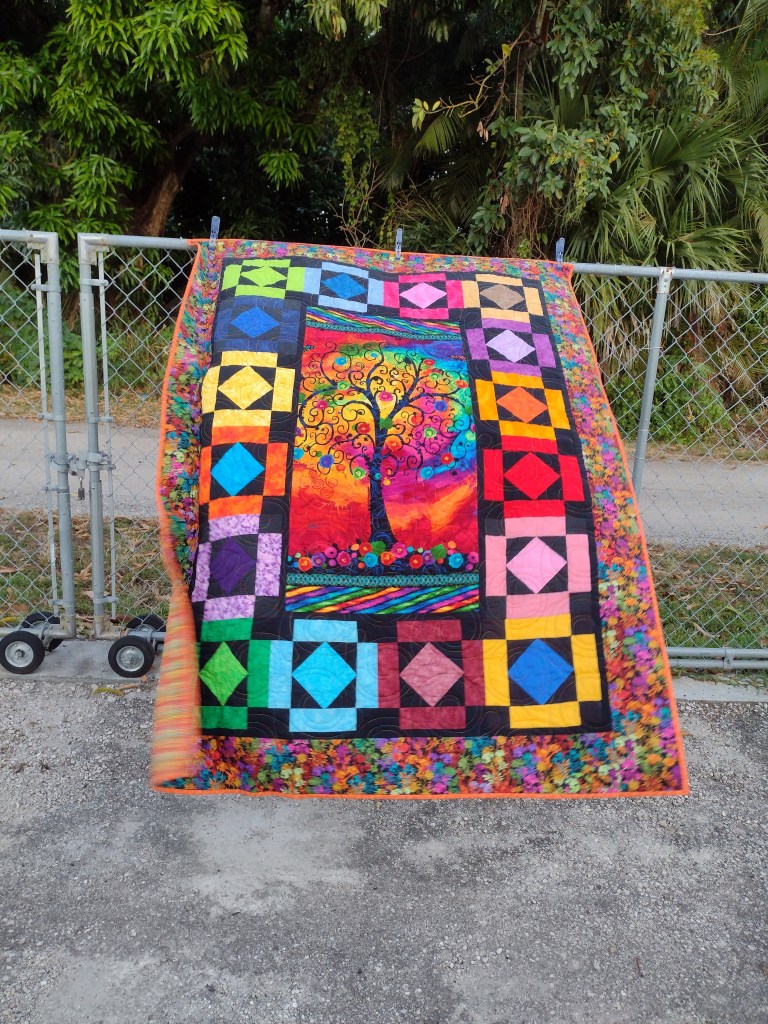
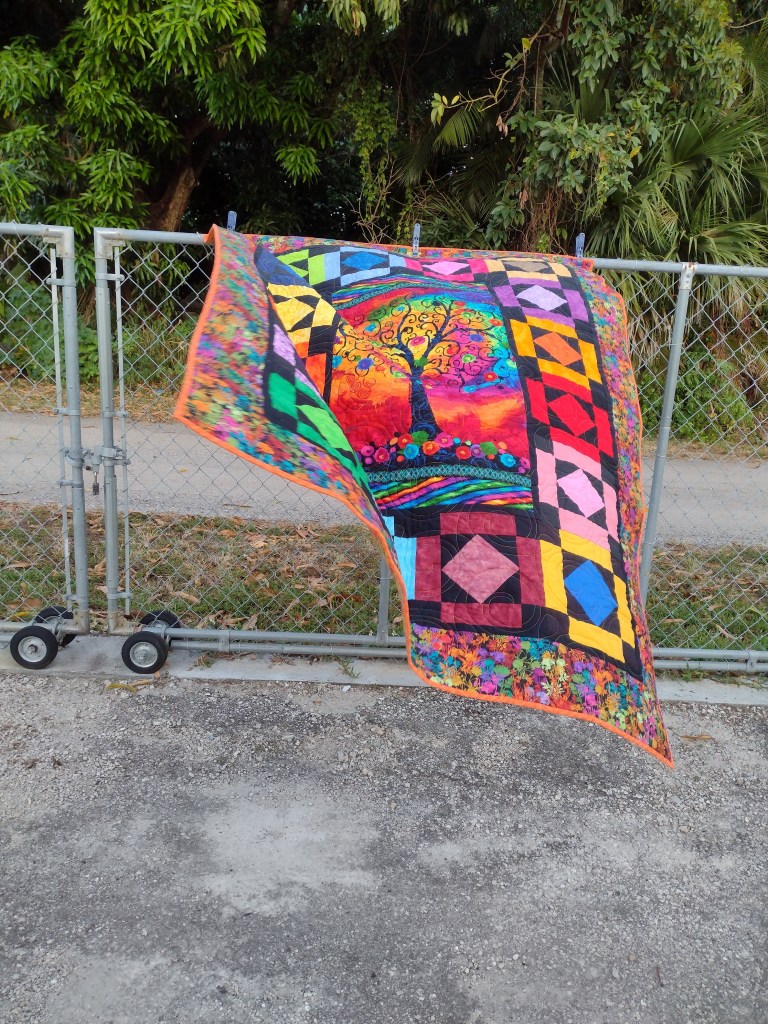
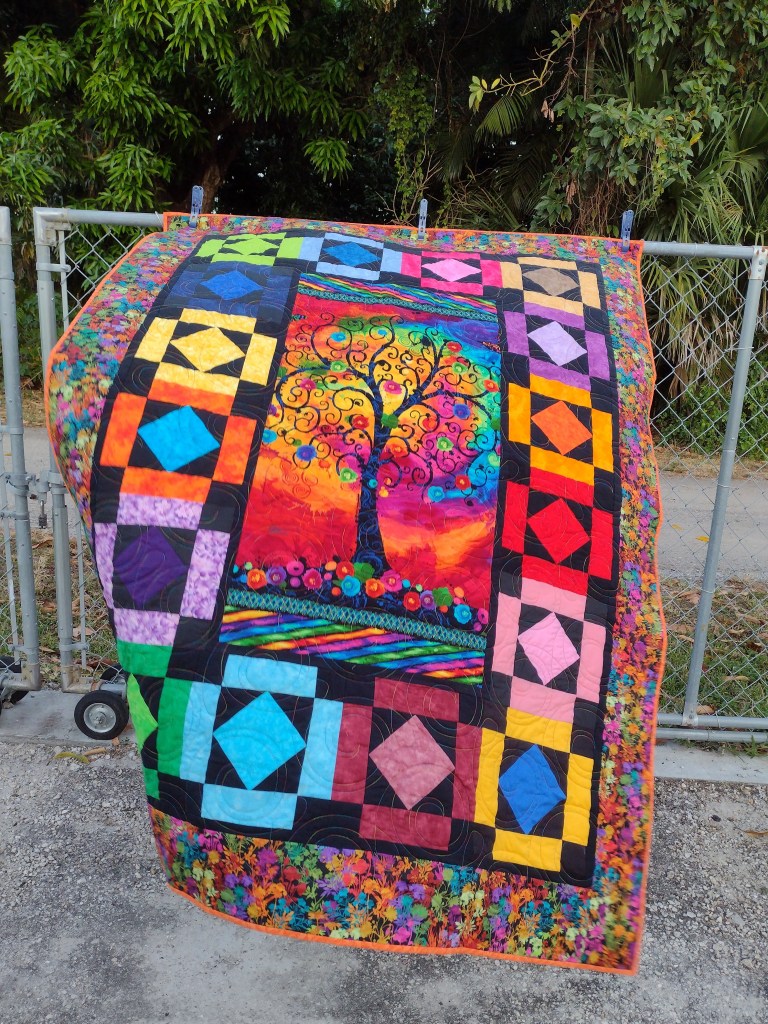
I finished the quilt from the blocks I won at last month’s guild meeting. The block pattern is Amish Diamond from the Quilter’s Cache website.
These were the 9 blocks I won. I really wanted to make something fun to donate that might appeal to a teen or pre-teen.
The original blocks finished at 12″. But, some were a little larger and some smaller so I chose to trim them all so they’d finish at 10″. Plus, the math worked out better.
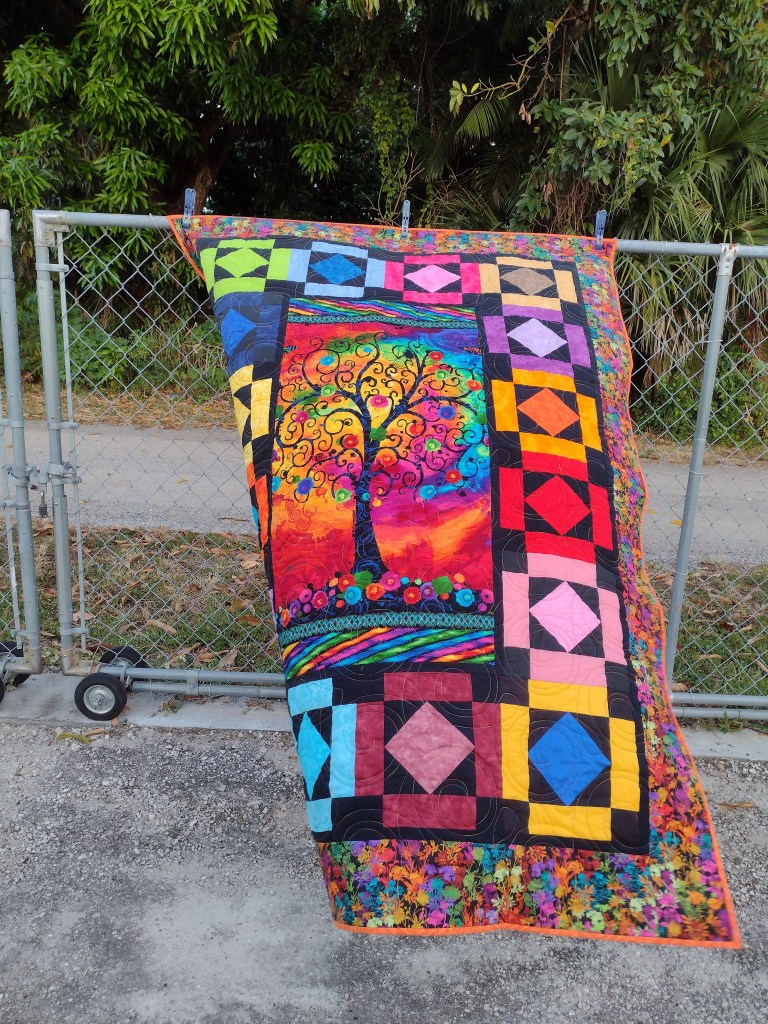
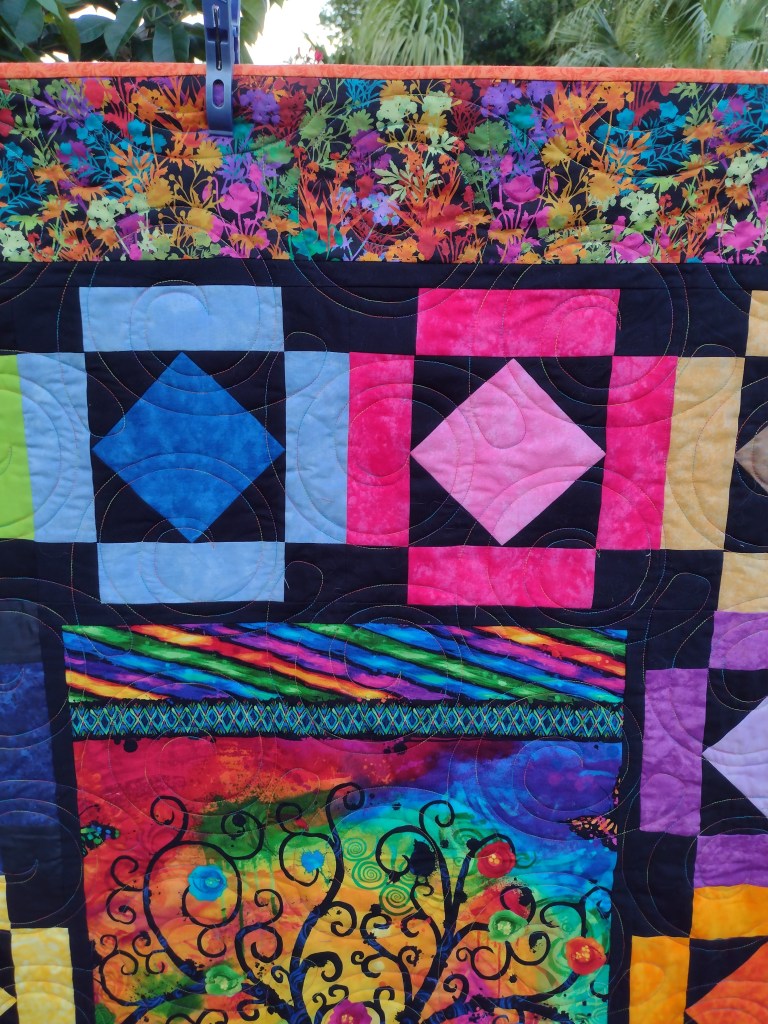
I made 7 more blocks so I could use them to frame this little panel I’ve had in my stash for several years. Two years ago I bought the fabric I used for the border at my local quilt shop’s end of the year sale.
It was windy so hard to get a good photo. You can see the fabrics and the quilting a little better in the last picture.
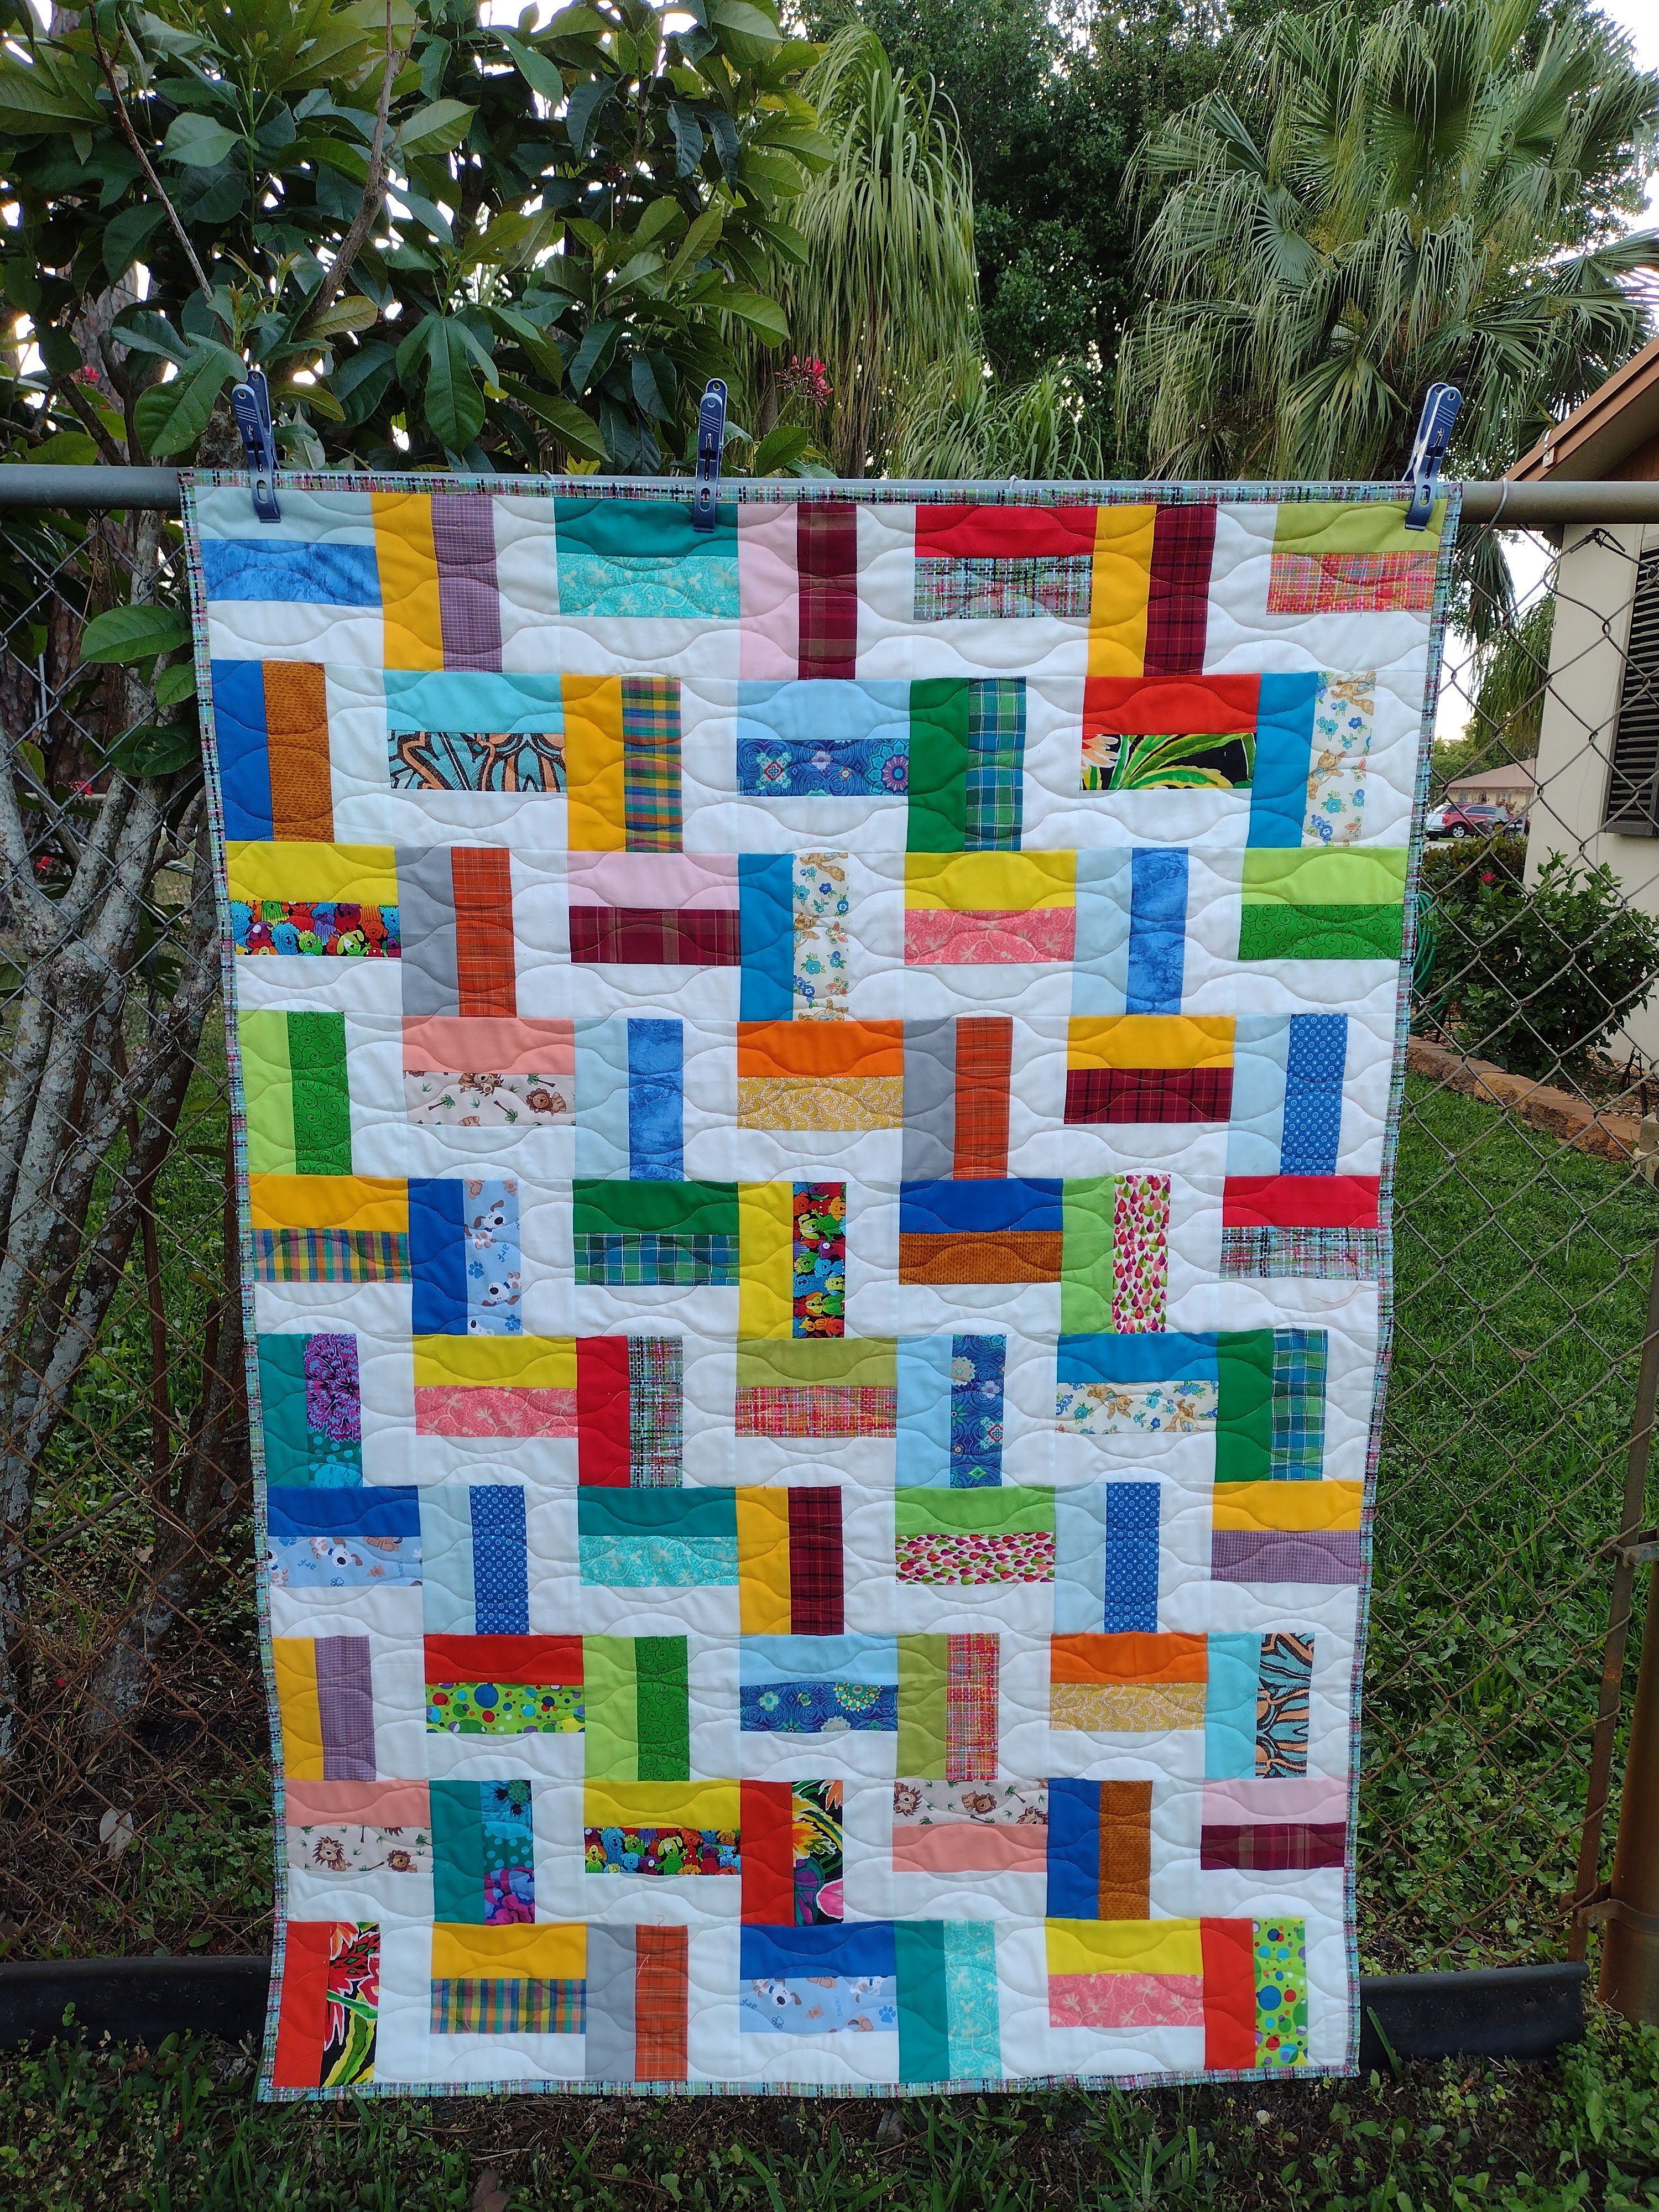
After making the extra 7 blocks, I decided to use the scraps left with some fabrics in the bin of bright scraps as my first group of scrap busting quilts.
The first one is a simple rail fence block using some 2 1/2″ wide scraps that are less than 10″ in length.
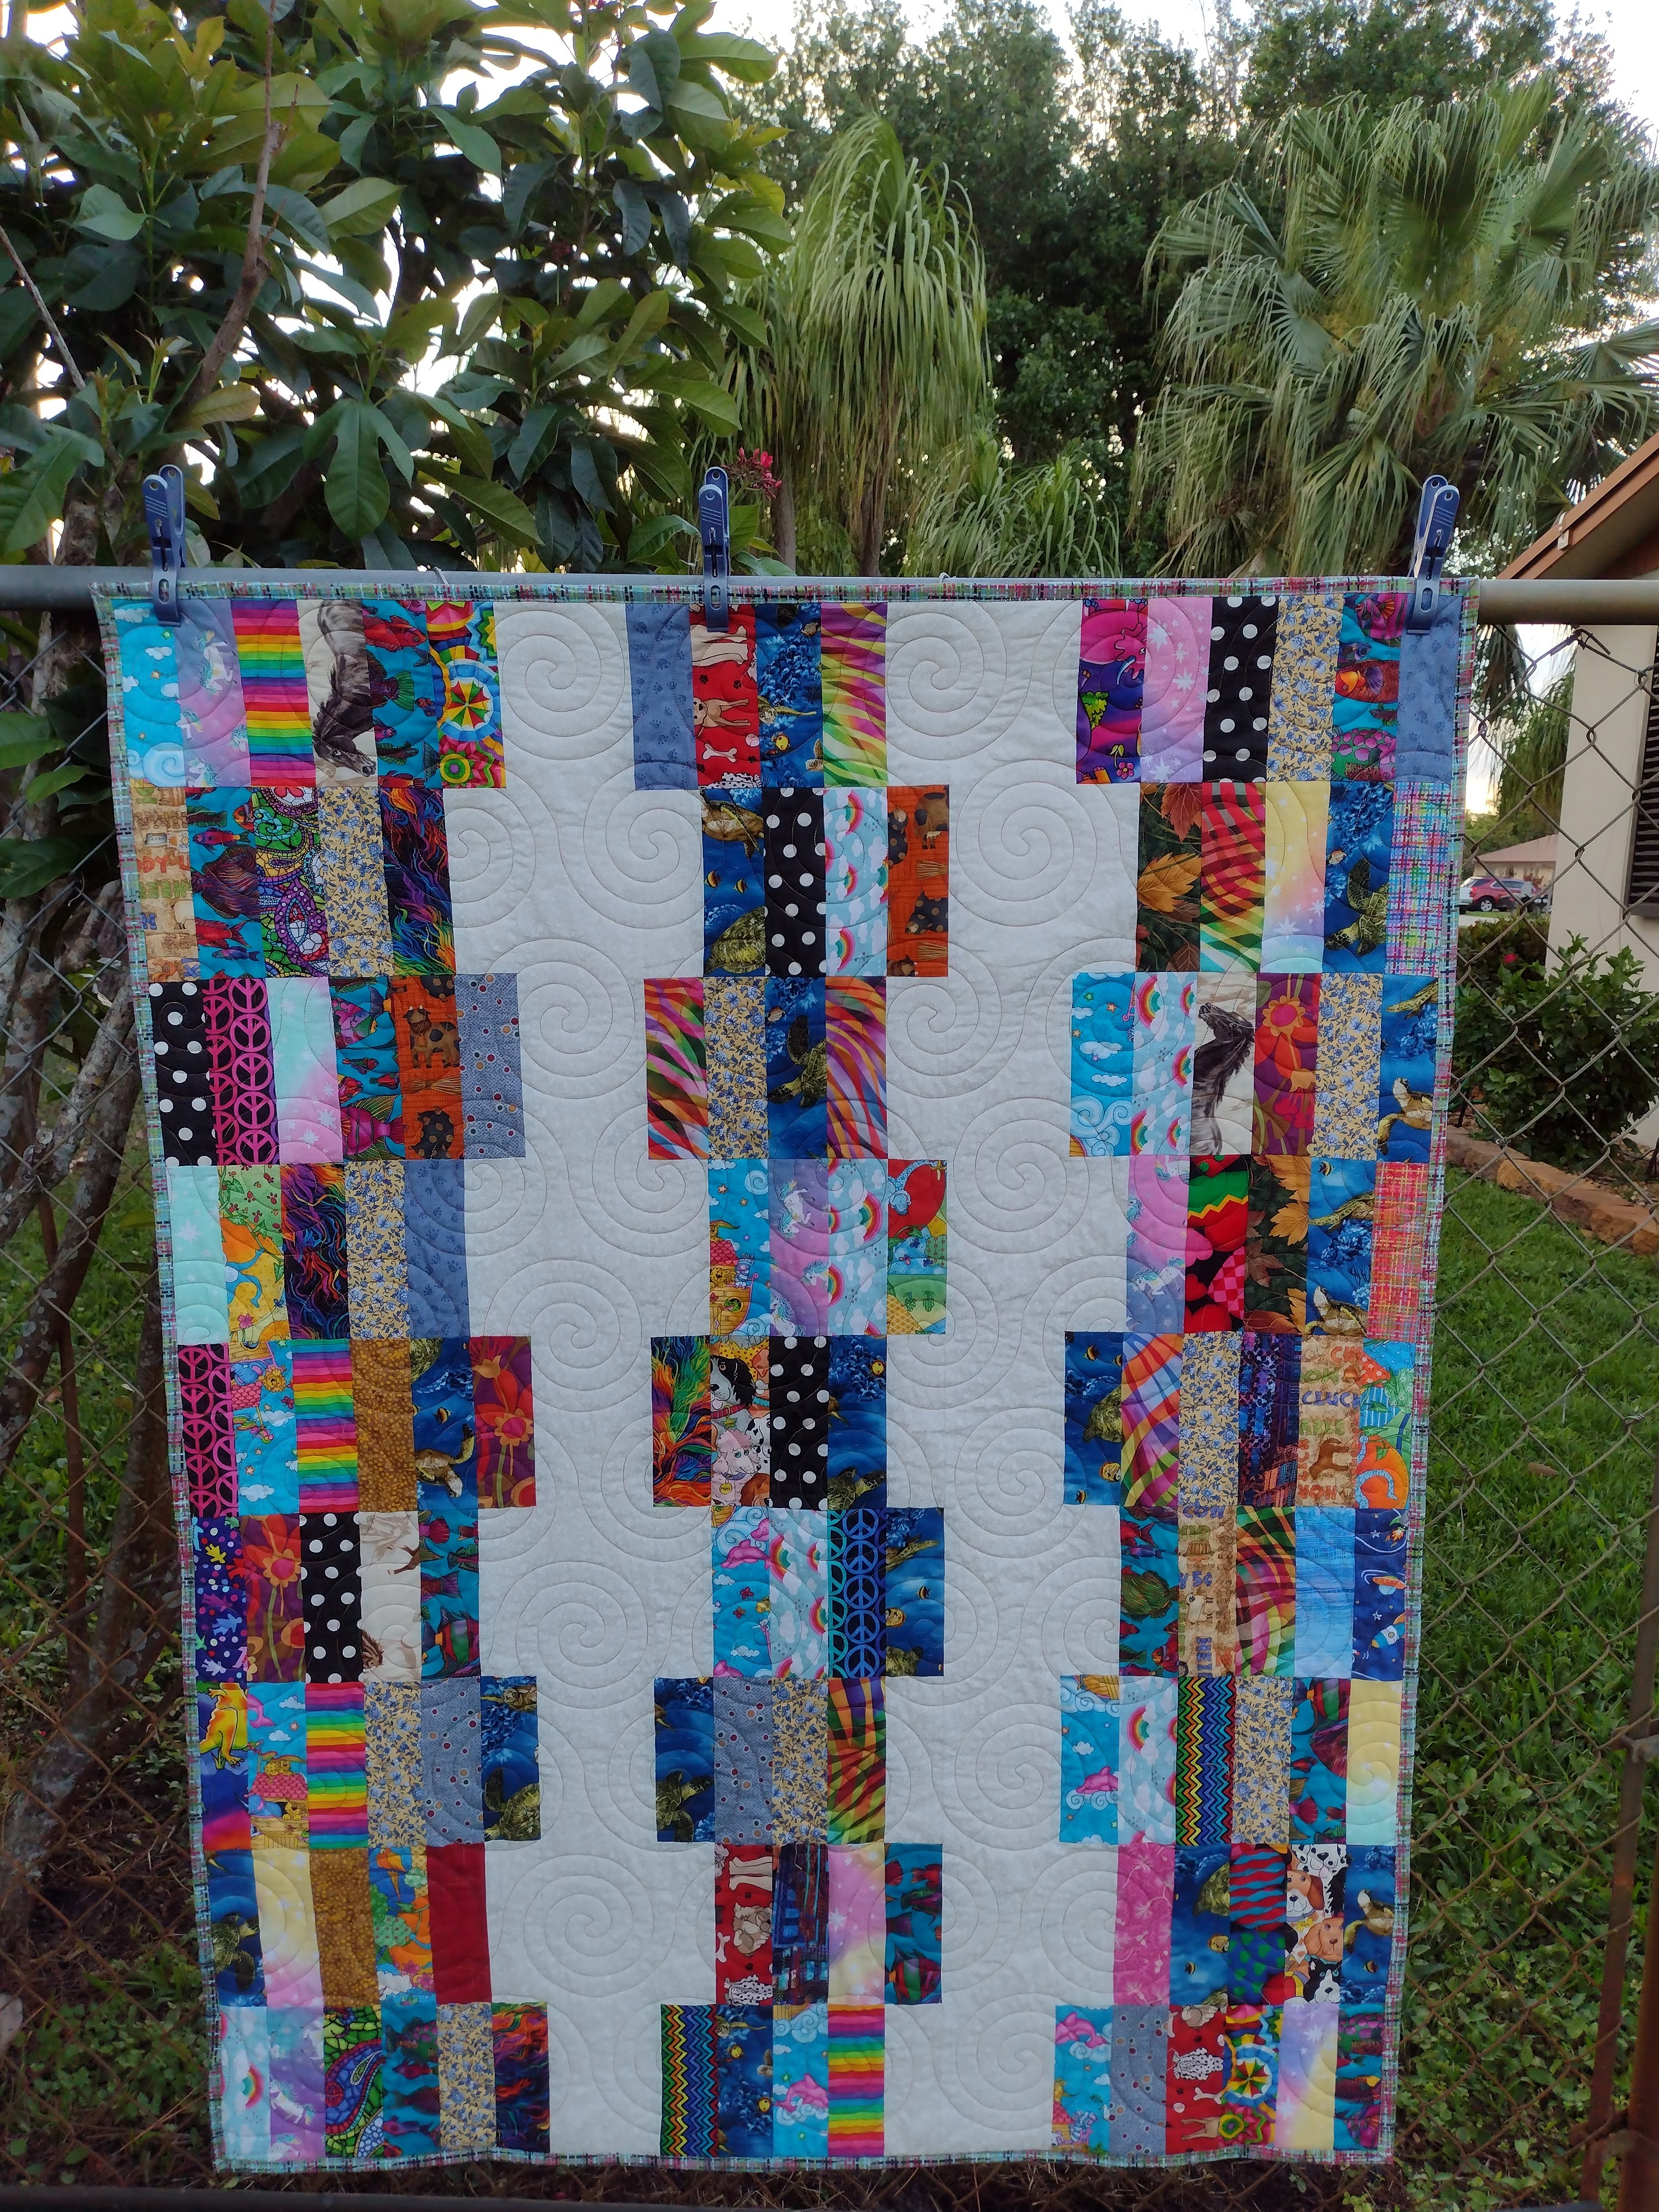
I used more 2 1/2″ scraps to make a smaller version of Jo’s Country Junction pattern Jimmy John.
After I finish a couple of string quilts from this bin I’ll be ready to move on to a different style fabric.