I’ve been busy for the last two weeks but not much that’s quilting related.
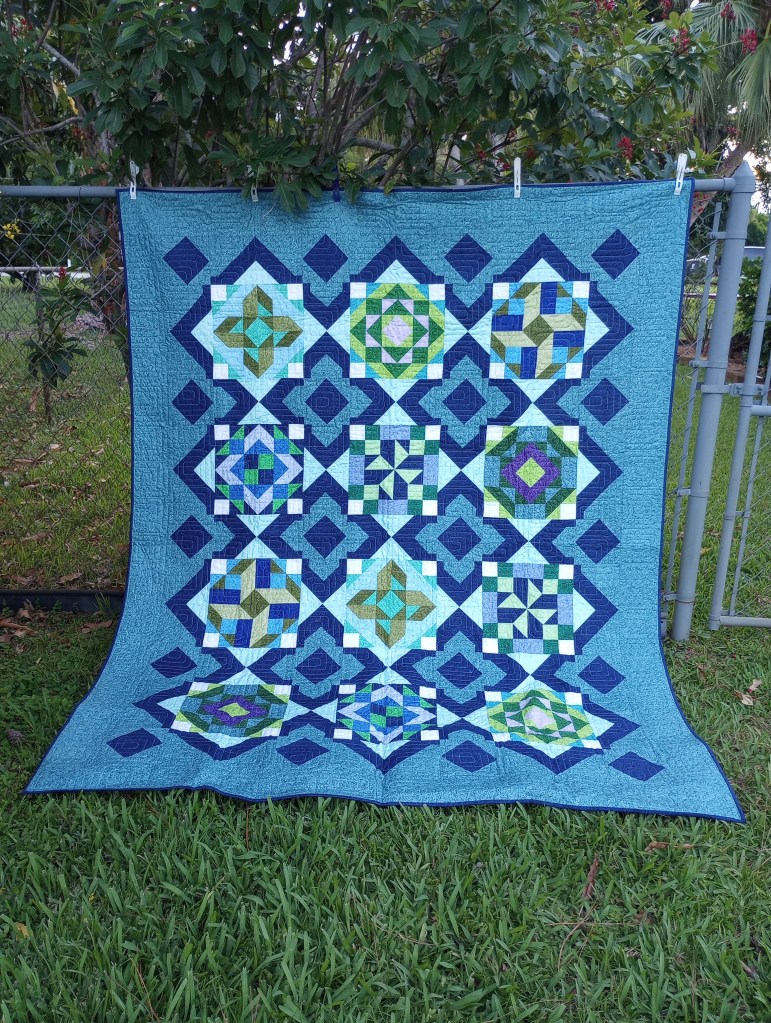
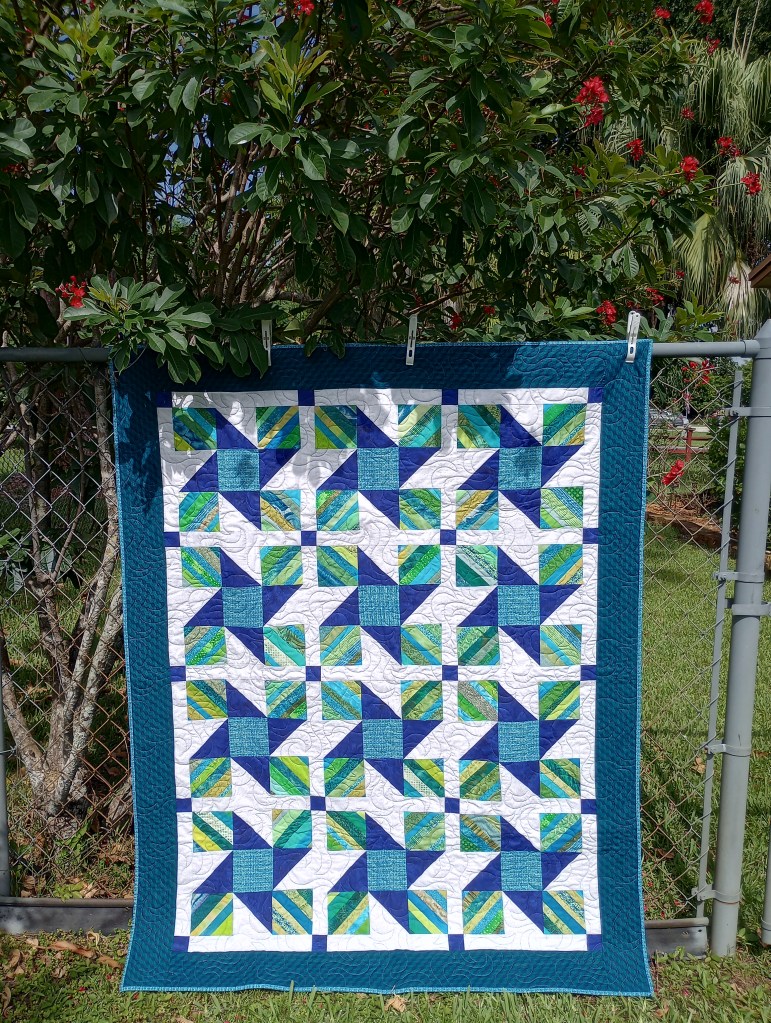
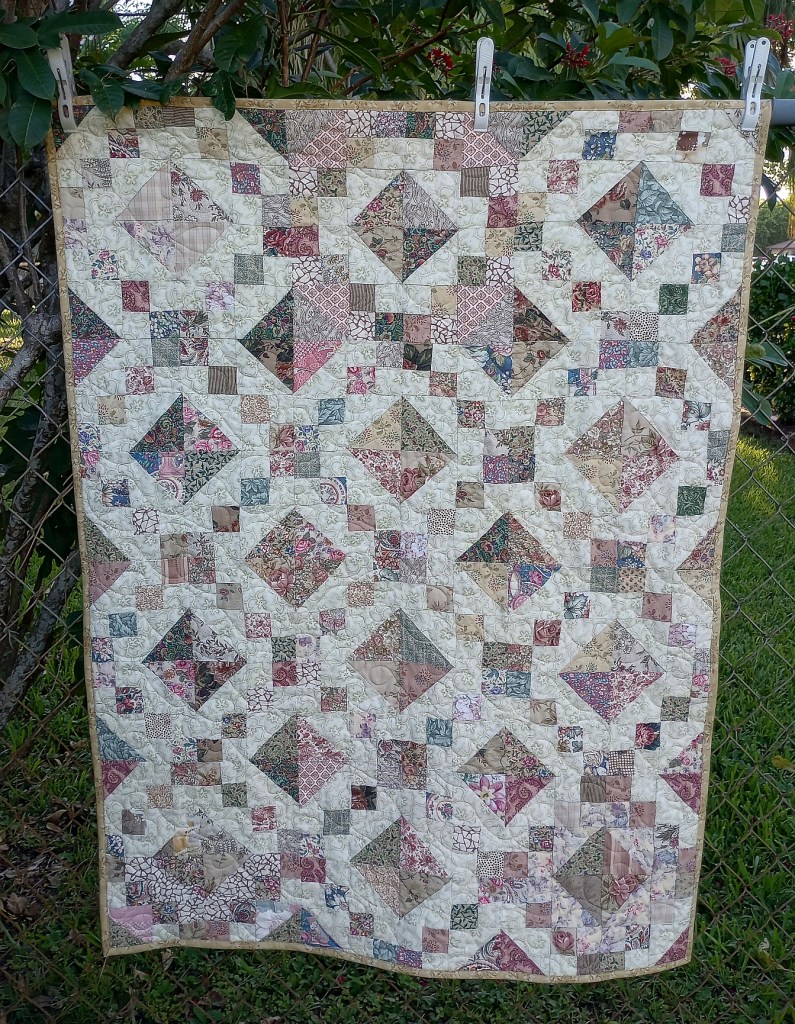
I came across this quilt when I was considering which ones to donate for a fundraiser.
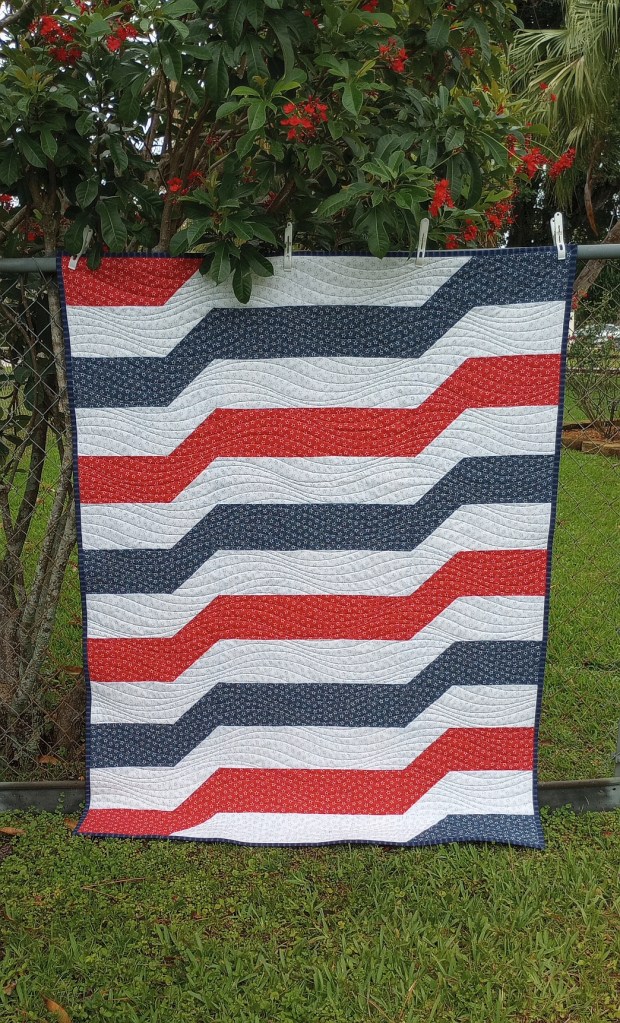
It’s a block of the month from 2018 called Surf and Sand. I didn’t like the setting in the original pattern so it was a while before I took it back out to finish.
This was the original setting. I was lucky to find more of the Quilting Treasures fabric line for the setting I ended up making. I’d seen a photo on a long armer’s quilting page and was able to graph it out. I’m glad I waited because I’m much happier with the quilt I eventually made.
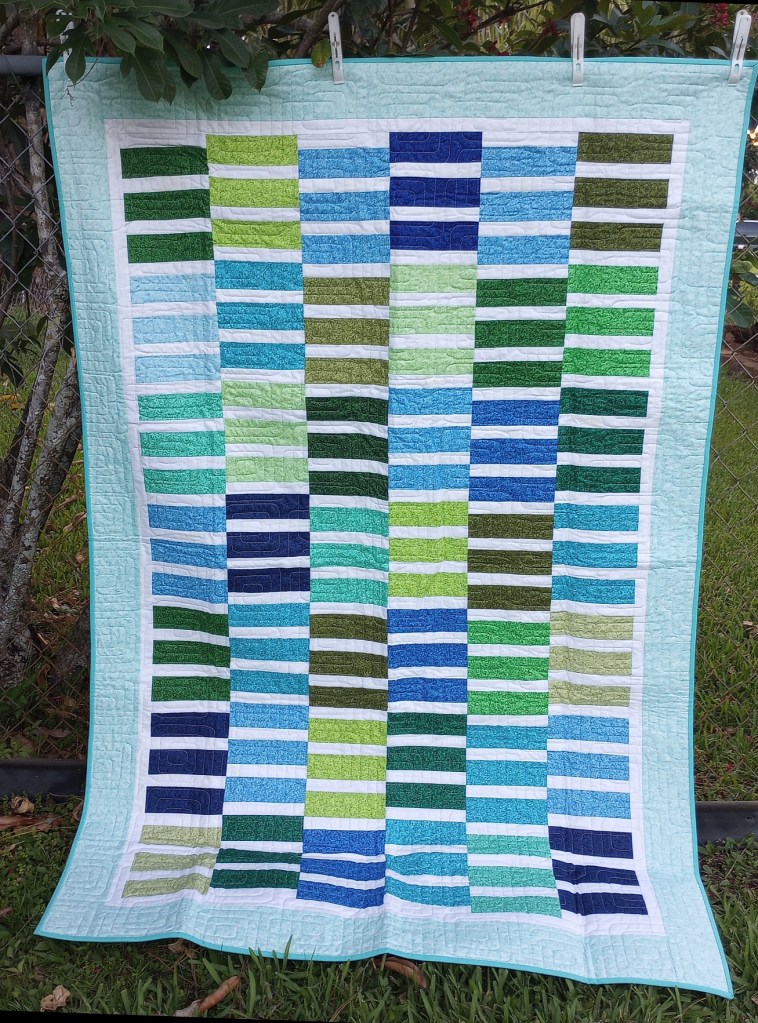
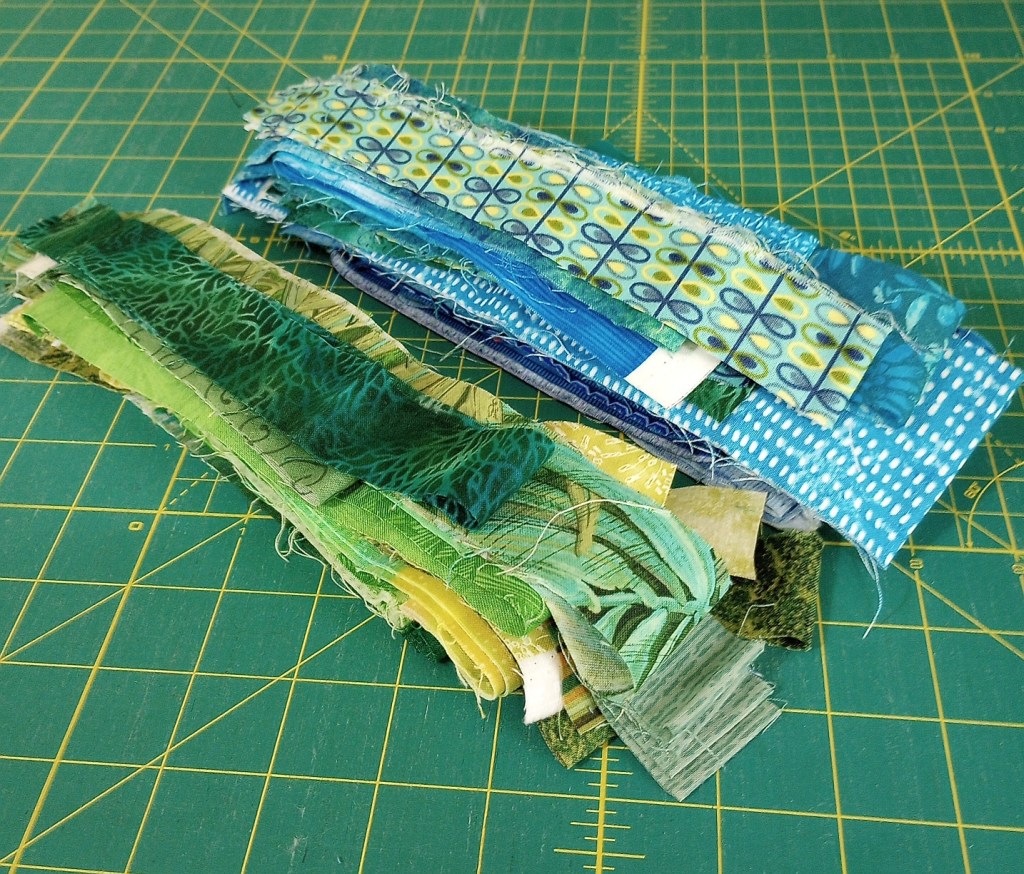
I made a lap quilt with nothing but leftovers. As you can see, it’s been folded for awhile. I need to do better at refolding my quilts every so often.
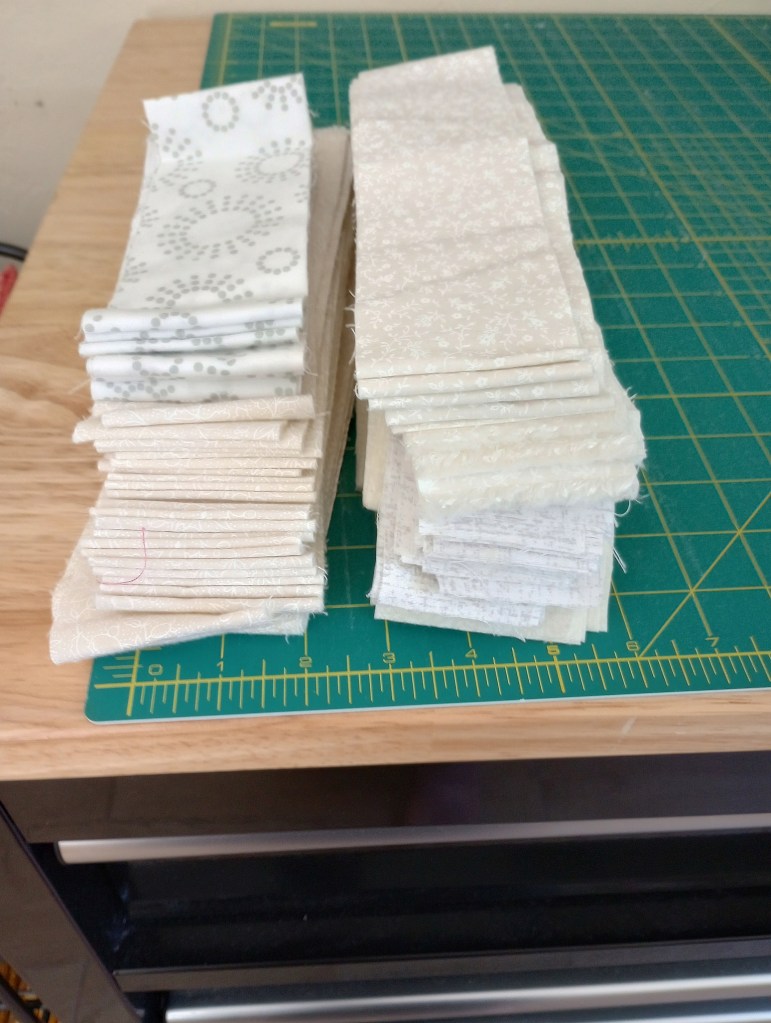
I have more scraps and these white strips I’d like to use up but I haven’t quite made up my mind what I feel like making with them yet.
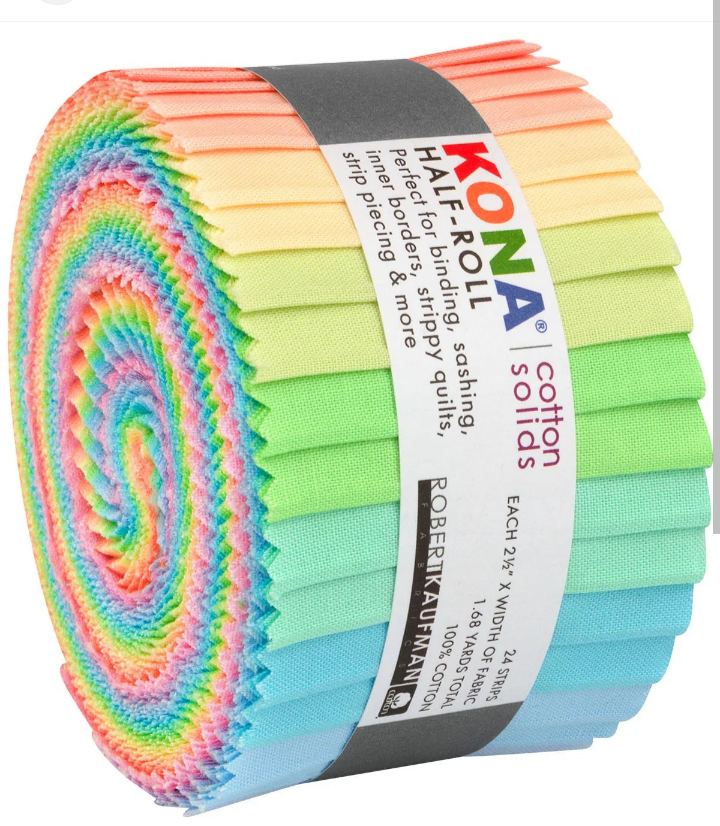
I DO know what I think I’ll make with this half-roll I’d purchased from JoAnn’s several months ago on sale.
Your guess about what comes next is as good as mine! There are 2 of my quilt tops in line to be quilted and a couple for my guild’s outreach program so not much chance of getting bored anytime soon. 🙂
I completed another string quilt last week, and I’m really happy with the result.
I do need to make few quilts that are almost entirely strings to use more of them. I’d have been able to use double the amount of strings had I just pieced the 9″ blocks together. I used 12 blocks rather than 24 that I would have otherwise.
It is fun looking for ways to incorporate string sections into other patterns! I figure as long as I’m being intentional about using them often, rather than let them accumulate it’s all good. 😉
I took some photos while making the blocks using grocery store ads on newsprint paper.
Once the blocks were trimmed and the paper removed, I cut each 9″ block into 4 1/2″ squares. I forgot to take a photo of that step.
Each time I sew a string to the blocks I stop and iron them before adding the next string. Not everyone bothers to iron as they go but the extra step seems to make my blocks lie flatter than I think they might otherwise. It’s also a good opportunity to make sure the paper is easier to remove later. I to that by folding it back, sliding my thumbnail across the crease to sharpen it, then folding it back in place so it’s ready to add the next string.
Rocky (our cat) has his own little piece of batting to lie on and nap, watch me, or look out the window. I know people have cat allergies so I’m careful to keep the rest of my batting covered.
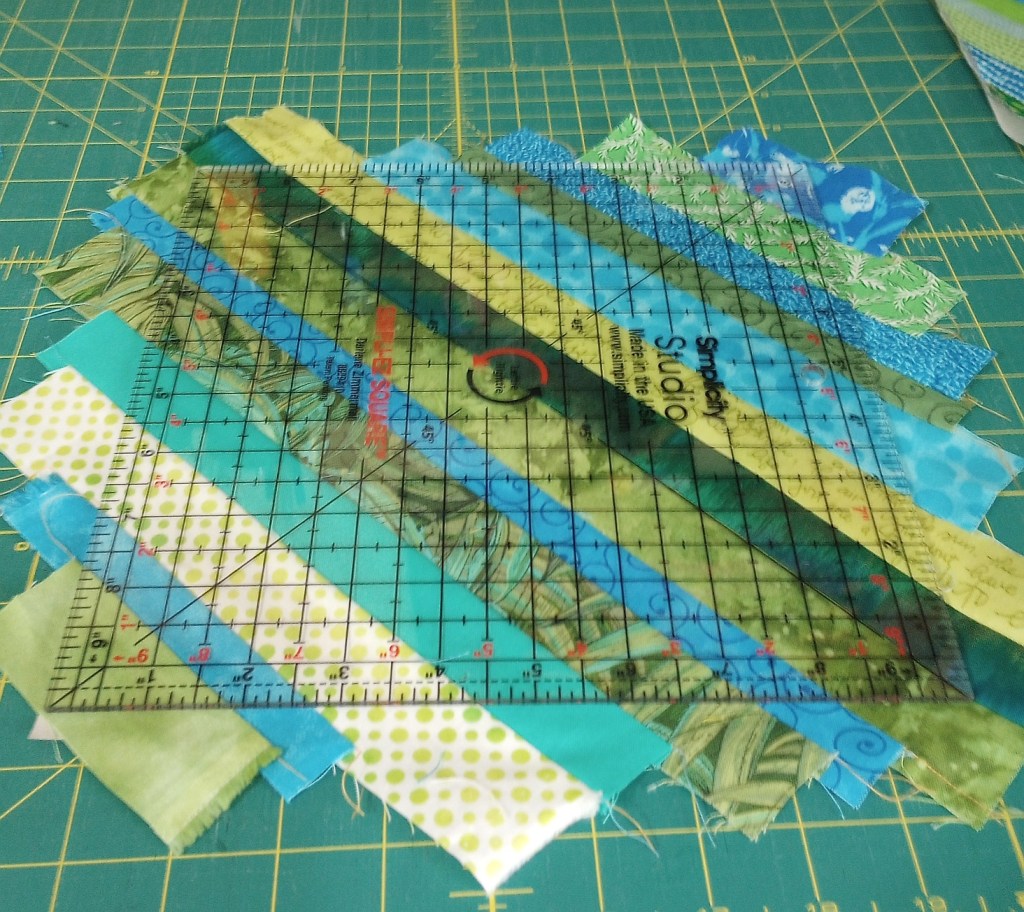
Today I’m cutting 2 1/2″ strips from Kaffe Fassett scraps for my next quilt. I didn’t think I had enough until I laid them out!
Any leftovers and narrow pieces will go into my next string quilt. It’s better to use them now than save them for Ron. (Late R On ;-))
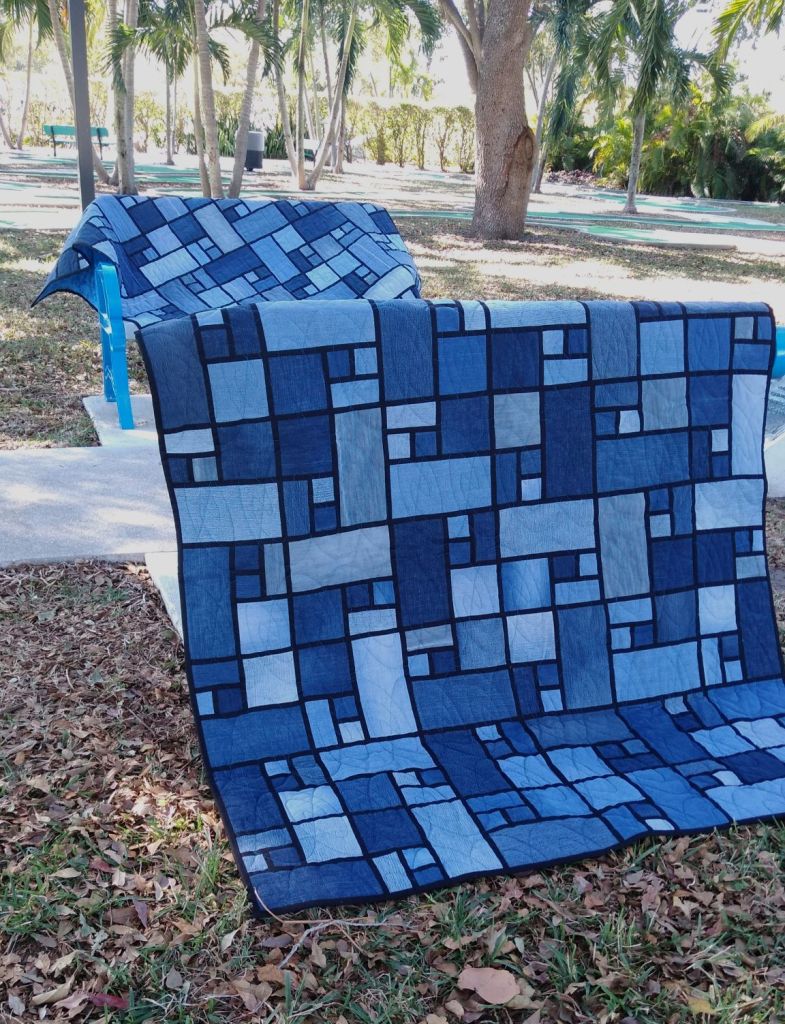
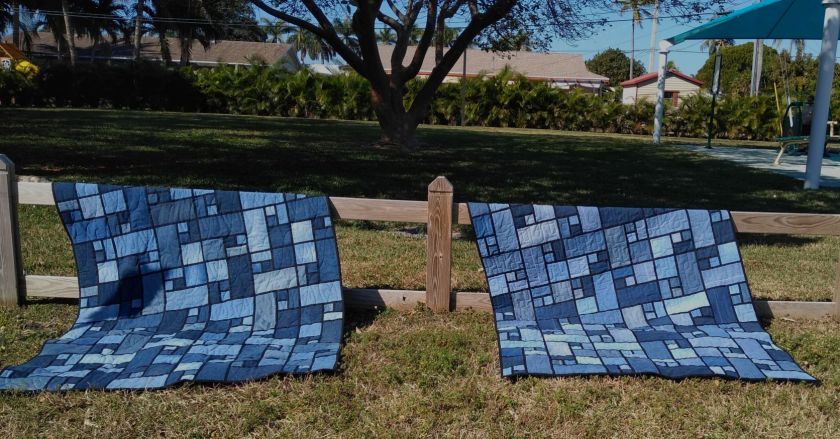
I searched the archives and found my original posts about a pair of quilts I’d made for the sons of a friend who’d passed away. One of her closest friends asked last night to see a photo of them again.
Making these two quilts was challenging, not because of the piecing or quilting, but due to their emotional significance. They were made from the jeans of a friend who had died from brain cancer. Her close friend gave me the jeans to make quilts for her two sons. It was an honor to make them and knowing how sentimental she could be, I think Patti would have loved them.
You can read more about them in this original post here and here. The brief instructions on how to make the quilt are in this post.
It’s one of the many posts I’ve had to look for in the archives and republish. It takes a few minutes to reformat them but I’ll work on a few at a time, at least the ones worth repeating. 🙂
Patti absolutely loved this song! I remember weekend nights sitting around a fire singing it to the top of our lungs, and loving every minute of it. ♥ (After a long day of watching our husbands drive the four wheel drive trucks in the mud. Laughing at the wimps who were too chicken to try it. Then, spending the afternoon pulling out those who did try but didn’t make it to the other side. Those were the days.)
I quilted and bound this guild unfinished top that had been in storage for quite a while. I asked if I should adjust the size, either make more blocks or remove a few, so it would be easier to donate. The answer shook me to my core.
The lady making the deliveries said these smaller quilts can always be used by a senior in a recliner or wheelchair (depending on size). She then added that one organization she gives the quilts to will take any size. The children and teens they help are by referral and they know many of the children sleep on the floor because they have no bed.
Children. Sleeping on the floor because they have no bed.
How can you not remember that when you’re making quilts? I know if I’m not careful, I’ll overdo it to the point of burnout. That won’t help me or them. The best way to avoid it is to put my quilting on some sort of weekly schedule. It’s the same thing I do for household chores, laundry, and grocery shopping. It’s a habit now so I don’t stop and think about it. I need to make a habit of rotating what I work on at the beginning, the middle, and the end of the week.
I want to have a mix of quilts that are needed, quilts that are ones I’m really inspired to make, and quilts that will use up my abundance of scraps and strings.
Last month I worked on the rescued quilt tops. Now, I’m making strings but I feel the need to quilt some tops for my guild and also projects for the weekly bee I joined. It makes my head spin but, I know it doesn’t have to so I made a plan.
Saturday – Reset my sewing room including piecing frankenbatts, trimming scraps, make sure all fabric is noted with the yardage and put away. If there’s extra time, prep for the next project.
Sunday / Monday – Sew string or scrap quilt
Tuesday / Wednesday – Sew inspiration (bucket list) quilt
Thursday / Friday – Bee project and quilt a guild top
Life happens and there are days I’ll be busy with family things and not sew at all. The point is to rotate what I’m working on so I don’t get in a rut.
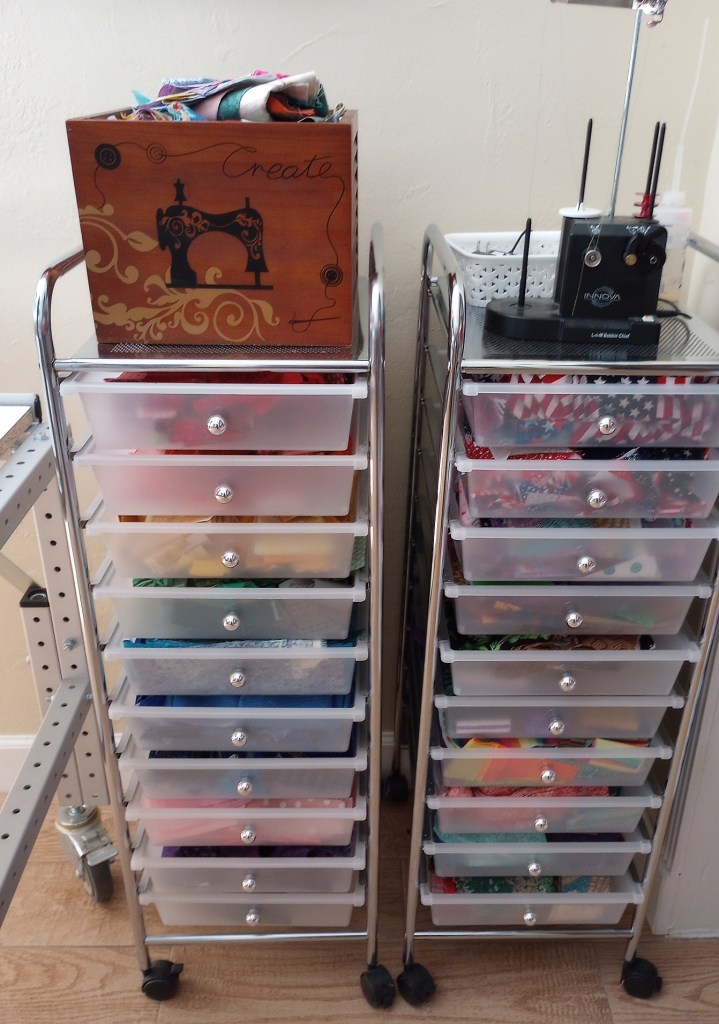
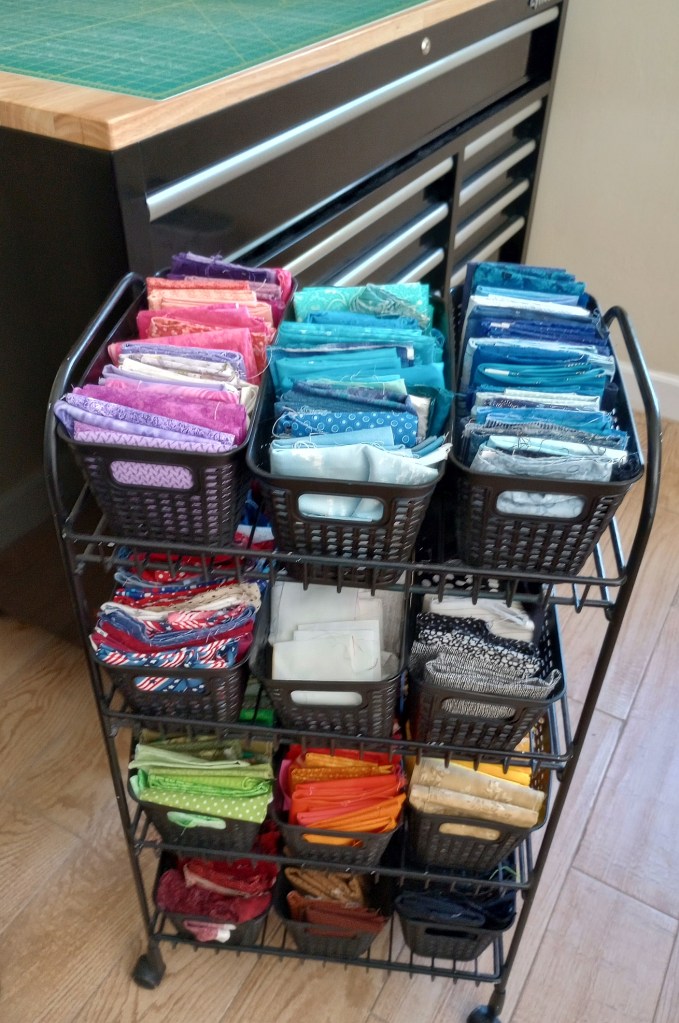
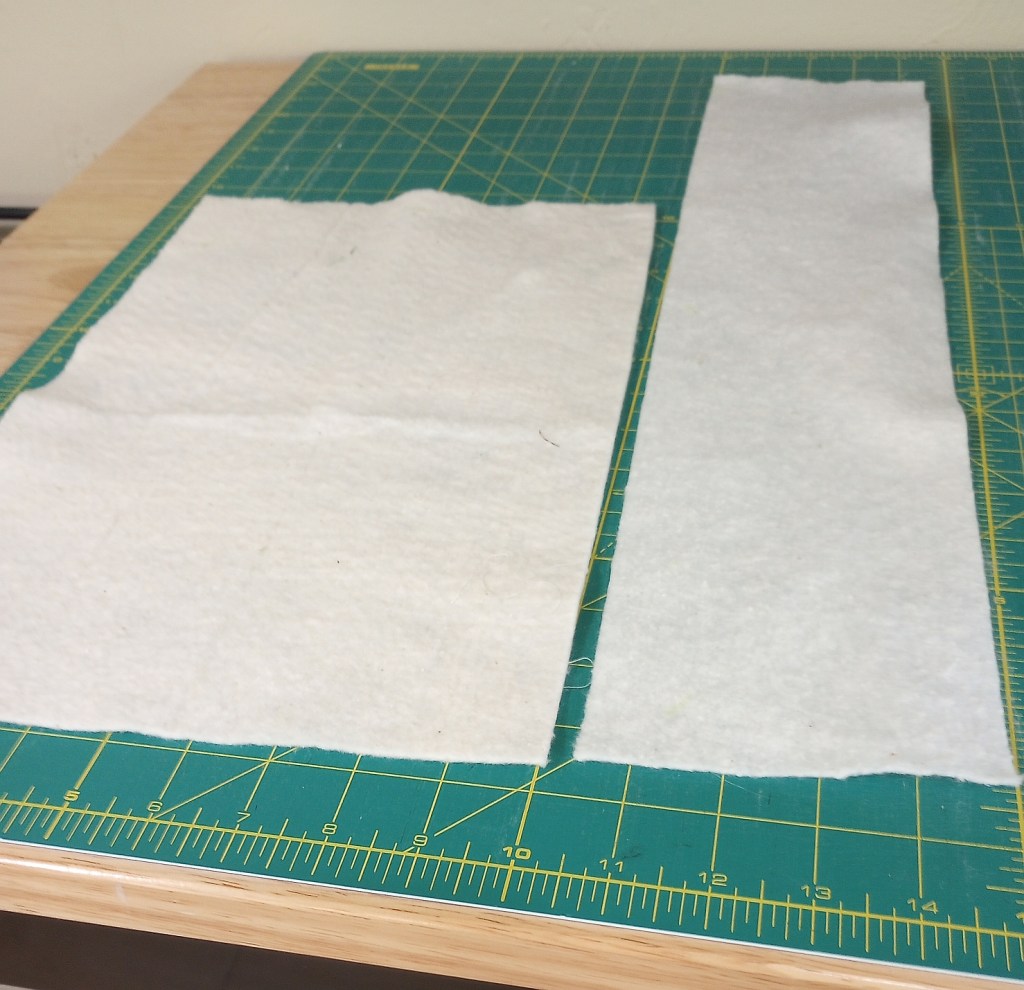
I once read that procrastination is simply decisions deferred. That’s a pretty accurate description. The left photo shows how my strings are stored. The wooden crate on top are pieces I need to trim and/or sort.
The next photo shows my scraps, and the last one are white/off-white strips on that were cut for projects I later changed my mind about. Those strips rest on top of my scrap baskets because I have no storage space for them.
As you can see, I have an overflow of fabric for both string and scrap quilts, not to mention the two drawers of fat quarters. I have ideas for all these fabrics! I don’t want to just store them; I want to get a better habit established to use them regularly.
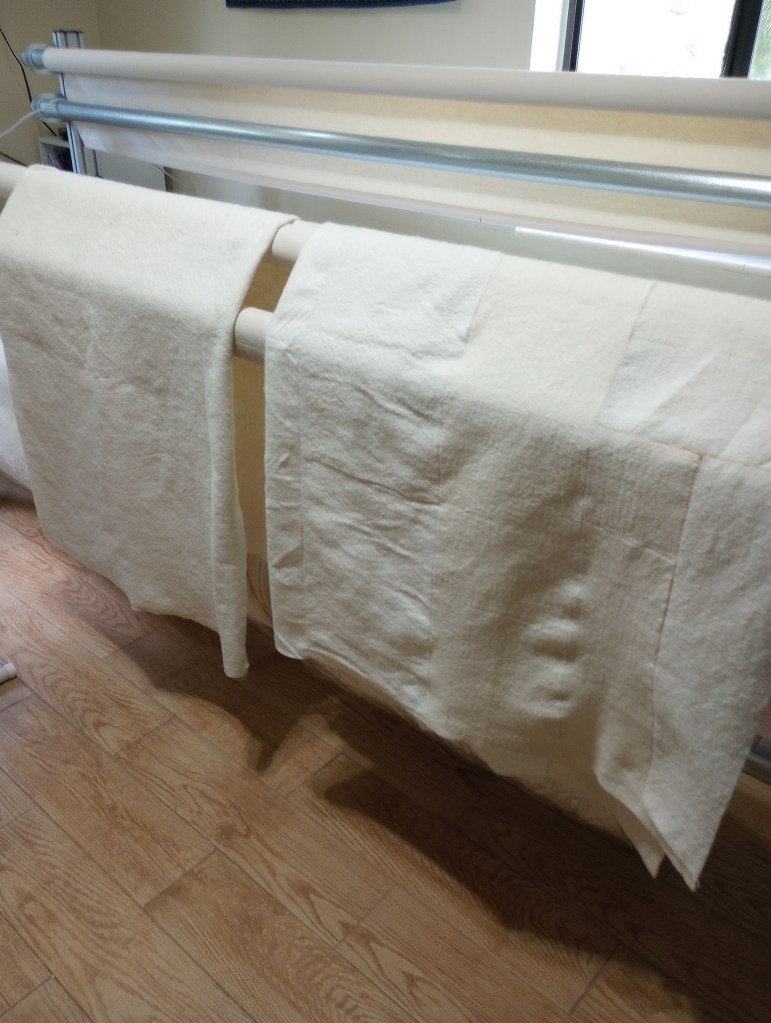
On Saturday, I started my plan and used the morning to reset my sewing room. I thought I had kept up pretty well with my batting cut-offs so I was surprised to see there was actually enough for 2 small quilts. I only have 2 little pieces of batting left over. Staging them at the end of the table on the back of my long arm works well as long as I keep up with piecing and using them.
I’ve had good success by zig zagging them as soon as I finish attaching a binding while my walking foot is still on the machine. while I have the walking root on from binding the previous quilt. Now I know if it’s late and I’m tired, or have somewhere I need to be, I can just catch up on my Saturday morning reset.
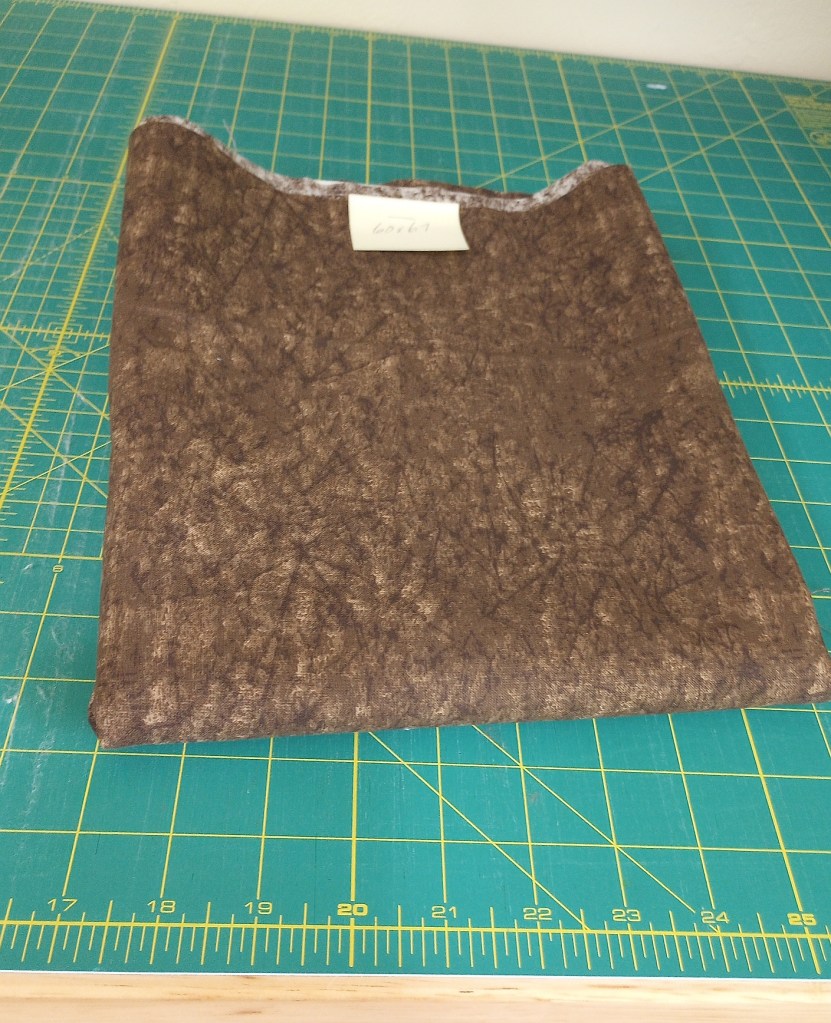
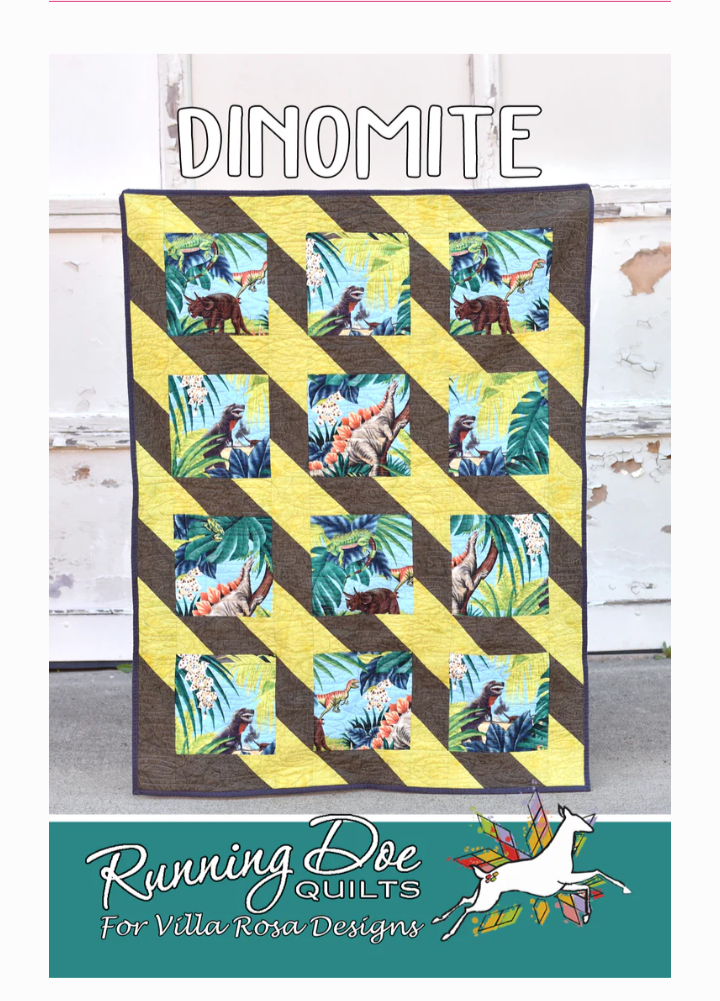
I trimmed pieces from quilts I worked on last week too. I have 60 “waste” half square triangles trimmed to 3.5″ from the Dinomite quilt.
If I put them away, it might take a while before I want to work on them again. Better to keep them out and use them up eight away, especially since I have an idea for them based on a simple 3 Yard Quilt pattern.
I’ll cut the rest of the pieces for the quilt tonight. I’m anxious to start the next quilt so I’ll sew these as leaders/enders. The fabrics are so different than the quilt I’m making next that I won’t have to worry about the pieces getting mixed up.
I joined a quilting bee that meets every Thursday morning. It’s a great group, and many ladies make quilts to donate, but it’s not mandatory. The little quilts are a fun break from the other things I’m working on. I’ll dedicate Thursday for little quilt day and maybe Friday too when I have one ready to quilt.
I used the Villa Rosa pattern Dinomite. As you can see by comparing it to the pattern picture, I change the upper right and lower left corners.
This is really a quick, fun pattern! Running Doe is my favorite designer at Villa Rosa. At only $2 per pattern, they’re a fabulous bargain!
The quilting design i used is a freehand motif created by Dawn aka The Pajama Quilter. Her DVDs and workbooks are no longer available to purchase but she did put the videos on You Tube.
Make sure to check out her other fun videos while you’re on You Tube. She’s a member of the online group I’m in called Stashbusters. Yes, she really is as fun and happy as she appears to be in all the videos.
These five quilts are also from Running Doe patterns. (I made “Luv Ya” too but gave it away without taking a photo first.)
My guild is completing quilt tops that were stored before the current coordinator revived the Outreach group. They need help finishing them, so my second goal is to quilt one every weekend.
Lastly, I want to make some string and scrap quilts and work on my bucket list ideas. I’ll focus on these during the other 3 or 4 days a week. I might only post on Fridays or Saturdays, but it’s not because I’m being lazy! Life just gets too busy to spend much time online.