Today I made a trip to Hobby Lobby and it was so hot I just didn’t think I’d have any energy left to cook so I stopped by KFC on the way home. After eating, I went back out to pick up my grocery order. I think it was even hotter by then! 🥵
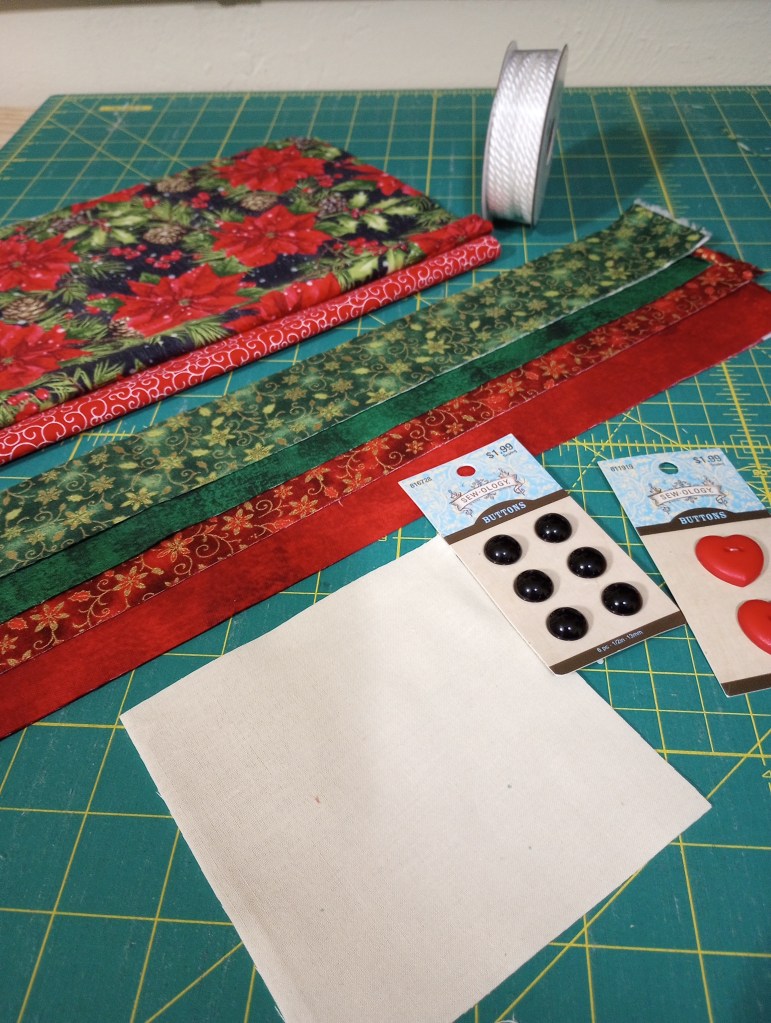
The Hobby Lobby trip was to get a crafty gift for someone and to pick up supplies for a Santa wall hanging workshop at our guild next month. I thought it would be hard to even think about Christmas as hot as it was.
I was wrong. Hobby Lobby had everything Christmas on sale 50% off. So many nice things. So, so tempting! I only picked up a couple of boxes of Christmas cards.
I haven’t mailed cards in the last couple of years. It’s a fun tradition that I miss so this year I have no excuse to procrastinate until it’s too late.
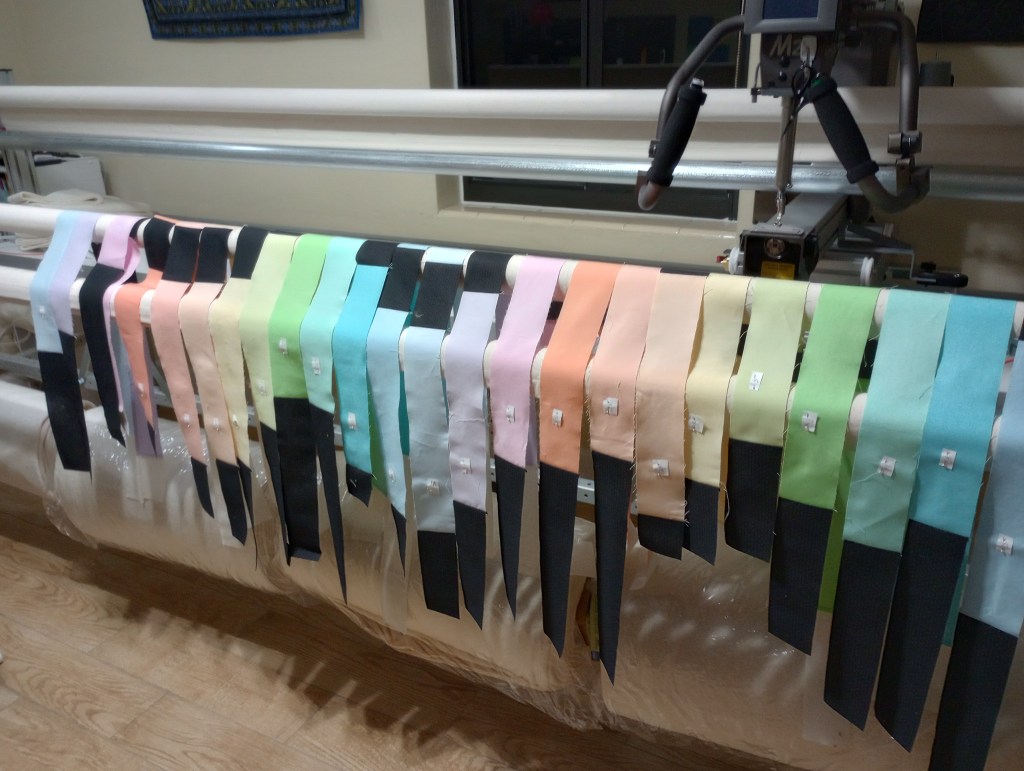
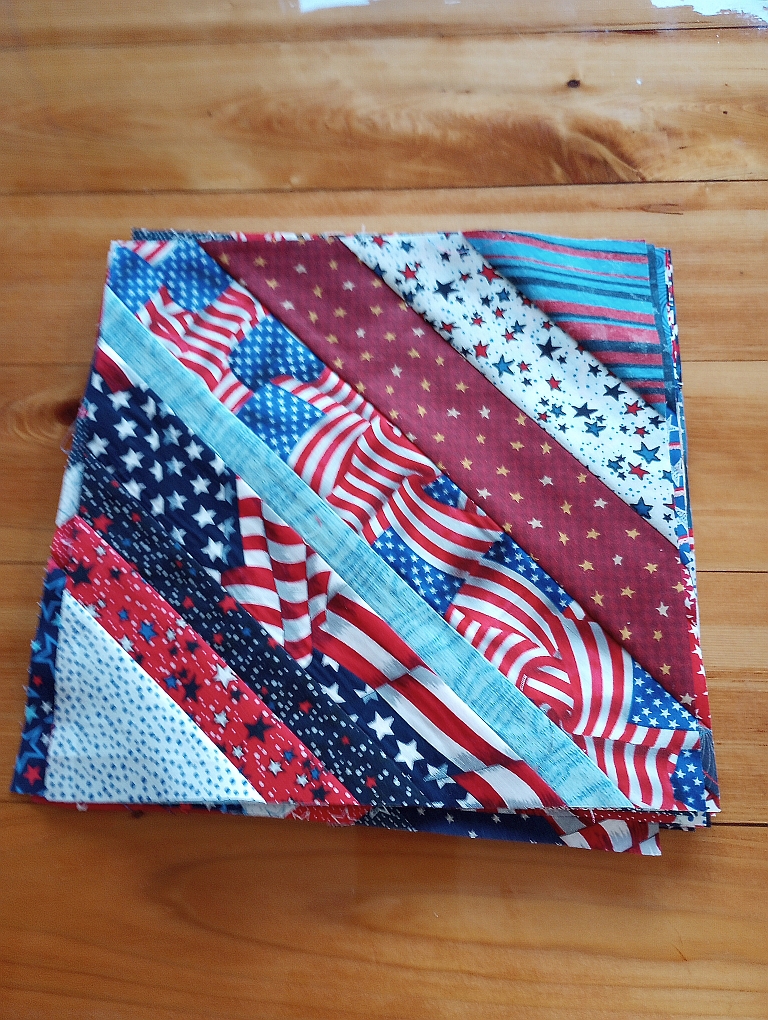
Sticking with my plan, on Sunday and Monday I made more patriotic string blocks. Still have lots of these strings to make into blocks so I may try to sneak in a few between other quilting projects.
I started my next inspiration quilt from a 24 strip Kona jelly roll I’d purchased from JoAnns a while back and some leftover strips of white fabric I’d mentioned wanting to use up in the plan I referred to above.
Hope to get some quilting done later in the week. Lots of rain in the forecast so it’s a good excuse to stay inside and sew.
This week I stuck to my plan and worked on each of 4 of my weekly goals.
personal quilt
stings/scraps
bee project
quilt a guild Outreach top
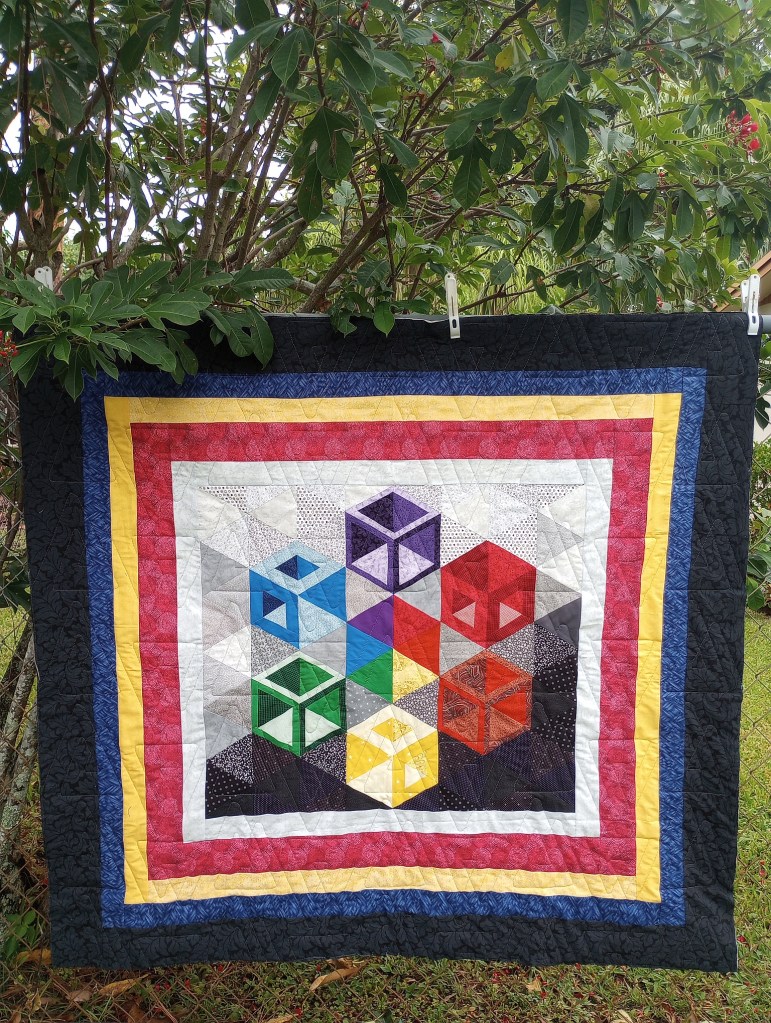
I didn’t make this quilt top but it’s such a nice one that I wanted to share a photo of it. I quilted it for the Outreach committee of the Palm Beach County Quilters’ Guild and will turn it back in for the next member to bind it.
The quilt top has likely been stored for a while, and I don’t know the original maker, but she did a fantastic job piecing it. It’s uncommon to find a quilt top with five borders that don’t cause issues during quilting, so I appreciated how easy this one was to quilt. Trust me… when shortcuts are taken and borders are added without measuring, your quilter will definitely notice!
Even the backing was pieced well, no doubt due to the attention to detail by our committee chairwoman Vivian.
On Thursday I met with the local bee I recently joined. I’m not typically a morning person, having worked nightshift for many, many years, so I almost shrugged it off and skipped going this week. I’m so glad I didn’t! I worked on my hot air balloon quilt top while I was there but didn’t quite finish it. If you guessed I probably chatted too much, you might be right! 😉
This is such a wonderful group of ladies! No pressure to do anything, no costs, and everyone works on their own quilts. We have a little show & tell at the end of the day so you get to see the quilts that were finished and ready to be donated. Photos are taken to share with all the members later via text. What more could you possibly hope to find in a quilting group?
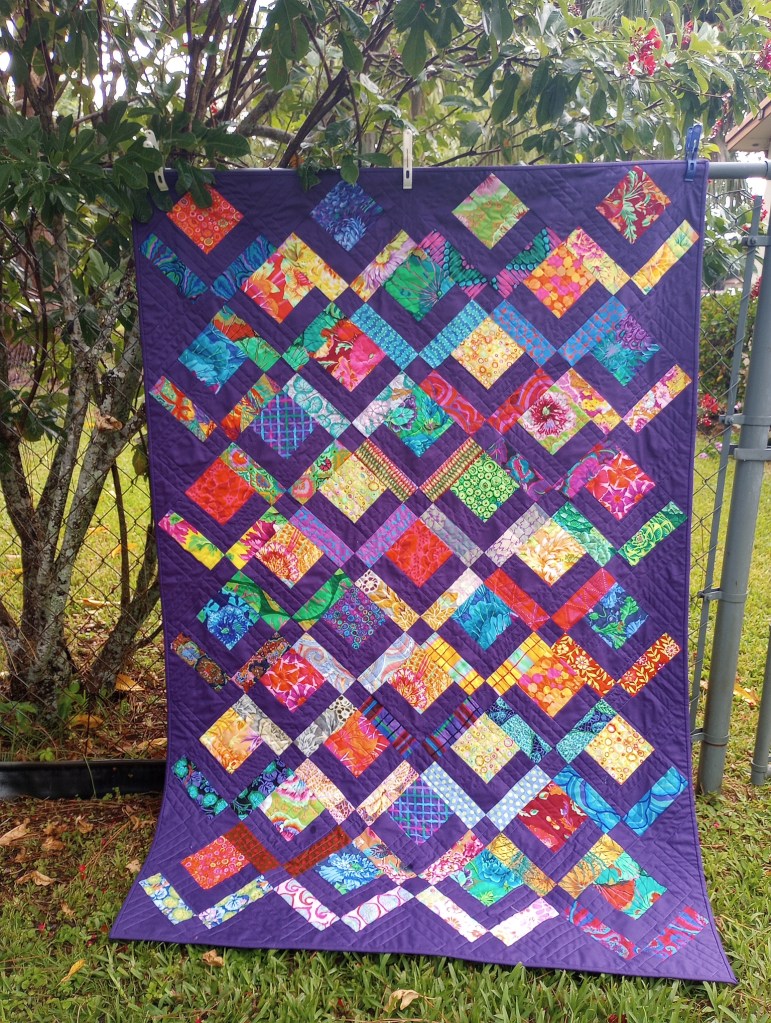
I did finish my other quilt that I categorize as a personal or bucket list quilt. Even though I’ve never been a fan of Kaffe fabrics, I wanted to try making a quilt with some scraps I had and a purchased charm pack.
While the blocks were on the design wall, I knew I was going to be disappointed in the quilt. I cut my losses, decided to eliminate a column and the border I’d planned to add. I just wanted it done so I could move on. The quilt finished at around 48″ x 68″. I started sewing the binding down by hand last night and finished it this morning. All I can say is at least it’s done and didn’t end up in a drawer as a UFO. That’s always a good thing.
I also made one set of string blocks this week. They’ll be bagged with an index card describing what my intentions are to finish them – namely add sashing with friendship star cornerstones and a border, so I won’t forget.
The next set will be 8″ finished blocks and will likely be set with alternate star blocks. Strings can get a bit messy to work with so I want to continue to make blocks out of all the patriotic strings I have while they’re out. Once that part of the process is done, I’ll make them into quilts.
Once those quilts are finished, I’ll repeat the process with the next category of strings- bright mixed prints.
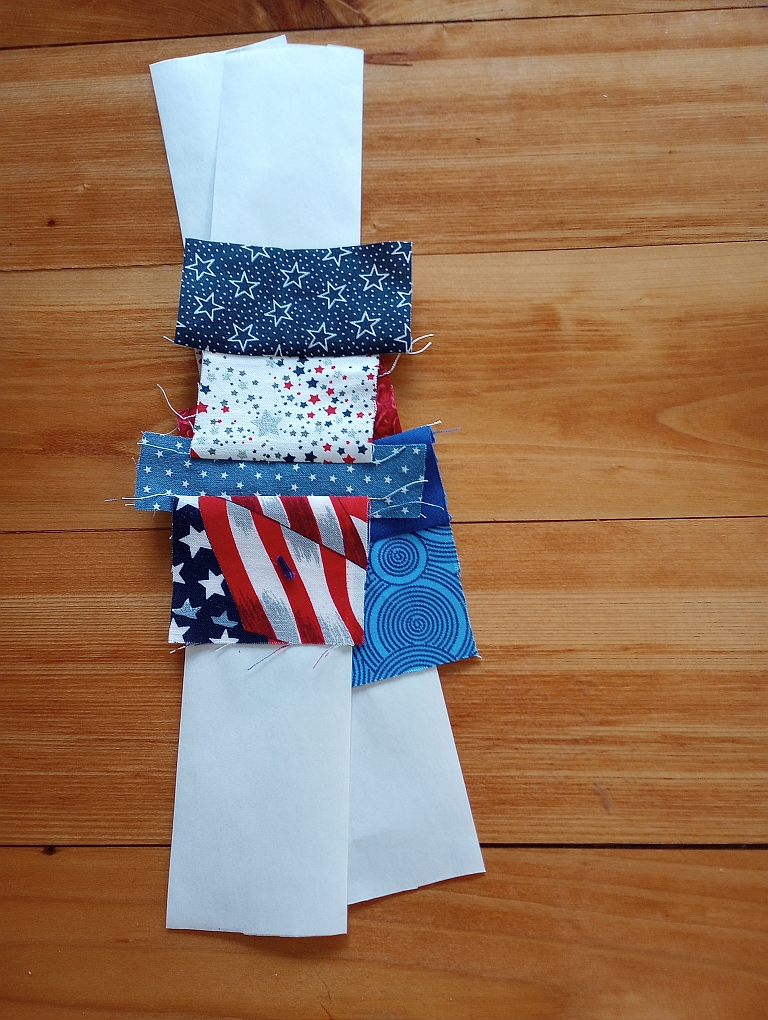
I generally don’t do leaders/enders when making string blocks because I use leftover bobbin thread, no matter the color, and a very short stitch length to sew them. In this case I decided to start sewing the tiniest leftovers onto adding machine tape as a leader/ender project so I can use up the littlest strings too.
If I only have a few strips, I can always add to them by cutting up some patriotic scraps. I have a couple of ideas that won’t take very many of these adding machine tape strips.
Saturday is our monthly guild meeting with another workshop planned. It’s also the day to sign-up for a log cabin Santa workshop next month. I’m looking forward to the fun workshops that have been planned for the next several months.
I’m hoping to accomplish at least a little on all four of my goals again this week.
A few people may have found my blog this week through one connection or another since I’ve mentioned it to a few friends. I thought I’d share a few thoughts for anyone who may not be familiar with personal blogs.
What IS a blog?
Why do you have one?
Do you make money on it?
How often do you post?
Do I have to “subscribe” to see your posts?
Where do I go if I want to start one too?
What is a blog? It’s a journal of sorts. It’s a place to share thought and ideas, links, photos, and build a community with people who have similar interests. This one is personal but you can also find plenty of business blogs by doing a quick Google search for almost any topic you’re interested in.
Why do you have one? I’ll refer you to my first post here. I stopped blogging for awhile but I’m trying to renew the habit and revive some of my older posts that have since reverted back to draft form. The blog helps me communicate with quilters around the globe, and those close to home. Some of my friends are not on Facebook, and some friends there just aren’t that into quilting. (Go figure! LOL) It’s a place I can list my ideas and plans without losing them in a drawer and, an easy way to access my quilt photos when I’m with a friend and we’re sharing ideas.
Do you make money on it? No, I don’t. While some blogs do, mine is not at all monetized. Even though it’s a free blog, I actually pay a small yearly fee because I prefer not to deal with annoying ads and so anyone who visits the blog doesn’t have to deal with scrolling past advertisements either.
How often do you post? My goal is to post at least once a week. I’ve learned that even if I don’t have much to say, it’s easier for me to maintain the habit if I do it regularly.
Do I have to “subscribe” to see your posts? Nope. You can just come back to this website anytime. Subscribing is designed to make it easier for you. You’ll get an email with the post or, a link to come to the website to read it. Either way, you’ll know the minute I post (often before I’ve caught all the typos!). You won’t waste time visiting the blog if nothing has posted since the last time you checked.
Where do I go if I want to start one too? I use WordPress.com but Google also hosts free blogs at Blogger.com
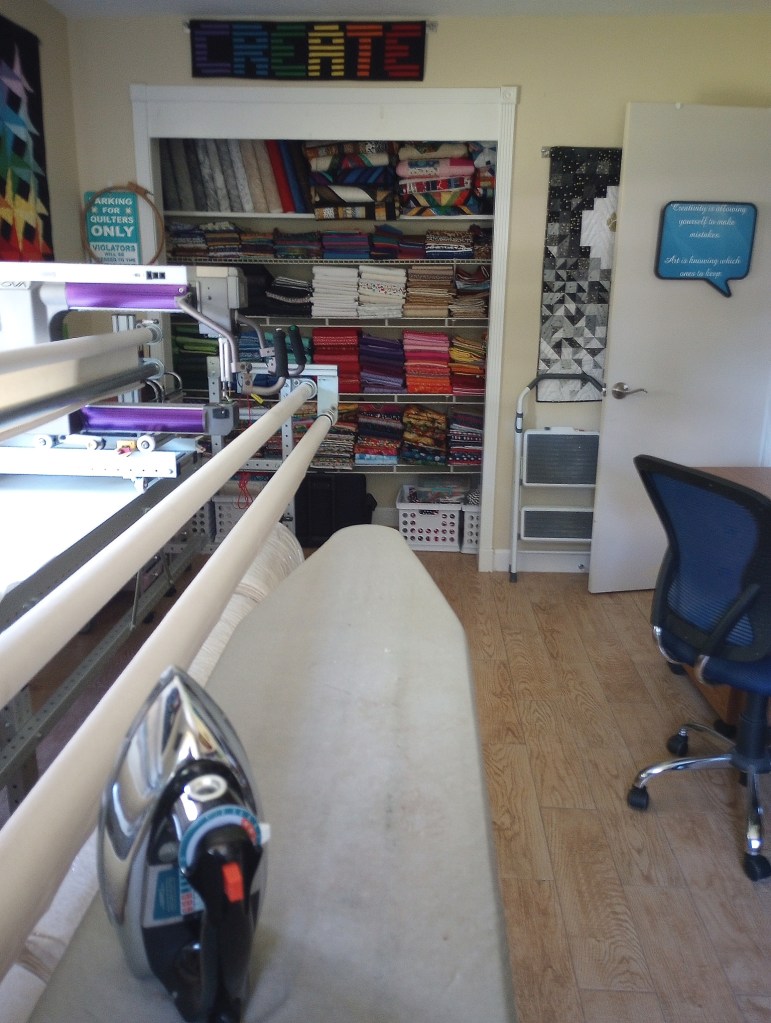
I had a few questions about the size of my room so for anyone else that may be curious, it’s 14.5 feet long by 10 feet wide, not counting the closet.
The quilt frame takes just over 10 feet of that length and about 4 feet of the width when it’s rolled close to the wall – so it consumes a large portion of the room. Several years ago I had my first long arm in our (non air conditioned) garage. I’m happy to give up floor space to be able to quilt inside the house!
I posted this link to the YouTube video tour of my sewing room yesterday. Hopefully, these still photos will give you a much better idea of the size. In the first picture I’m standing in front of the closet. The second one was taken at the opposite end of the room in front of the widow.
Yes, it can be tight at times, but it works well if I keep things organized. That’s the easy part.
The real challenge is managing tasks so I don’t have too many projects going on at the same time. I also need to get better at using leftover scraps regularly so they don’t get out of control and spill out of their designated space.
Yesterday, I put in an order online to have some inspiration photos I’d saved printed at Walgreens. They’re having a 50% off prints sale until Saturday, August 23rd and the same day pickup is convenient. If you missed this one, they have their photo printing sales pretty regularly so the next opportunity to get them at half price won’t be much of a wait.
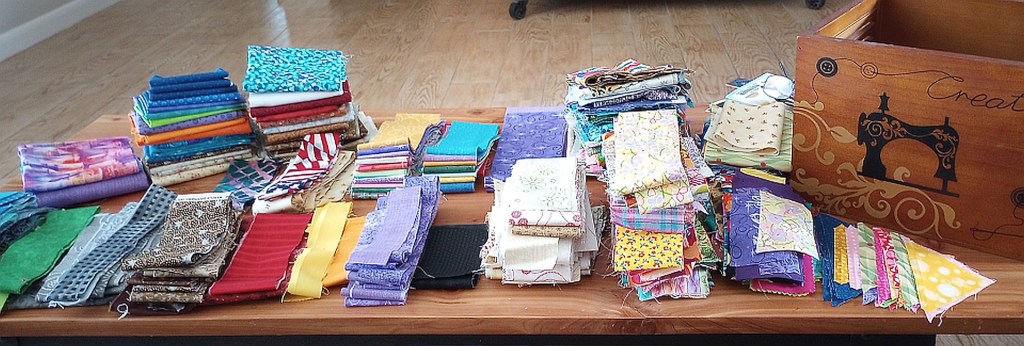
This morning I woke up, did some laundry and vacuuming, then sat on the couch to organize my scraps from the last few weeks.
They’re all sorted now and put away. It always feels great having that out of the way and makes me wonder why I procrastinate doing it. 🙂
Stuffing the pieces into full little drawers was yet another reminder “I need to use this stuff up!!”. So I started cutting paper foundations to do just that.
I’ve tried fabric foundations but they do add a lot of extra weight to the quilt that we really don’t need here in south Florida.
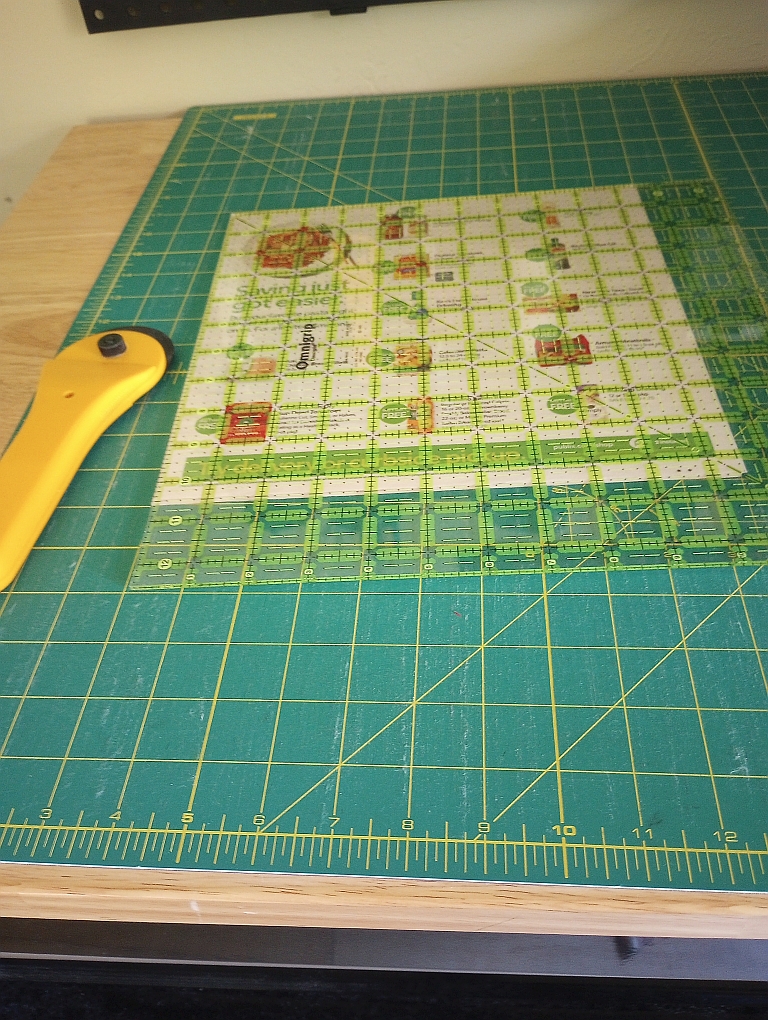
The Publix grocery store ads I like to use are printed on 10.5″ by 11″ newsprint paper. It’s a good size and easier to remove later than regular printer paper.
I used my a rotary cutter, designated for paper only, and trimmed a set of 12 pages to 10.5″ squares.
I’m plan to continuously make blocks until I have as many empty little string drawers as possible. I won’t be able to set them all into quilt tops as I go but once the blocks are all made, I’ll do a marathon top making session.
There were two drawers of patriotic strings so that’s where I need to begin. I plan to work on block sets for specific ideas on how to set them. This first group will be set with sashing, cornerstones, and a border.
I’ll admit.. I am curious to see how many blocks one of these full drawers of strings generates. Care to guess?
Finally! A new video showing how my sewing room looks today. I’m not good at this type of thing at all but, at least it’s done.
Now if I mention “my strings are out of control!” or “I need to empty the drawers that held my fat quarters” so I can use them for something else… you’ll know what I’m talking about.
My room isn’t magazine worthy. Not even close. It’s small but it works and I’m grateful for a space to call my own.
As you probably heard several times in the video, I do need to stay on top of my smaller pieces of fabric- strings, scraps, and fat quarters. If they grow out of their designated space I have only two choices, use them or give them away. You can expect to see more string and scrap quilts in the near future because I’m clearly to that point.
The room is 10′ x 14.5″ and my longarm is an Innova M20 on a 10′ frame. It’s not computerized.
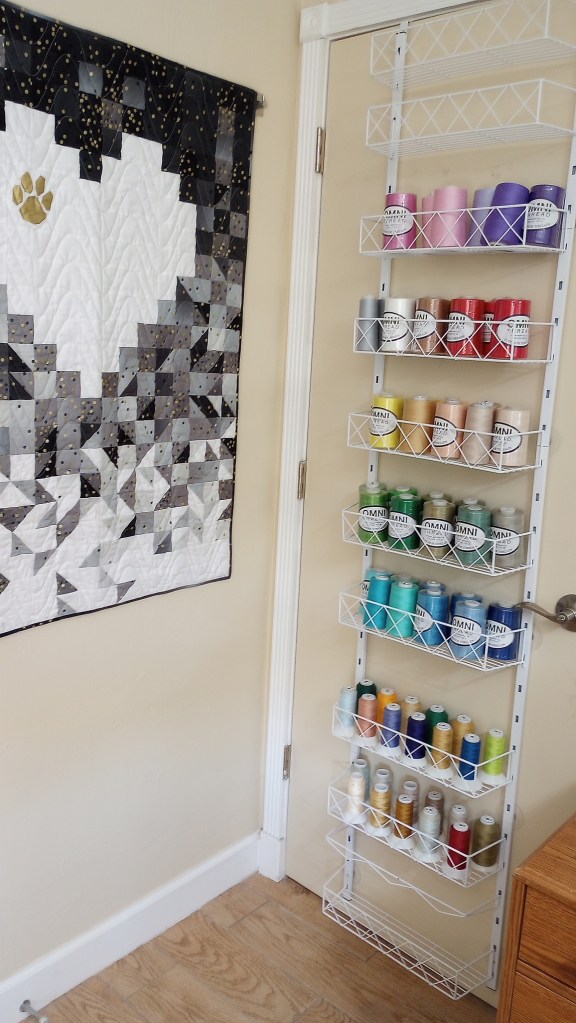
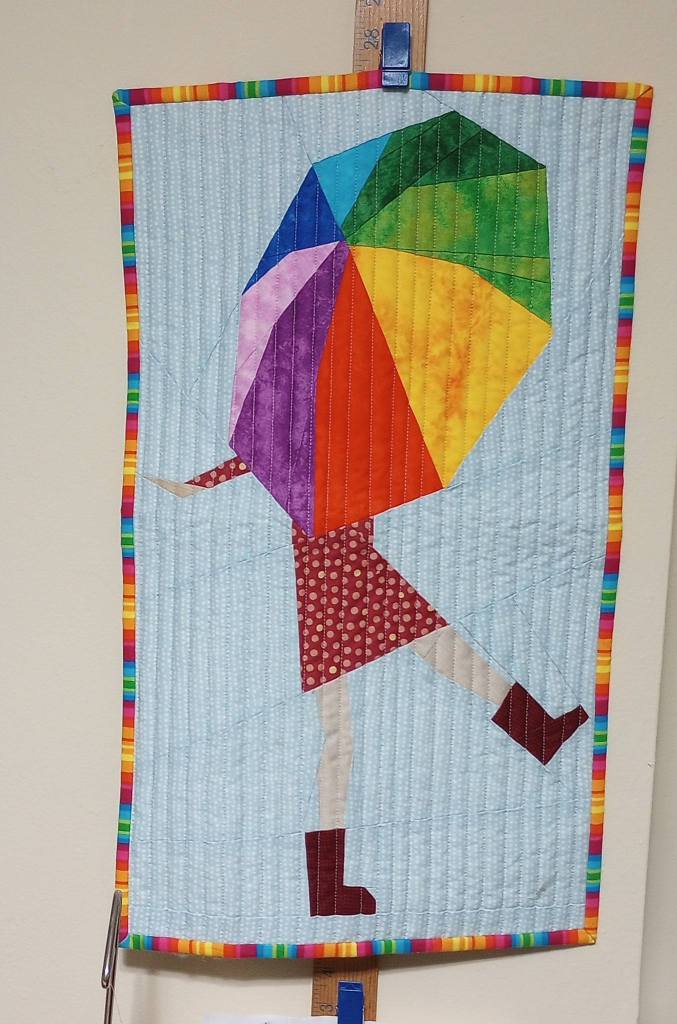
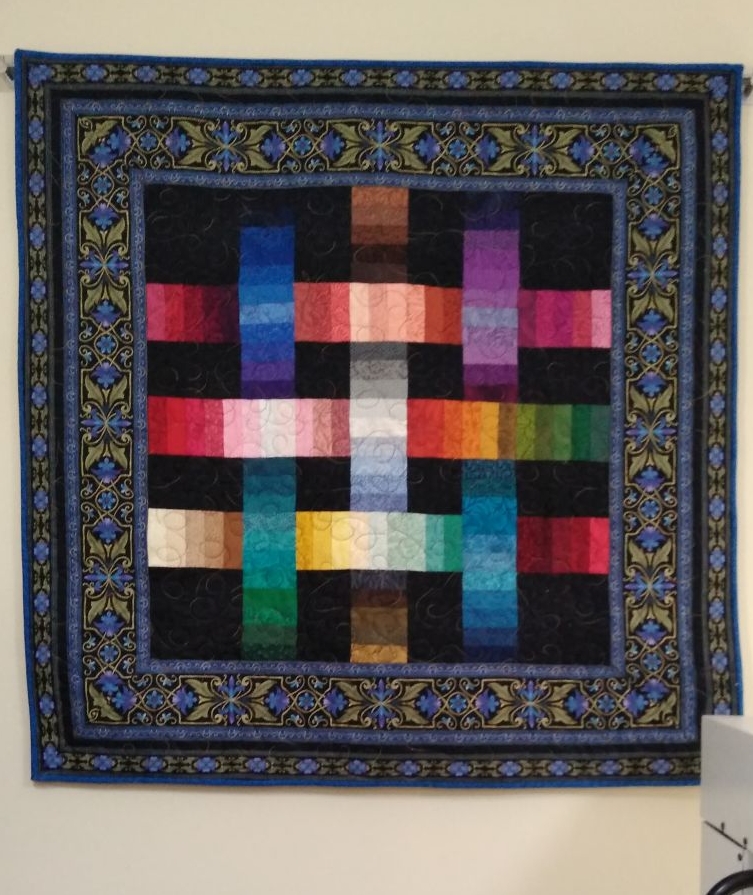
Here are a the wall hangings you saw in the video with links to the patterns used if they’re still available. If you have questions about anything please don’t hesitate to ask.
Over the door storage rack I use for thread was from Amazon.
I call this one “we are all New York” Made during covid when crowds cheered the doctors and nurses who were overworked and exhausted by the number of patients, but showed up every day to care for them. The pattern I used was Shenandoah by Creative Sewlutions. The panel is Blue Skylines by Hoffman. I purchased it from Quilted Twins and it’s now out of stock but I located it online at Beaverhead Treasures.
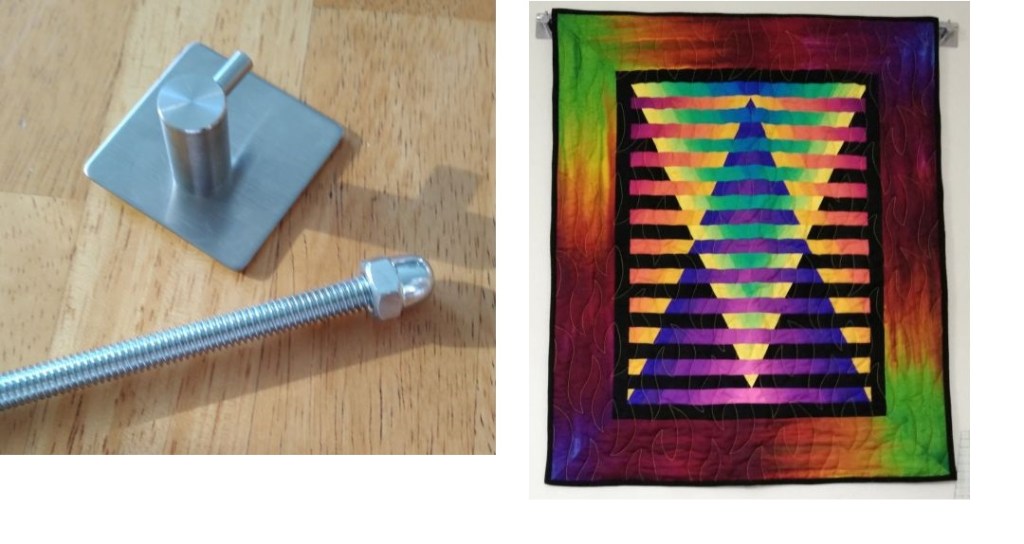
I hang all my wall hanging using a threaded rod with endcaps from Home Depot and these heavy duty hook made by 3M from Amazon. They don’t require drilling holes in the wall but the adhesive it much stronger than Command hooks and I expect they might leave some damage to the wall if you had to remove them.
Illusion pattern by Caryl Breyer Fallert but her internet store has since gone out of business and I don’t see where it’s available.
Pattern is Tighten the Tension by Chris Gilman but if it’s still available, I haven’t been able to find it. (If you locate it, please leave the link in the comments.)
Woven Ribbons pattern by Jinny Beyer (not available online).