The binding scrap plan

I have a plan! Picture this: A quilter that actually spends more time USING scraps than endlessly dreaming up storage solutions.

But, let’s be real—creating a quilt solely from leftover binding would take… I don’t know how long, but I can guess it’s longer than I’d want it to! While the goal is to use leftover binding bits, they’ll be other scraps joining them along the way.

Coming up with ideas for 2 1/2″ strips seems pretty simple, until you try doing it. Too many block ideas require more than just one fabric and a background. Having to collect another strip or two before I can make a block is not at all what I have in mind.

I nixed ideas like a 3 fabric rail fence block because I don’t want to a leftover strip to sit in some sort of container somewhere waiting for their future fabric friends to show up. If I can turn it into a quick, simple block right away, I’m way less likely to enter my procrastination black hole!

Another goal was to pick out the other fabrics for my tops ahead of time from my fabric stash, avoiding the chaotic game of “find the right match” after creating a bunch of blocks. A few days ago, I chose a couple of fabrics, but then I had a classic case of fabric remorse and swapped out a couple of them for different ones.

Three of the tops will be made using the Zippers pattern by Urban Elementz. I’ve owned the pattern for a long time. I graphed it out anyway because I wanted to adjust the size. I also had to make sure I’d be able to use the directional print I choose for this first quilt. The good news is, the piecing doesn’t get much easier than this.

I made my plans last night and as soon as I woke up, I embarked on an epic quest to cut up all the background pieces needed for all the scrap quilts—because who doesn’t want to feel like a mad scientist in their sewing room first thing in the morning?

It’ll make it a lot easier to know I have enough blocks for a top when I run out of background squares in it’s project bag – than to continually keep counting the units and calculating like I’m preparing for a math test. 🙂

I also graphed it using 2 1/4″ wide leftovers—I needed a smaller child size version, and it’ll work with the one-yard focus fabrics I’d like to use with them. I still bind with 2 1/4″ strips occasionally and they’ll work well here. I’ll just give those wider pieces a little trim if the color works better with these prints than the larger adult lap size above.


I love using stripes, checks, plaids, and all sorts of geometric prints for binding. So, I’m planning two quilts to use them up. They’d be waaaay too busy to use the zipper design.

The first one uses an 18″ length strip for each block. It only needs 24 blocks plus some snazzy borders, so I fully expect it to strut across the finish line before all the others.

The second one is a classic two-rail fence block, the superhero of short fabric scraps.

I’d toyed with the idea of whipping up some 9 patch blocks out of those pesky leftover 2 1/2″ squares, but then I had an epiphany—why not be a little more creative? As I rummaged through my inspiration photo albums (aka my wish list), I stumbled upon not one, but two fantastic 4 patch quilt ideas that I’d saved. Talk about a jackpot! I mean, who needs 9 patches when you’ve got coordinating fabrics ready to party with a 4 patch?

To keep my sanity, I’m shoving all that coordinating fabric into a project bag with the photos, because forgetting what you planned to make is just awful! (Or so I’ve heard, because it NEVER happens to me! 😉

For now, I’ll dive headfirst into making a mountain of 4 patches as my next leaders/enders—who knows, maybe I’ll eventually conquer both designs. I’ll keep this little clear bin next to my sewing machine as a monument to my ever-evolving creative chaos! (I’m starting to sound like maybe I didn’t get enough sleep after all. LOL)


It may seem like I have a mountain of projects planned, and I do. But, I think that’s what it’s going to take to wrangle those scraps into submission!

I absolutely love making string quilts and go through a lot of scraps/strings less than 2″ wide. It’s those slightly larger pieces that have declared a rebellion—getting ready to scale the walls of their containers and stage a jailbreak.

Grabbing a square or two to stitch onto another piece is about as challenging as ordering takeout.

I’ve got 30 projects on my “to make” list, which will happily churn out even more scraps. If I don’t manage to finish at least one scrap quilt every quarter, I might have to face the reality that these scraps are just not that into me!

Once I graduate using up binding scraps as I go, I’ll tackle planning and making a scrap quilt from start to finish from the other bins… or decide it’s not my thing and stop saving them.
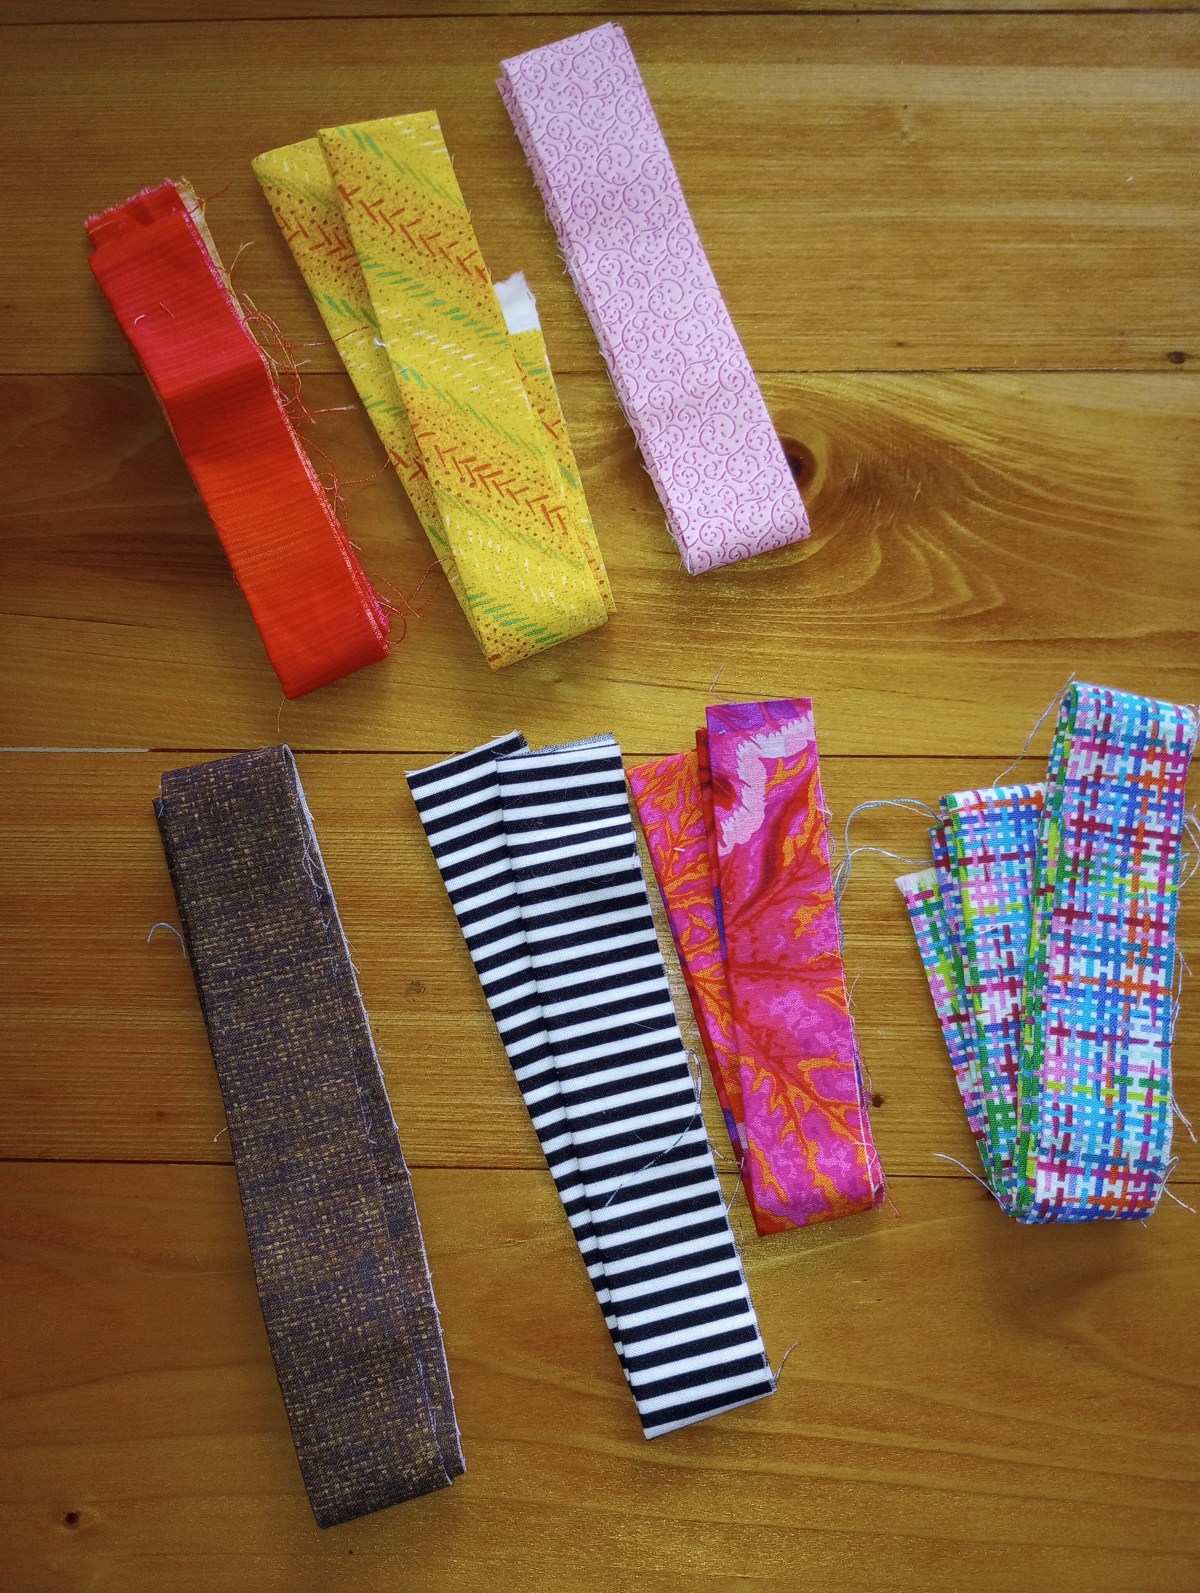
Binding Scraps

If you’re a quilter, you have them. We all do! Suggestions on how to sort and use them could fill books – and they have.

This post is specifically about those leftover binding pieces.

When you’re working through personal projects or finishing donation quilts, the last thing on your mind is what to do with that leftover piece of binding. They often end up in a drawer or bin where they linger for… well, who knows how long?

Many of us love scrappy quilts, but the full-on “kitchen sink” look isn’t as appealing to some of us as a quilt with a more cohesive feel. I definitely fall into that camp.

I’ve decided to start using these bits as I create them, instead of letting them pile up. I’m in the process of choosing a couple of block patterns to use. The top priority is something fast and simple so it actually gets made — even better if it’s easy enough to piece as a leader/enders block. No doubt there will be a lot of 2 1/2″ squares, so either a four or a nine patch block will probably be on the list too.

Pulling a few fabrics for possible borders can help motivate me to get the blocks made and organized. I plan to keep each of these fabrics in its own project bag and add blocks to it as they’re finished, until there are enough for a quilt top. These are preliminary choice and they may change after I decide on the block or pattern idea I’ll want to use.

I’ll share my block choices with you soon. Stay tuned!

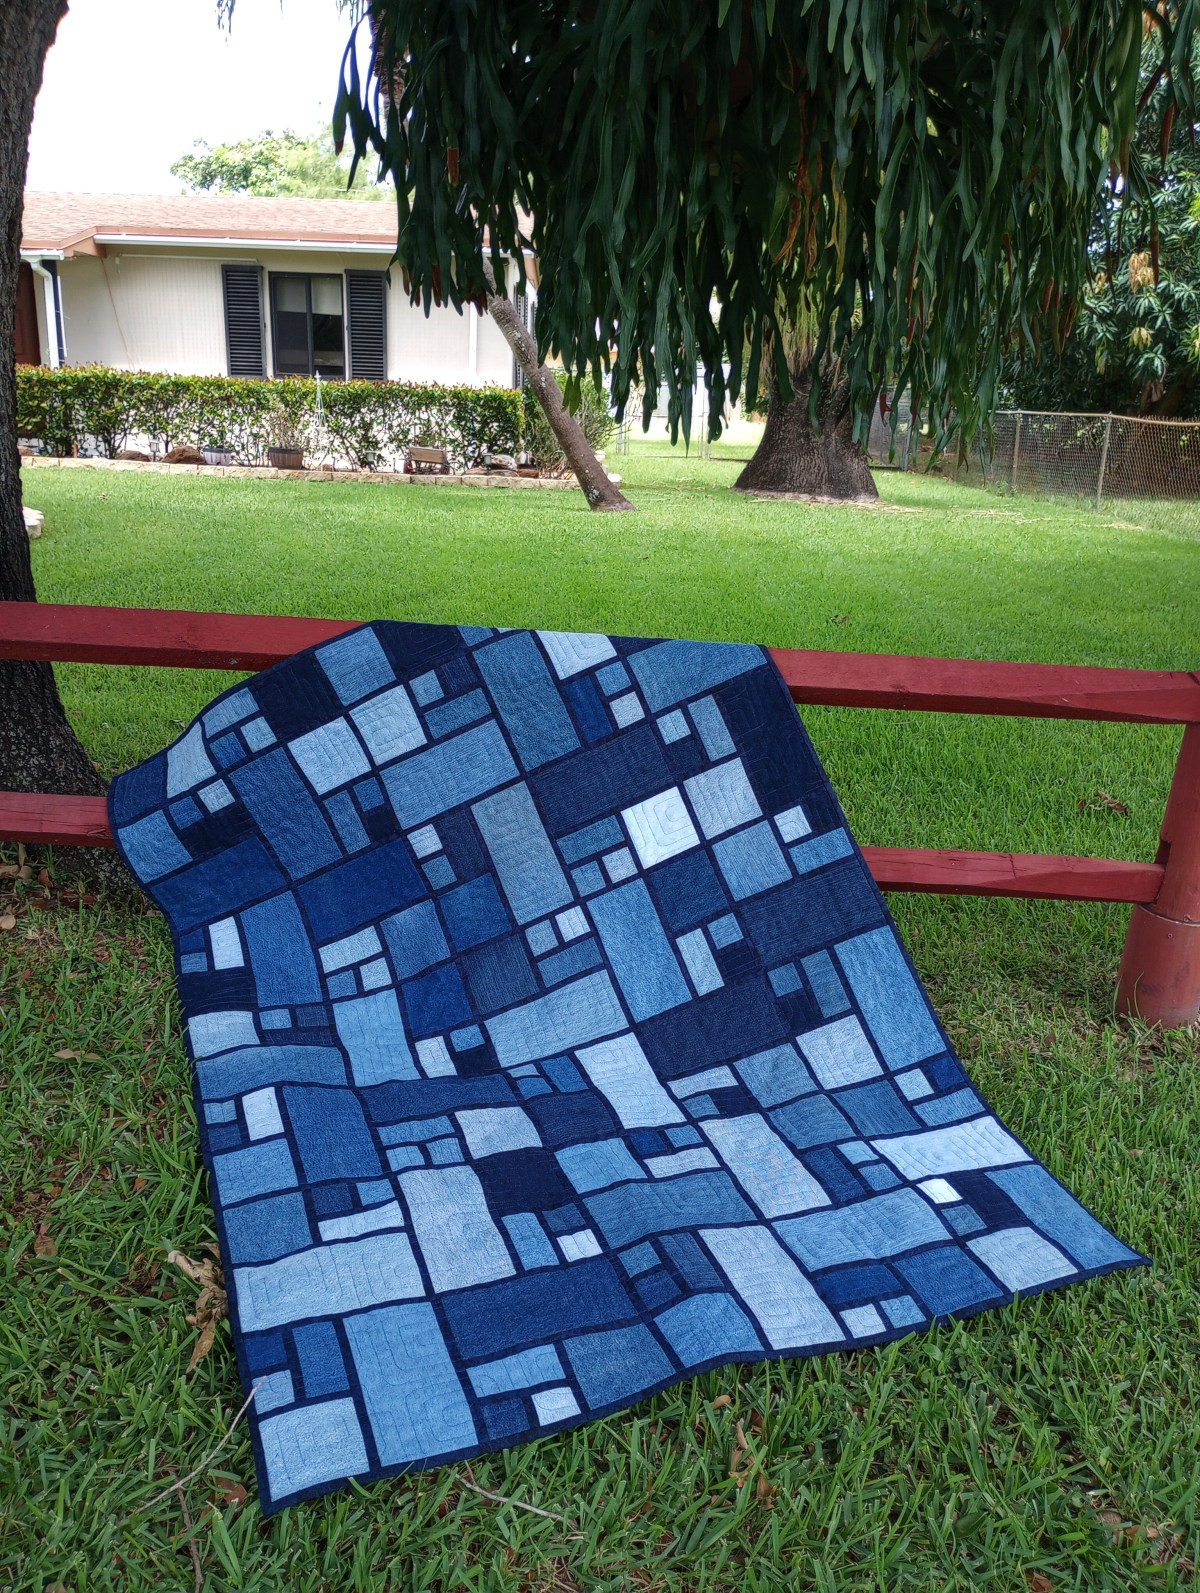
Upcycled denim quilt instructions

The idea for a quilt made from blue jeans came from seeing The Fleming’s Nine quilt here.

These instructions use smaller pieces of denim than the quilt referenced above. A quick Google search will bring up a lot of quilt ideas using the stained glass technique. It may be worth checking out before you begin cutting all of your jean pieces to see if a different pattern or design appeals to you.

Stained glass designs work well with denim because it ensures that none of the pieces are sewn directly denim to denim. The strip of regular black quilting cotton between the heavy fabrics results in seams that are less bulky and a quilt that’s more comfortable to use.

The quilt below is composed of 35 blocks and finishes at 50″ x 70″.

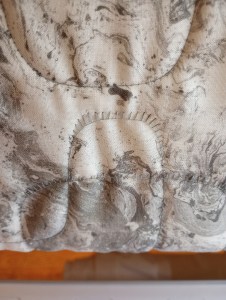
As you piece the top, press all seams toward the black sashing.  You can see from this photo showing the back of a row, pressing toward the sashing results in the denim pieces butting next to each other. The seams lie smooth and flat.

Collecting jeans in varying shades from light to dark blue gives the quilt interest. “Jeans” and “denim” are both used in this post to refer to upcycling fabric from blue jeans.

Some jeans quilts are made using all the fabric, including the seams. This one doesn’t. The jeans were “de-boned”, a term made famous when it was coined by Bonnie Hunter. Neither the seams nor the waistband was used.

After deboning, the pieces were cut into (70) 5″ x 10″ rectangles.
There are 35 blocks and each block requires two of the rectangle shaped pieces.

It’s difficult to gauge how many pairs of jeans this quilt took to make. There were some very, very worn out pairs among them! The backs of the legs were fine and the inside of the back pockets always has some nice dark denim surprises waiting. The quilt took less than 10 but more than 5 pairs of jeans.

For each block:
Cut the following pieces from the 5″ x 10″ rectangles of denim fabric

  • 5″ x 10″
  • (2) 2 1/2″ squares
  • 5″ x 2 1/2″
  • 5″ square


For each block:
Cut the following strips from sashing fabric

  • (2) 10″ by width of fabric
  • (2) 5″ by width of fabric
  • (1) 2 1/2″ by width of fabric

Cross-cut each strip into 1″ wide pieces. The quilt top requires

  • (63) 1″ x 10″
  • (70) 1″ x 5″
  • (35) 1″ x 2 1/2″

Set aside 28 of the strips measuring 1″ x 10″ . They’ll be used as sashing between the blocks.

Reserve leftover 1″ x 10″ pieces. They’ll be added to the additional sashing strips listed below to join the rows in Step 11.

Binding and additional stashing:

  • (6) 1″ by width of fabric sashing for rows
  • (7) 3″ by width of fabric for binding
    • (If the binding will be stitched down by machine, cut the strips a little wider at 3 1/4″)

PIECING INSTRUCTIONS

Step 1: Set aside half on the 2 1/2″ squares of denim.

Step 2: Sew a sashing strip to all the remaining pieces of denim.


Step 3: Sew 2 1/2″ squares with the black sashing strips to the 2 1/2″ squares that were set aside in Step 1.

Step 4: Sew the black sashing edge of the 2 1/2″ x 5″ unit to each pair of squares.

Step 5: Sew the black sashing edge of the 5″ square to the bottom of the previous unit.

Step 6: Sew the black sashing edge of the 10″ x 5″ square to the side of the previous unit.


Construct all of your blocks with the pieces positioned the same direction as shown in the photo above.

Please note: before continuing you may want to lay all your blocks out and number them to disburse the light and dark denim fabrics as much as possible.

Step 7: Set aside 7 blocks

Step 8: Lay the remaining blocks out in pairs. Rotate the block on the right counter clockwise. Join the pair of blocks using a 1″ x 10″ sashing strip.
Repeat with all 28 blocks to create 14 pairs.

Step 9: Join the 2 of the pair units using a 1″ x 10″ sashing strip as shown below. You’ll now have 7 rows consisting of 4 blocks each.


Step 10: Until this point, the blocks and rows have been identical.

Now it’s time to turn every other row upside down. Look closely at the two rows below. Notice in the first block of row #1, the largest piece in the block 5″ x 10″, is on the right side of the block. In row #2, the largest piece in the block, 5″ x 10″ is on the bottom of the block.

Add the blocks that were set aside in Step 7 to the end of the rows using the 1″ x 10″ sashing strips.

Make sure to turn the block at the end of the row so it’s positioned in the same direction as the first block of the row.

Numbering the rows and the last block of each row will help ensure they remain in the correct position.

Step 11: Join leftover 1″ x 10″ sashing pieces to the (6) 1″ x width of fabric strips listing in the cutting information. Trim so they measure 1″ x 50″.

Join the rows using the 1″ x 50″ sashing.

(The quilt top is turned sideways in the photo below due to the limited space to take a photo.)

No batting was used to finish this quilt. It was backed with plush minky purchased at Hobby Lobby. It’s often on sale for 30 % off. If you upcycle old worn out jeans, or ones that no longer fit :-)…it’s a very inexpensive quilt to make!

Using a 1/2″ seam allowance with the 3″ wide binding strips mimics the sashing strips using in the quilt top and finishes the outside edge of the quilt.

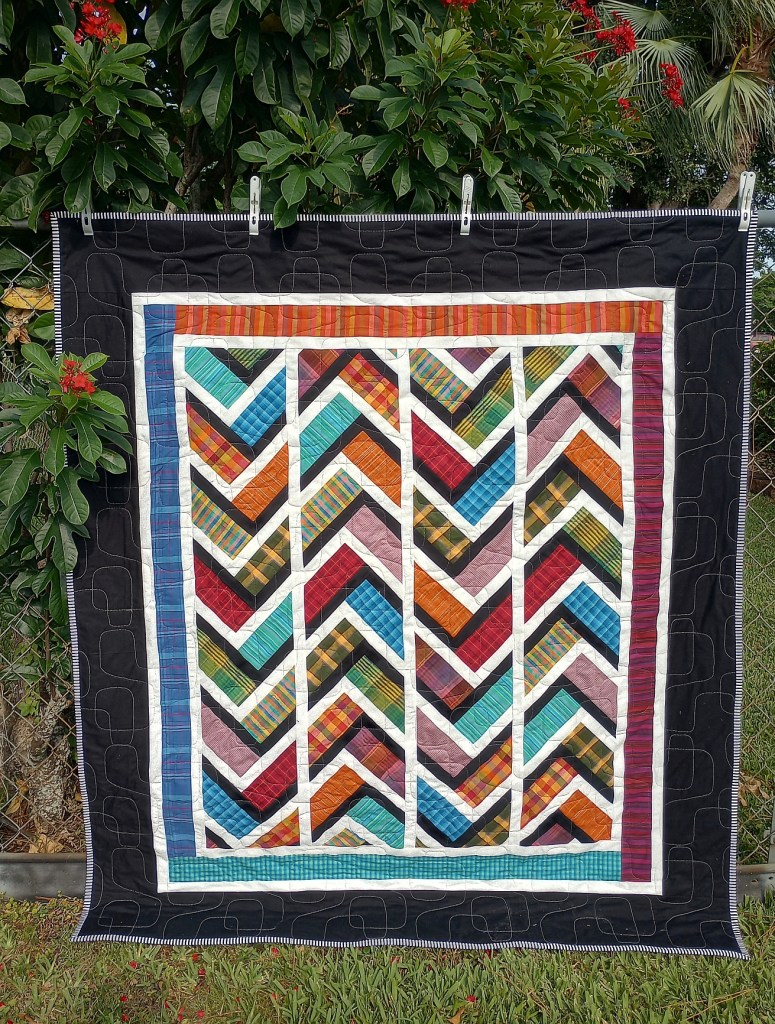
Big Modern Braid

I loved the idea of this quilt but the pattern for it? I’ll just have to censor myself and say “I’m not a fan”.

The braids finished 10″ shorter than the measurement in the book so the size quilt was way off. It much have been a typo so I looked online to see if there were any pattern corrections. The book was self-published and no website to check.

I added an extra plaid border with a couple of bright homespun prints I still had left. I’m happy to have used the last of this type of fabric. The 6″ finished wide border was part of the original design and because the quilt was already shorter than I expected, I had to leave it this large, otherwise I’d have been tempted to trim it down to 4″ finished.

And, if the whole experience wasn’t frustrating enough, my longarm decided to act up again. 😦 I removed the quilting, spent most of the day trying to figure out the problem, and then re-quilted it.

Less than a year ago, I replaced the bobbin case. I thought then that I may have dropped it at some point. Now that I’m having the same problem I’m beginning to think the bobbin case itself has a design flaw. I’ve ordered two cases this time and at $99 each I’m hoping it’s not going to be an ongoing expense. The long arm is less than two years old and Innova no longer has any certified technicians in the state.

The machine itself has a 10 year parts warranty and the company I purchased it form, Tops Vacuum and Sewing adds a 10 year labor warranty on all the machines they sell. Innova pulled their machines from that store so now Tops won’t even service the machine so I have to guess at how to fix things and hope the phone tech support can help. In this case, they weren’t much help. If I could re-sell the machine, I would!

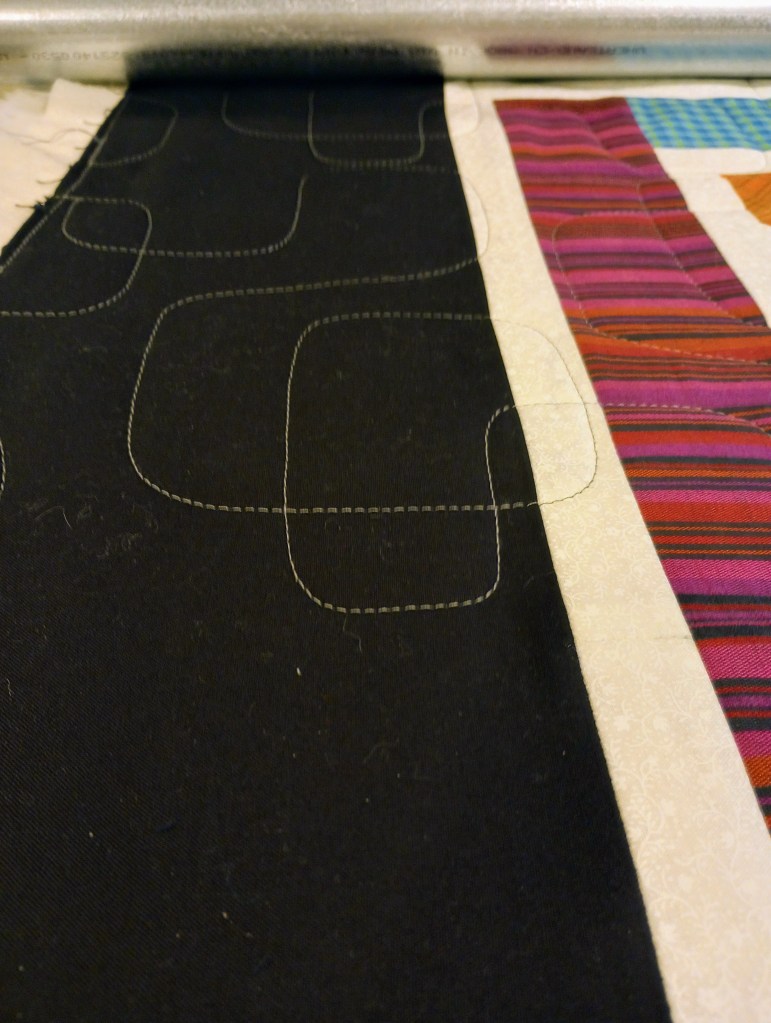
I kept plugging along and used a pantograph by Urban Elementz called “Modernish”. With that wide black border I knew the quilting would really be noticeable to I chose a design I hoped would blend well with the style of the quilt.

The best news of the day – I’m ready to move on to something else! 🙂

Down but not out

My Innova long arm is giving me problems this week.

I’ve tried everything I could think of and, that Google and Chat GPT suggested but nothing has worked. So, now it’s a waiting game until I can get a tech here to check it out.

At least I managed to finish this quilt before the problem began.

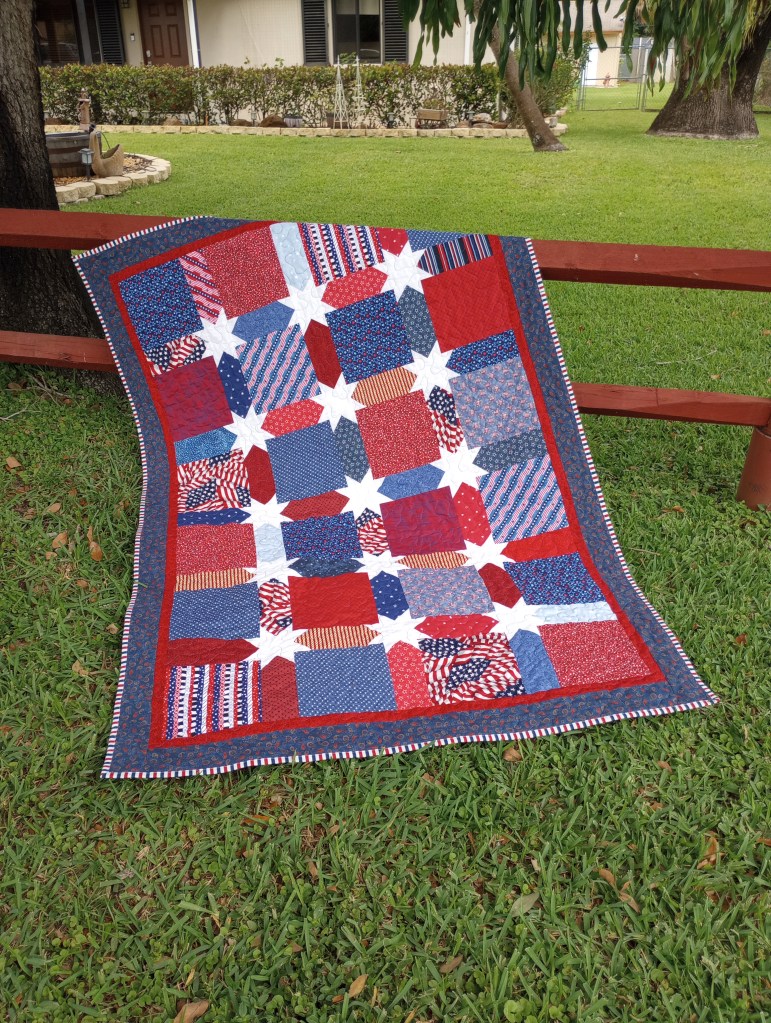
I’m donating a patriotic quilt to the Greenacres Community Center for presentation to a veteran at their annual 4th of July celebration. It measures 48″ x 68″.

Our guild is wrapping up a two-year project to finish over 400 quilt tops that were in storage. There wasn’t enough time, quilt tops, or fabric for our guild to make and donate patriotic quilts again this year, so I’m working hard to create as many as I can.

The machine problems may have the quilting part out of commission for a bit but, I can plan, cut out, and sew a couple more tops while I wait. So, I may be down (temporarily) but I’m not out! Not yet anyway.


Wedding Dress Blue

Quilting and other things I love in this colorful world

Quilts Pieced with Purpose

A community-focused quilting project dedicated to creating and donating quilts.