Harmony

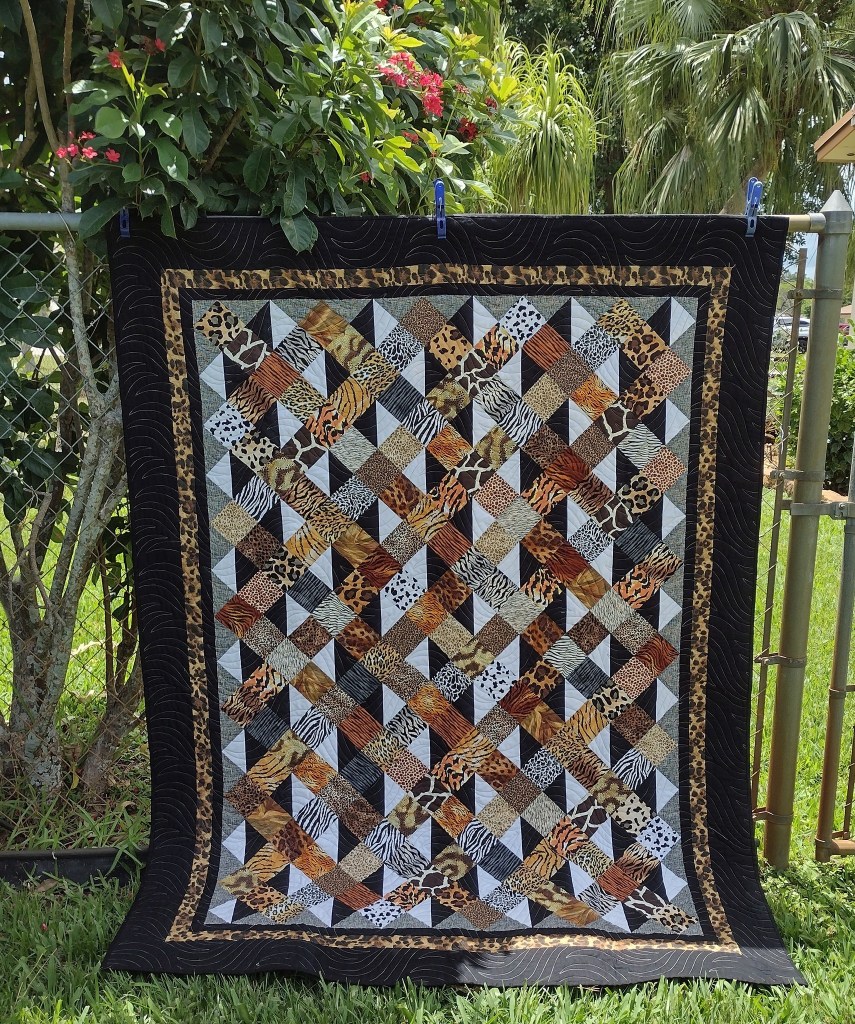
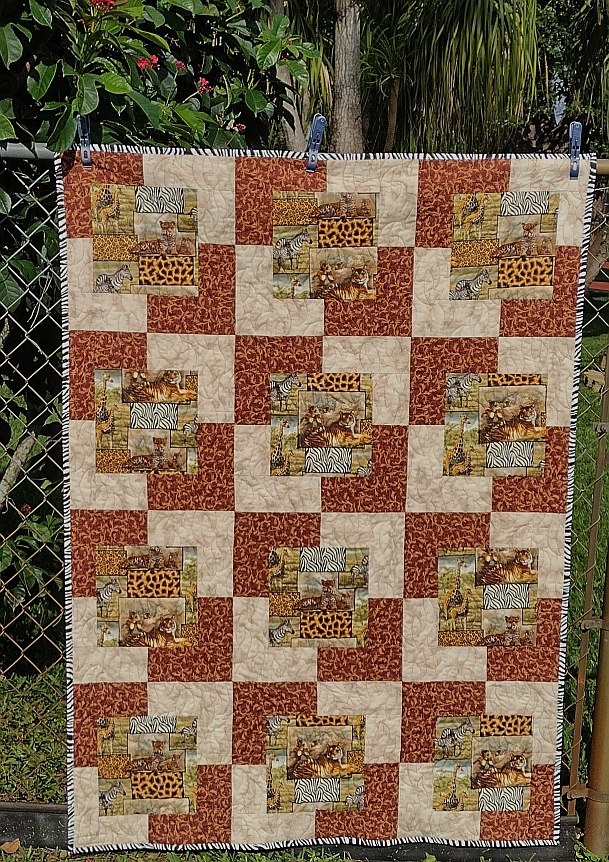
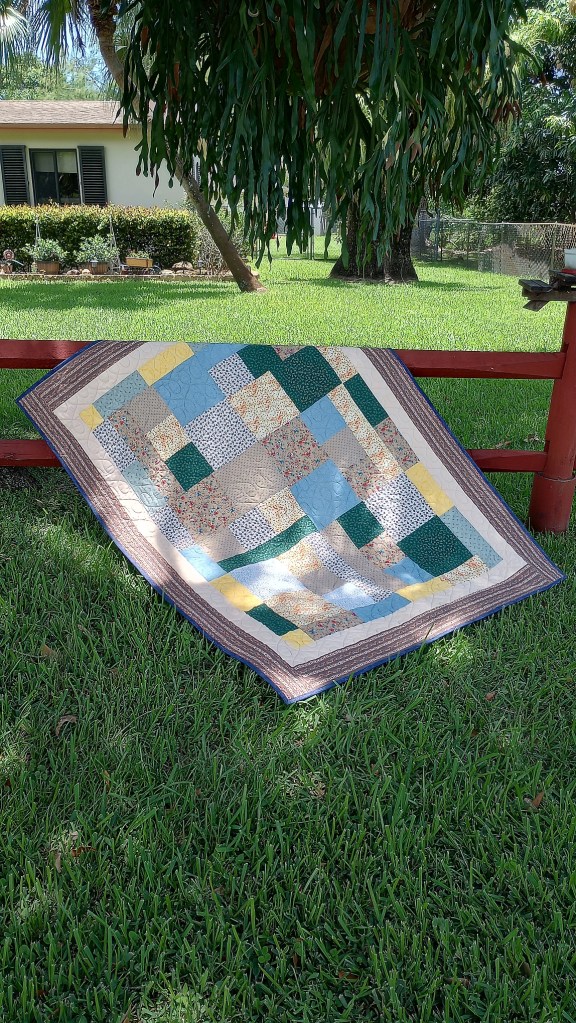
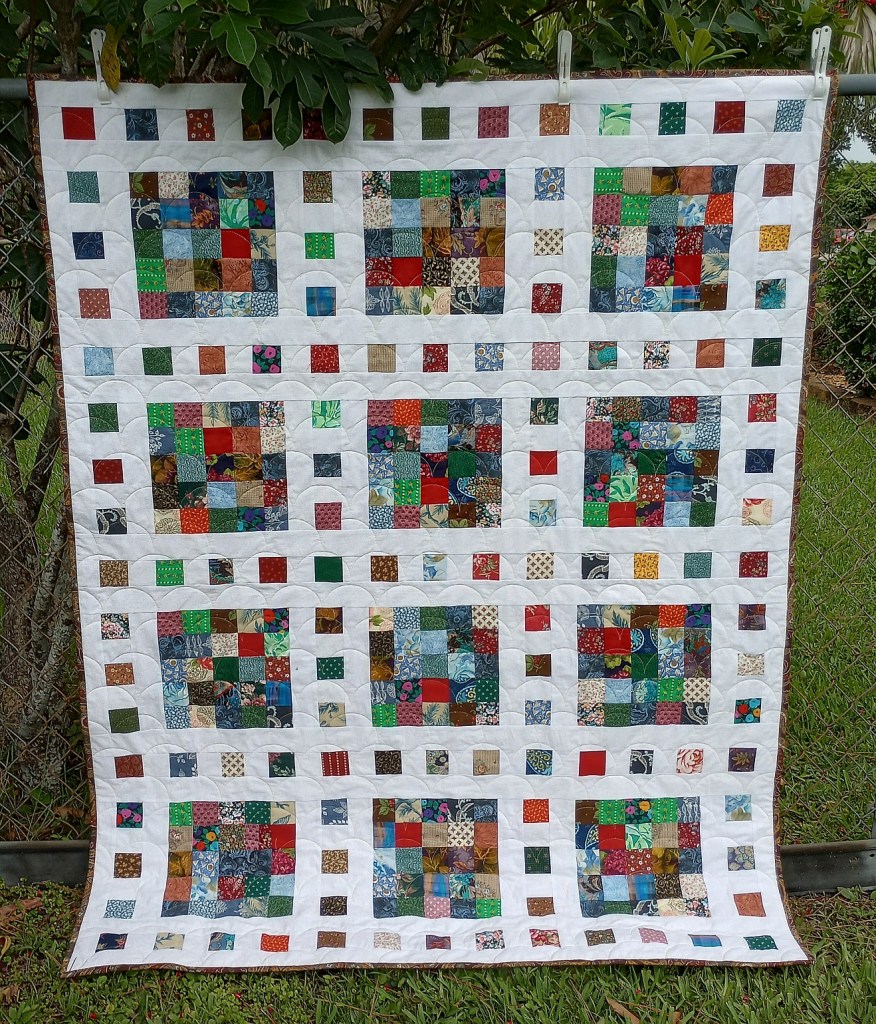
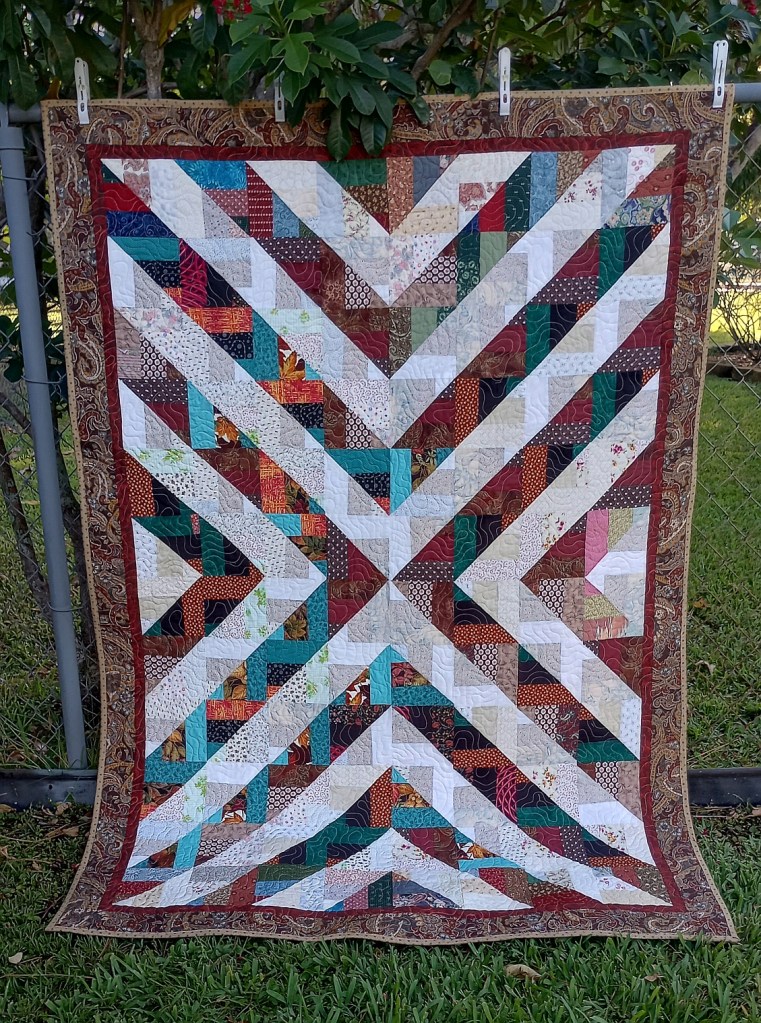
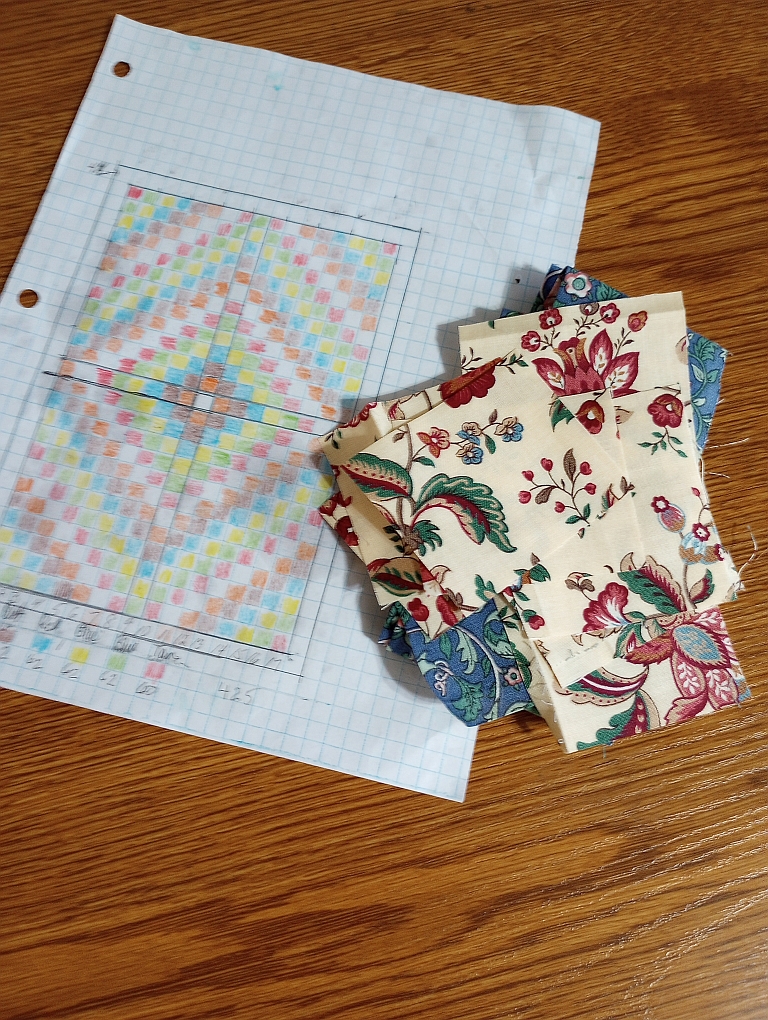
That’s the name of the Fabric Cafe pattern I used for this string quilt. It’s from the book Easy Does It. The pattern requires three one-yard pieces of fabric but I chose to substitute string blocks for the 6″ x 9″ rectangles in the design.

I love browsing patterns and thinking, “I can add a string block here!”

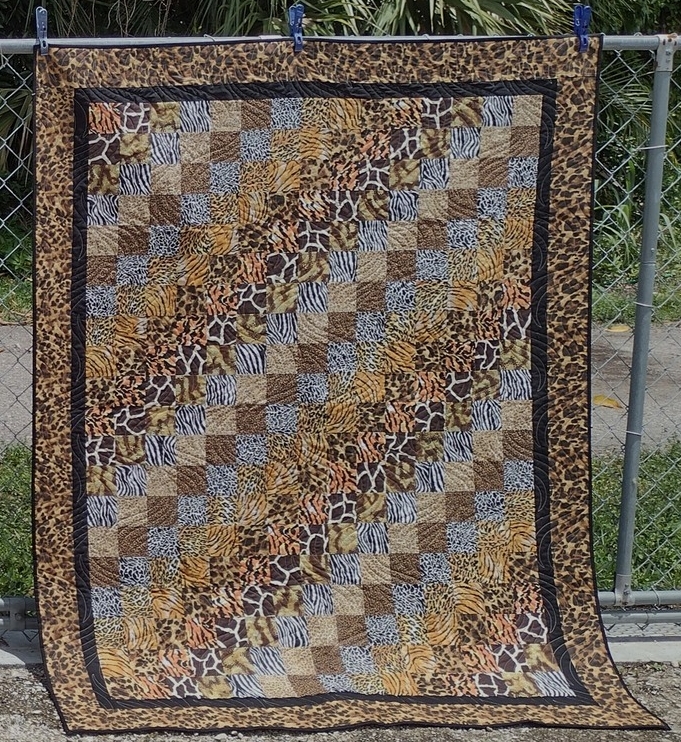
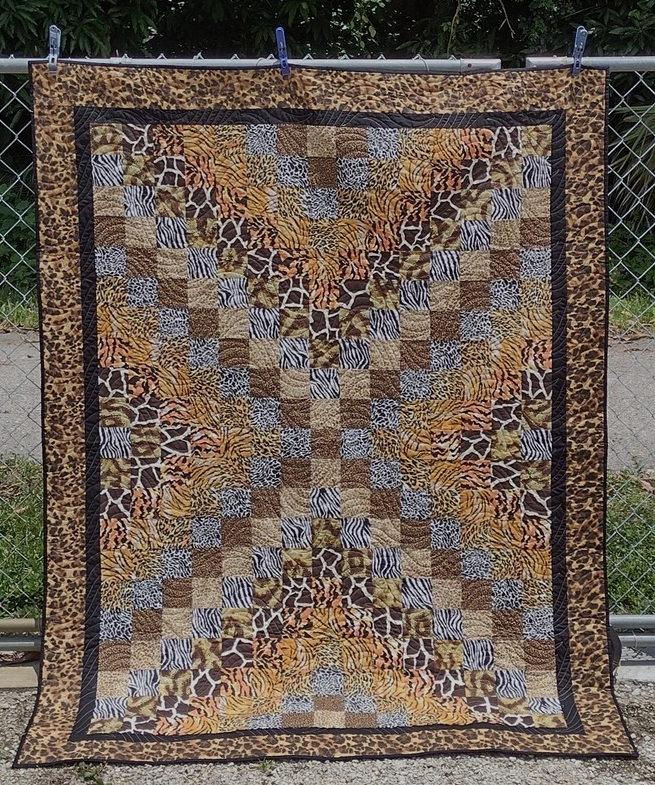
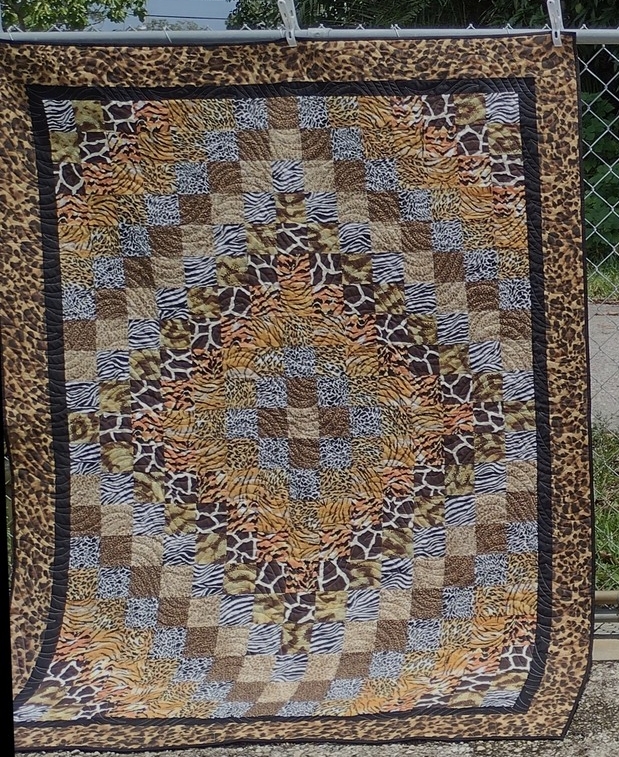
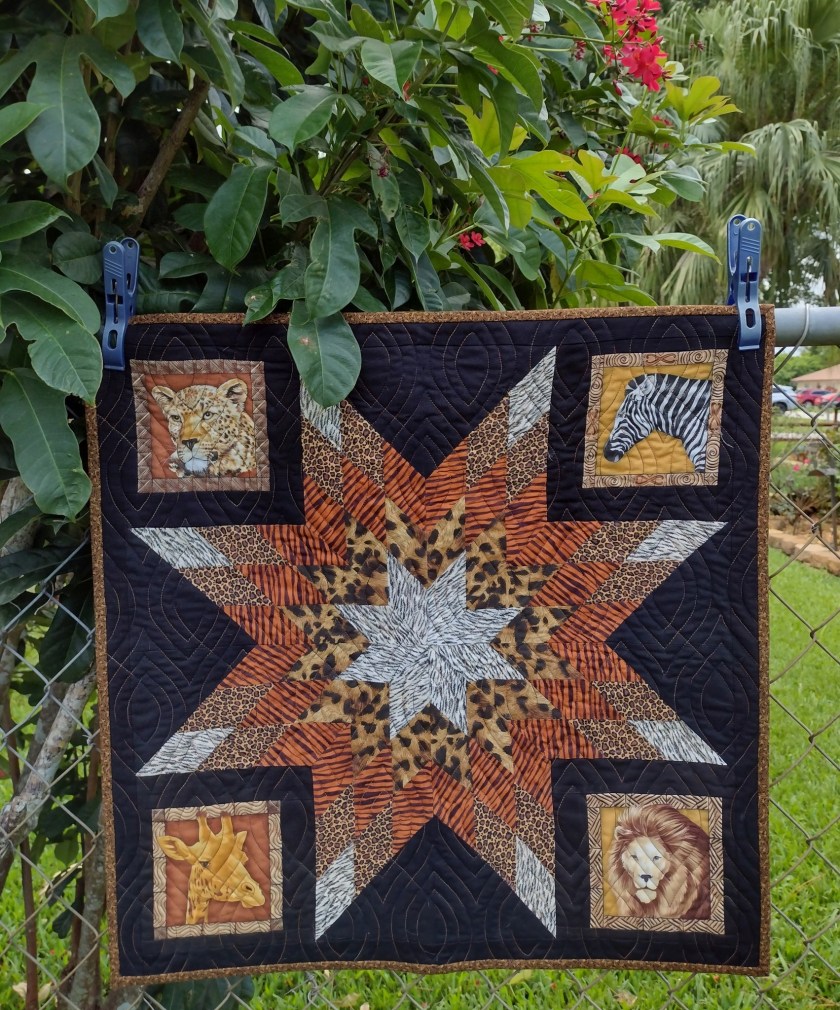
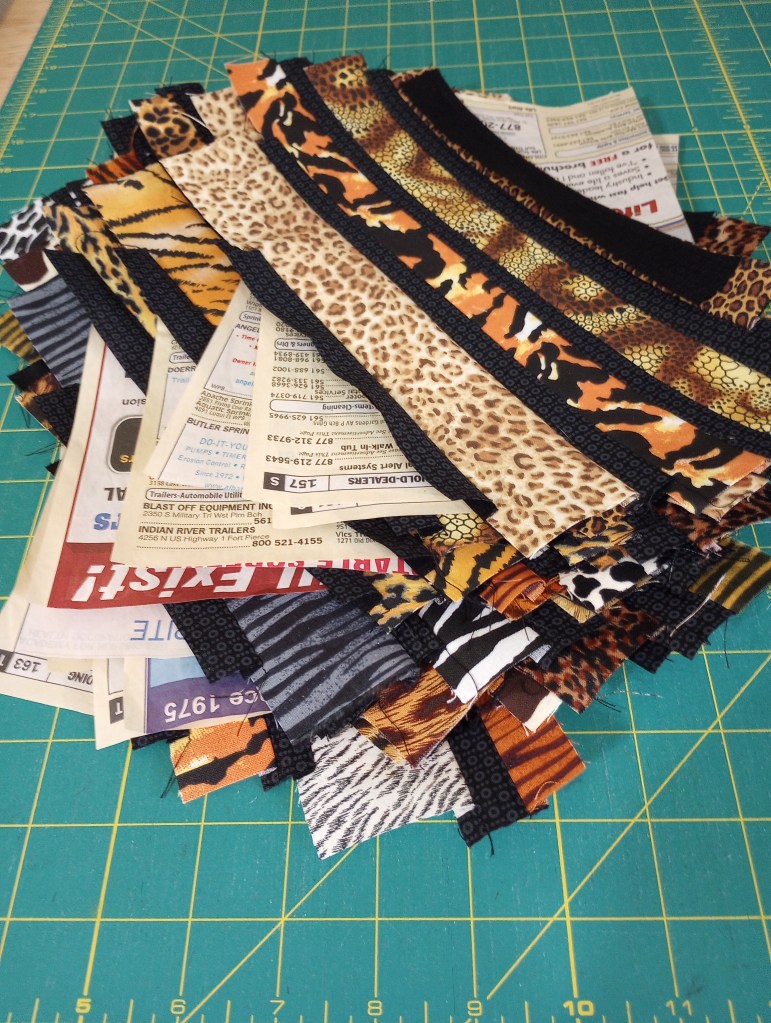
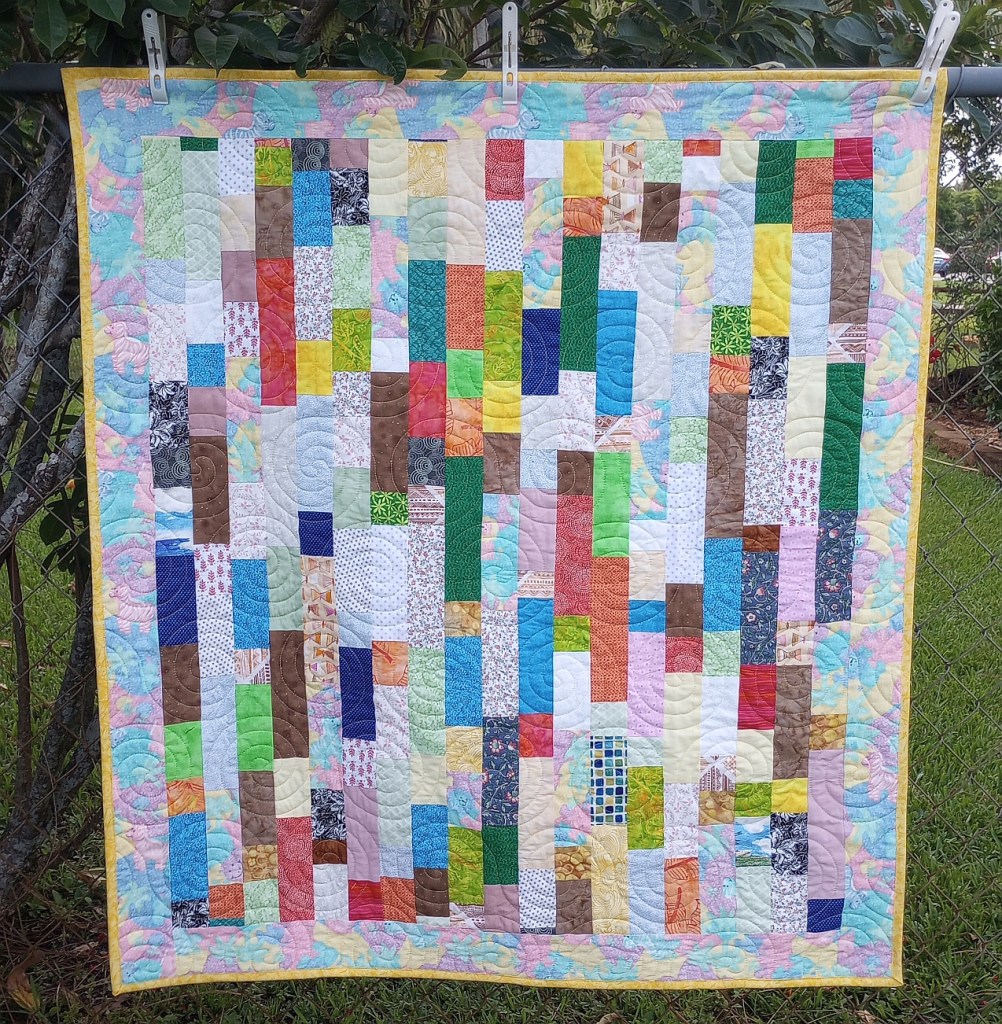
These strings came from several jungle animal quilts I’ve made in the last year or two and you can see those quilts here.

There’s also a separate page for string quilts now so they’ll all be in one place for my string-loving friends.

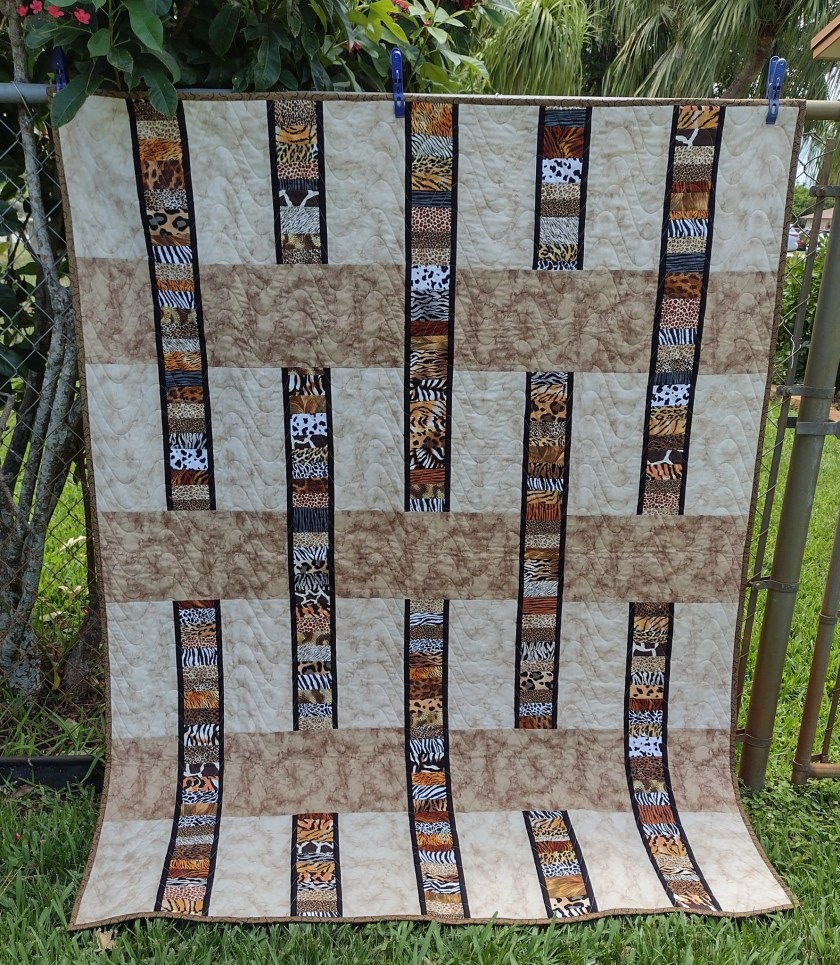
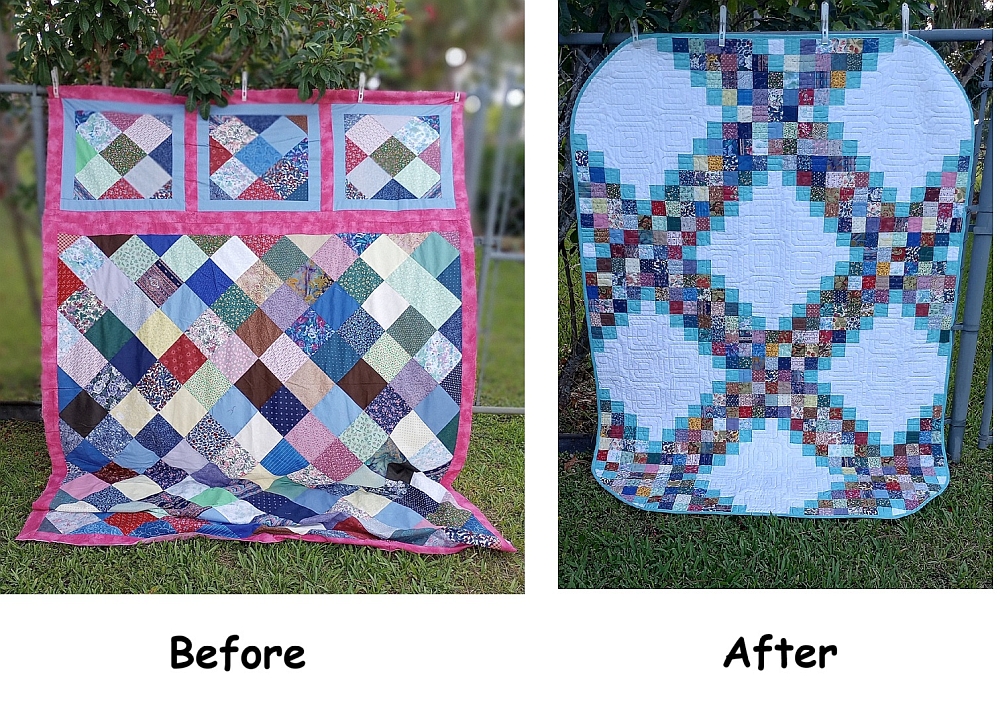
The print used for the snowballs (octagon shapes) is one I picked up on the de-stash table at the guild’s June meeting . It was just what I needed to use with this strings.

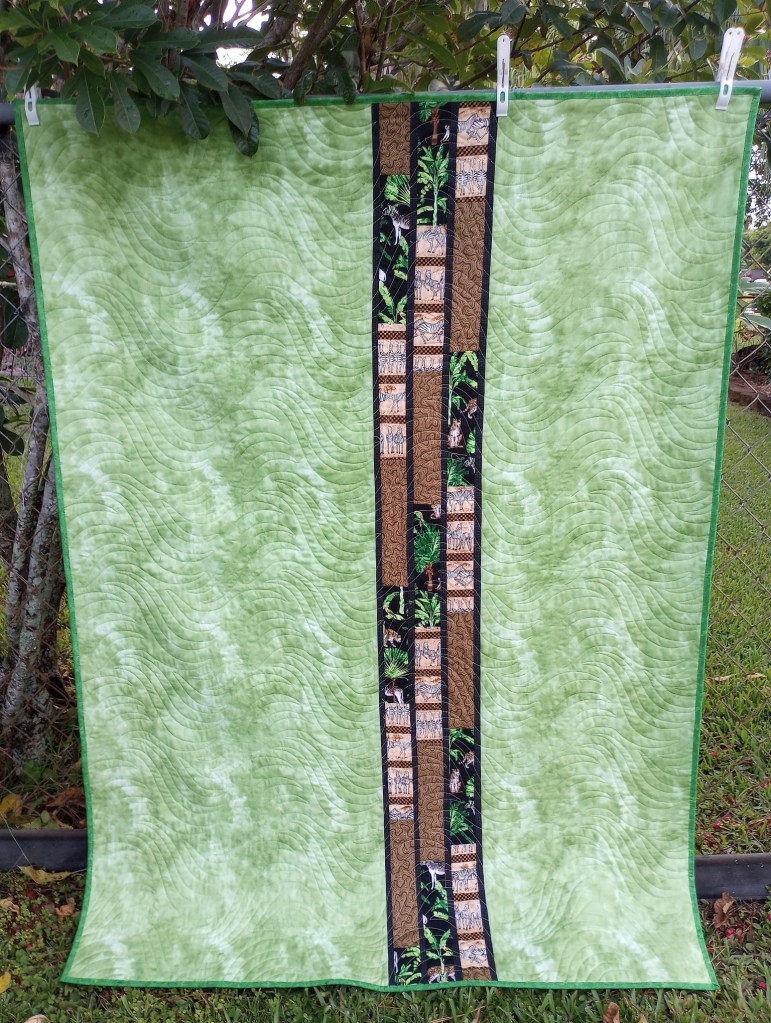
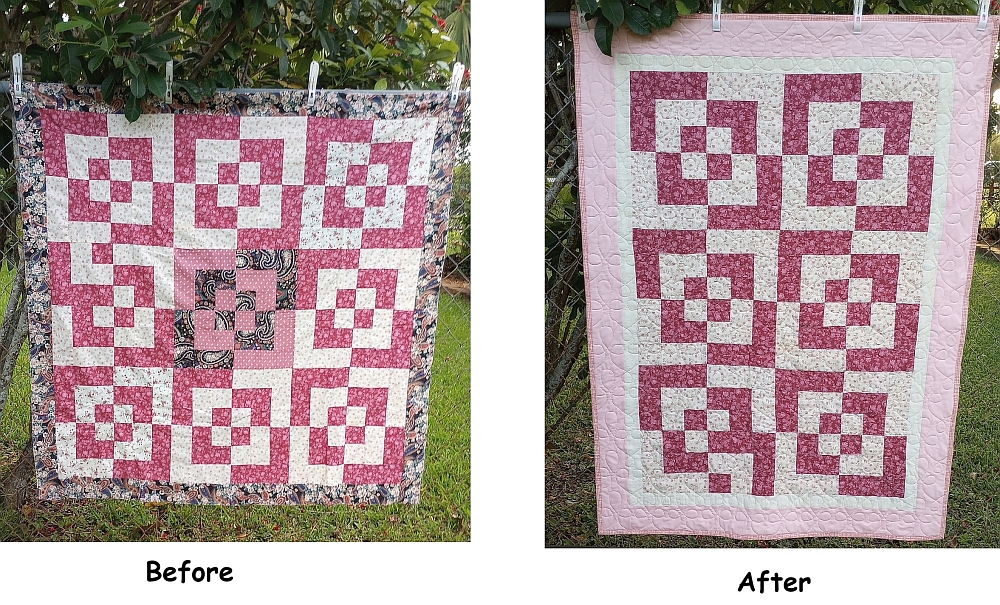
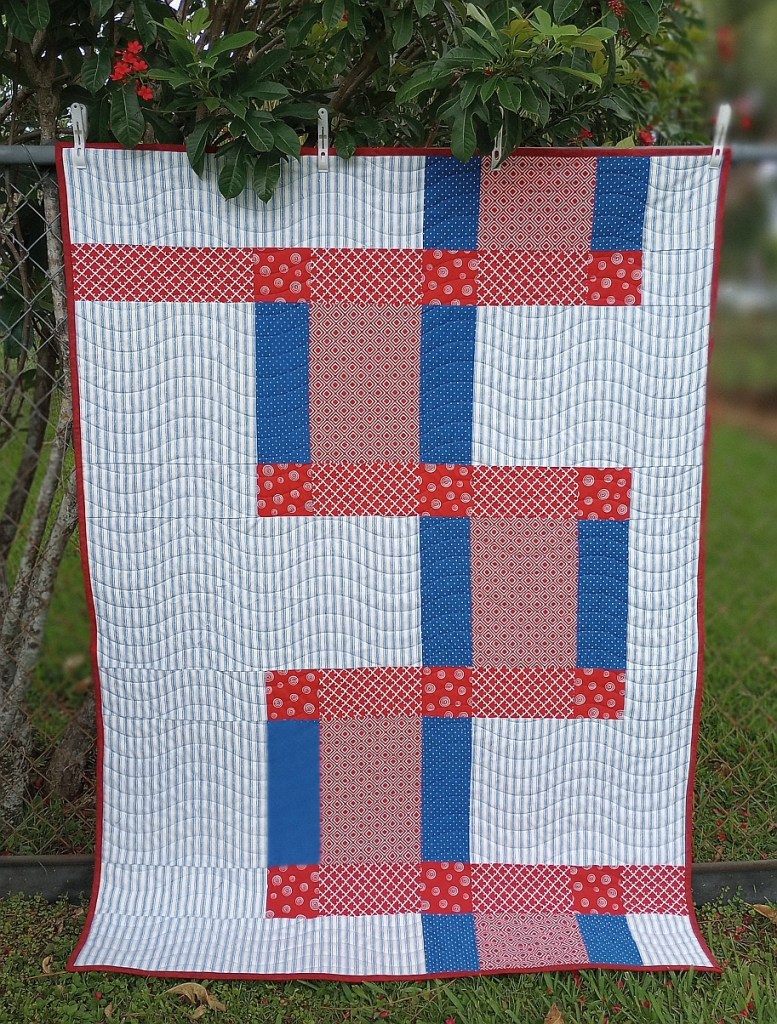
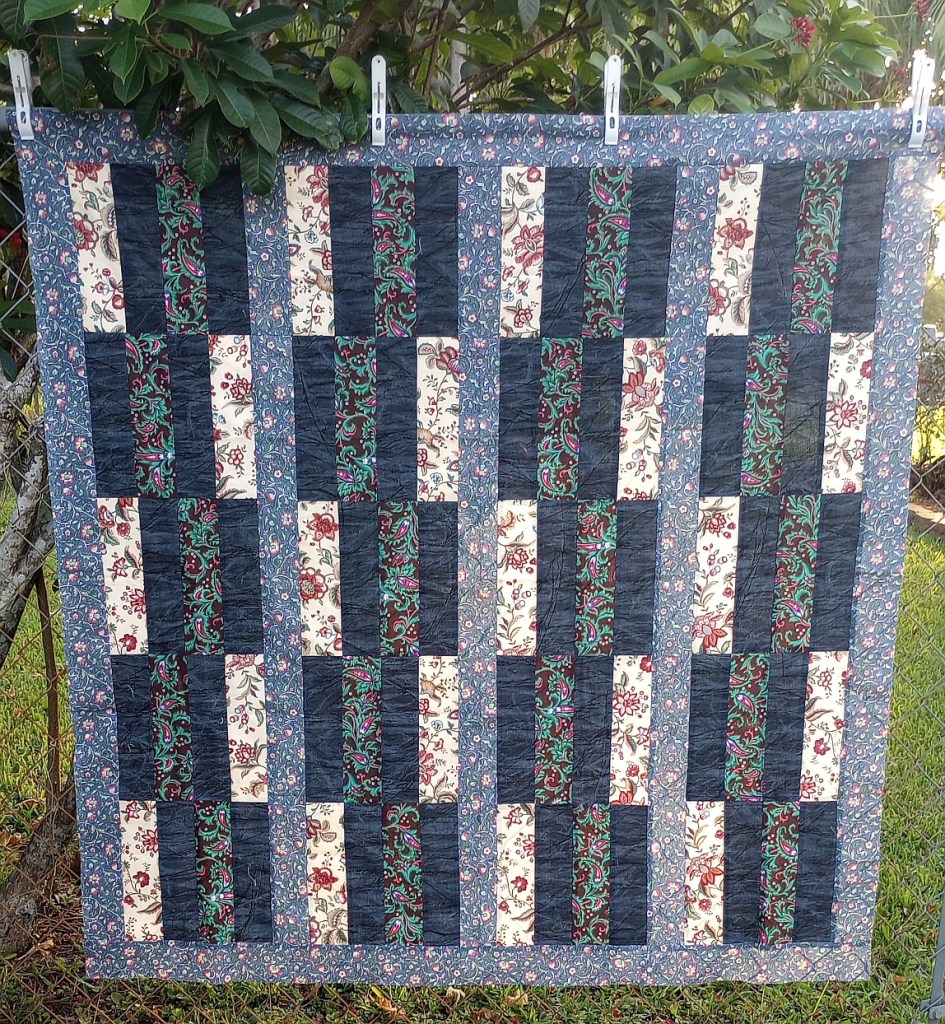
I had a couple of coordinating 2 1/2″ strips so I used those to make an offset insert for the back.

When I need to increase the width or length of the backing fabric, my goal is to start being a little more creative rather than just stitching an extra piece of fabric on.

The goal will be to use a design element that coordinates with the front whenever possible. For this quilt, I used the same narrow black strips that were also placed between the animal print strings on the front.

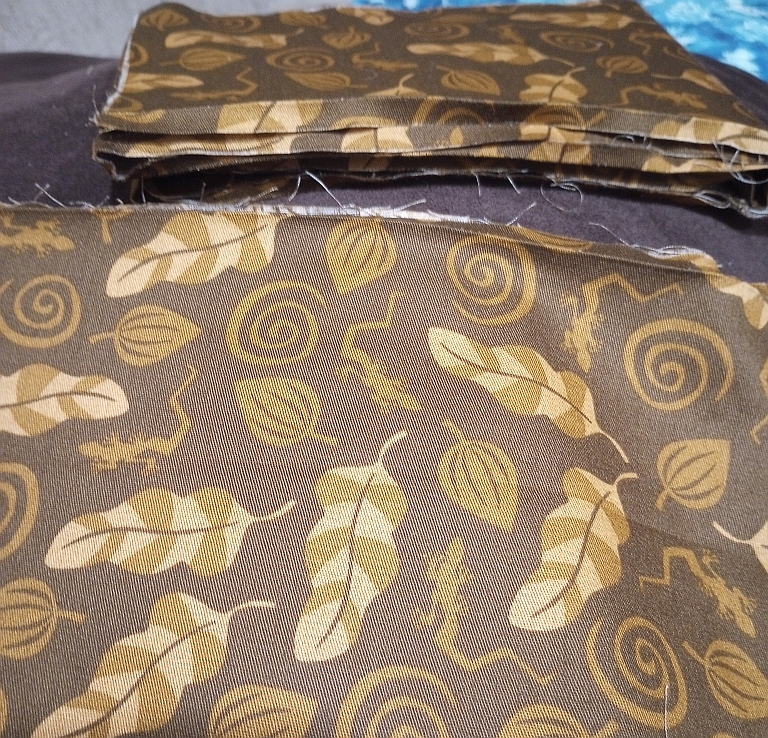
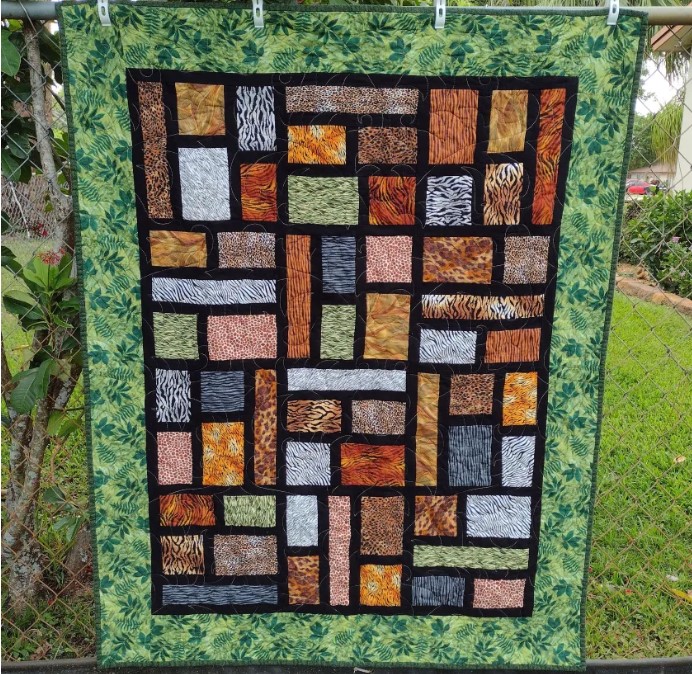
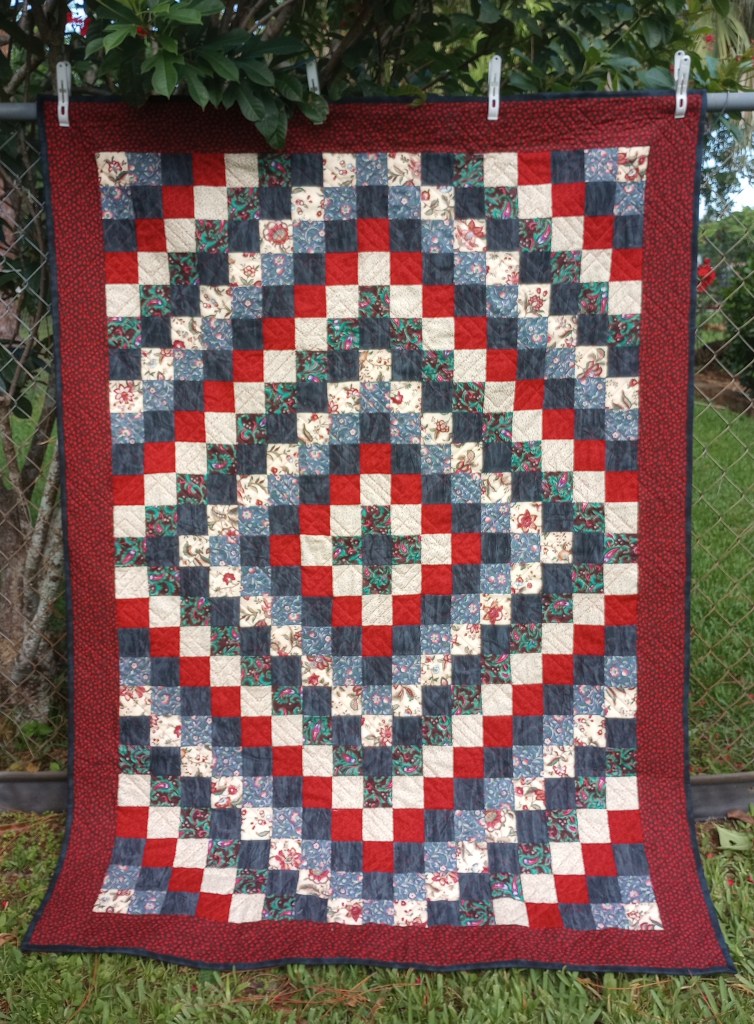
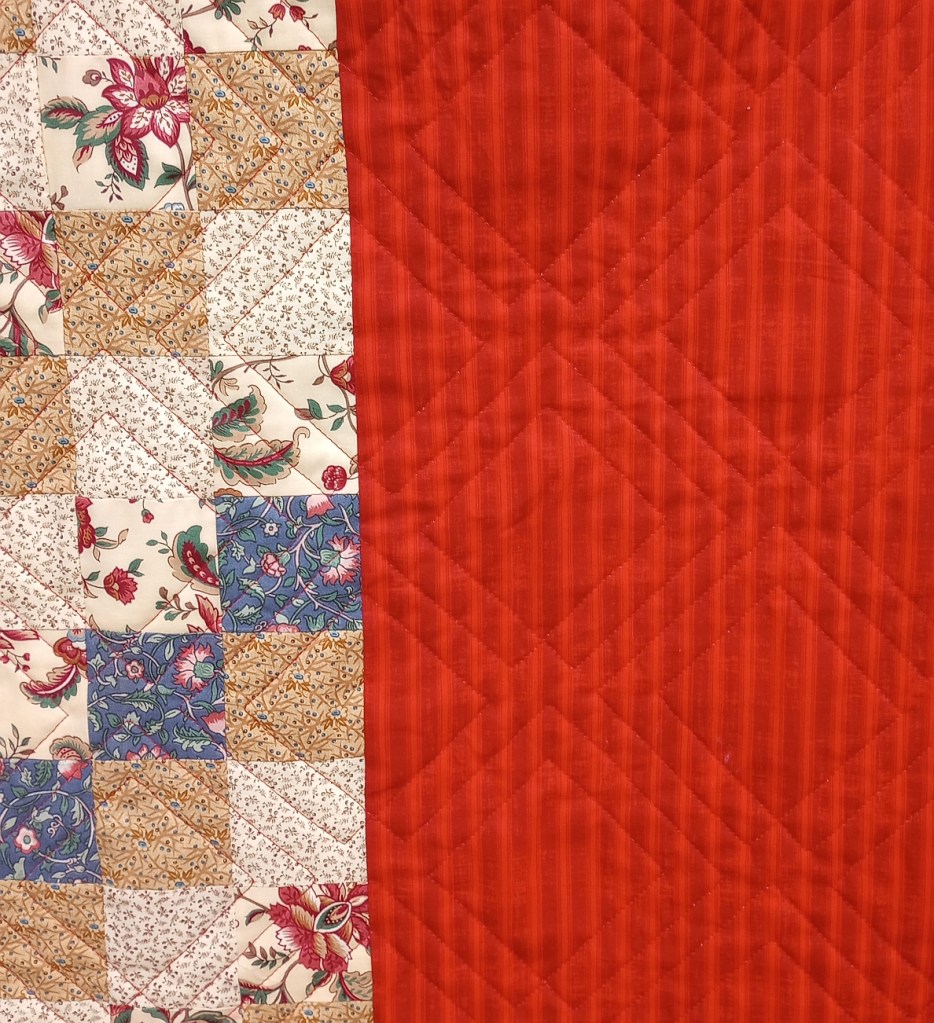
I originally used this fabric for the border. The design matched the jungle print, but it did absolutely nothing for the quilt. I decided to replace it with the green border and I’m happy now that I did.

The brown pieces will get tossed in the binding drawer for a future quilt.


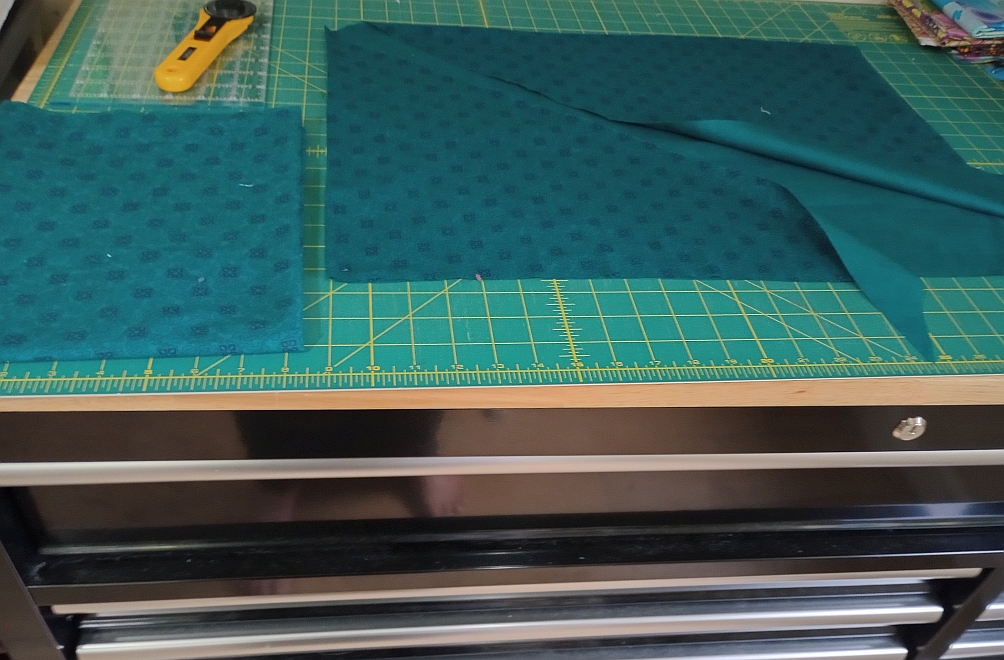
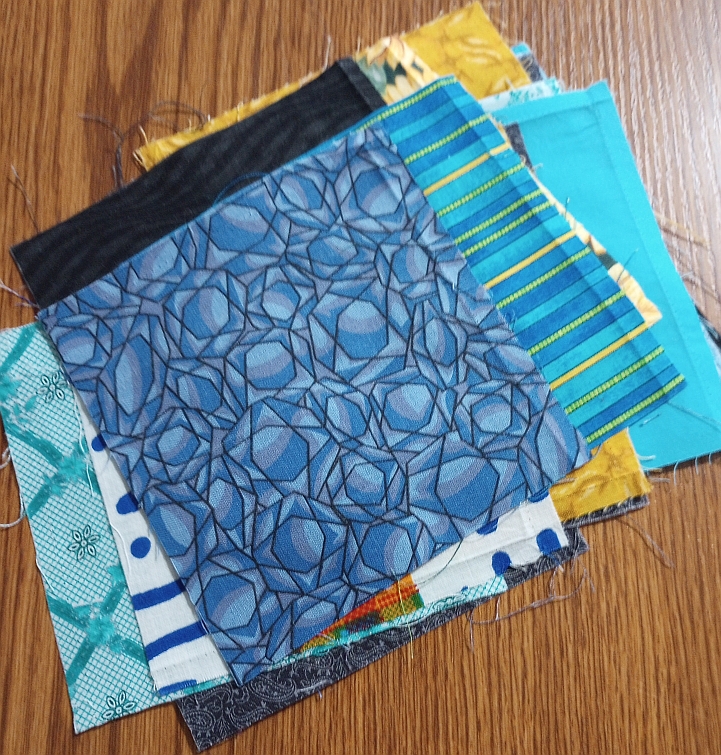
These are the beginnings of the next string project. A year or so ago someone gave me the teal fabric on the right. If you look closely, you’ll see she had cut it diagonally to make a bias binding. She was going to toss the leftovers away when I spoke up and said, “if you’re going to throw it out, can I have it?”.

Bias cut fabric is tricky to work with but, it won’t be a problem here. I’ll be able to cut around it for the pieces I need.

Teal, aqua, and turquoise are my favorite colors. I used to prefer green but somewhere along the way that changed and I was drawn to the cooler coastal colors. I’ll be using shades of green and teal together in this quilt..

We’re had rainy weather here this afternoon. A perfect day for either napping or sewing. (Yep! As tempting as a nap sounds… I think I’ll go sew a while. 😁)

Wild strings

I’m working on my latest string quilt today. I plan to hand-stitch the binding, so it might be a day or two before I can take a photo of the finished quilt, along with five other string quilts needing photos.

It’s made with animal skin prints leftover from quilts I made in 2023 and 2024.

I wanted to try making these first 3 quilts after seeing photos from a blog where the quilter had made similar ones in a class. (I’m sorry but I don’t remember the blog.) The method was to use the same strip strata in 3 different layouts. I never saw the last quilt, so I had to guess. It’s the first quilt below. While the class made smaller baby sized quilts, I decided to make adult lap-sized quilts instead. She had chosen animal skin prints for the class. I fell in love with her quilts the minute I saw the photos and remembered I had a yard each of these prints still on my fabric shelves. I gave them to my 3 step-grandsons: Robert, Matthew, and Joseph.

I had extra fabric, so I tried the pattern Simply Serene from Pleasant Valley Creations based on a photo of the pattern. The pattern description suggests using a charm pack or 5″ squares, but I used 3 1/2″ squares, making my quilt a bit smaller. I like this one so much I’ve kept it – for now. 😉


I obviously like working with jungle animals prints because I came across photos of these quilts I also made in 2023 & 2024.

The pattern I used for the panel is called Call of the Wild Leopards by eQuilter.com. It was free when I downloaded it, but I searched and it seems that it no longer exists.

Someone gave me a yard of this animal print. It took a while to decide how to use it. I decided to go with one of my favorite 3 Yard Quilt patterns called Town Square by Fabric Cafe. It’s a great one for showcasing large prints that you don’t want to chop up too small.

I followed this block tutorial to create my lone star wall hanging, but I used 2 1/2″ strips instead of 1 1/2″ it shows in the tutorial. I wanted mine to be a bit larger in order to qualify for a little quilt swap..

I had a lot of short pieces in the little drawer of animal skin prints. I usually save the shortest ones to use last, but not this time. I had an idea I wanted to try and two pieces of leftover backing that would work to get the woven effect I wanted.

After sketching it on graph paper, I used 3 1/2″ wide adding machine tape to create the needed string lengths. The tape was from our local Resource Depot, a non-profit that sells donated office and craft supplies. I used partial seams to avoid cutting and matching sections. Despite being a simple quilt, it took longer than I thought.

My first animal print quilt was the one above. I made it several years ago when feeling angry after seeing the disturbing barbaric photo on the right that was all over the news. Creating quilts have always helped me find calm amid anger or sadness. Although to this day, that photo still stirs a revulsion that I’ll probably never shake completely.

This is what I’ve been working on this week. I hope to have the finished quilt photo ready to share by Friday or Saturday.

Most of my animal skin prints came from Marshalls Dry Goods. You don’t need a wholesale account to shop that section of their website so I often buy wide backing by the bolt there too. I’m a fan of their great prices, big selection and good customer service.

Finished is better than perfect

Are there any quilters who haven’t said “finished is better than perfect” ?

Each of these three quilts showed me once again that despite my best efforts, things don’t always go as planned. What truly matters is how you respond in those moments.

A few years ago, I had a poster printed. I framed it to hang on my sewing room door so I see it every time I walk in the room. It’s a constant reminder to enjoy being creative and accept that mistakes are going to happen. If you want to be a quilter, you’re always striving to get better but you learn pretty quickly that you have to leave perfectionism at the door.


My goal was to turn these unloved tops into useful quilts for people in my community.

When you gift a quilt, the receiver sees kindness, they’re not looking for flaws. That’s reason enough to keep going.

This was a large square quilt. I’ve never made Bento blocks but recognized the pattern. I thought if I kept only the six blocks that had the same fabrics it might look a little less busy and using a soft pink in the border and backing would make it appropriate for a little girl.

Two blocks had red and blue print in the neutral rather than pink. The black paisley in the center block was different that the paisley in the border.

I didn’t notice the piecing mistake in one of the blocks as I was working on it. It’s the second block down in the left column in the “before” photo. When I took the “after” photo I saw it right away. (The bottom left corner in the “after” photo.)

There was no going back at that point. Since I didn’t notice it right away, I’m hoping the recipient won’t either.

This top had problems both before and after. The original quilt was very puffy in the center. I knew would make it a nightmare to quilt. I took it apart, trimmed the squares to 2 1/2″, and created a triple Irish chain top with the pieces.

Everything went well until I attached the binding and started ironing it over to topstitch. My iron overheated and scorched the backing all the way through to the batting. The next morning my iron wouldn’t turn on at all so I knew it had burnt out and I’d have to replace it. . I prefer a hot iron, but not that hot!

The burnt section was too big to cover with a label, so I removed the binding, rounded the corners to cut off the burnt part, and sewed the binding back on. I’m not completely thrilled with the quilt, especially after all the work that went into making those 81 piece blocks. The disappointment was gone the next day. When I looked at it again I realized that that I was actually pretty lucky that the damage was in the corner. Instead of disappointed, I was grateful that I was able to save the quilt.

This was one of those first three tops finished before I decided to take “before” photos. The borders were sewn on but never trimmed. It actually made me laugh thinking someone must have been in a huge rush to just stop working on it and leave it like that.

The way the borders had been cut made it a challenge to trim them so they’d be symmetrical. The fabric matched the rest of the quilt top so I wanted to keep them.

I took the borders off, trimmed them to look as balanced as possible and reattached them to the top. After making the pink one above, I was glad to have this one to finish with lots of blues & browns for a boy.

Perfect? Not even close! But, they are finished and that’s a good feeling.

Here’s a recap of all 10 quilts.

Back to basics

This is the last of the original 10 quilt tops saved from the Palm Beach County Quilter’s Guild de-stash table.

I recently accepted 7 more that had been set aside to use as possible backings. One of them was used to back this quilt. I was given the go-ahead to use them however I wanted, as long as I actually use rather than discard them.

A couple of them will make nice comfort quilts as they are so I’ll simple quilt and bind those. Others are a little plain and oversized. It was a good idea use them as backing for other quilt tops. I’m guessing they didn’t come across any tops in storage that coordinated with the colors and style of fabric. I’ll keep them in the forefront to plan a future quilt top around them, rather than hang onto them and hope the right top shows up… eventually. No rush on these so I’ll work on them between making string quilts.

Here’s the before photo of that 10th rescued top. The only issue with it was the autumn fabric used for the border. It didn’t really work with the rest of the top, especially for a child size quit and was an easy fix.

It was lucky that our Outreach coordinator had remembered seeing strips of one of the fabrics using in the top. She located them quickly for me Amazing, considering the massive purge of the guild’s storage unit.
Here’s the after photo.

The quilt probably would have looked better with an inner yellow border. I chose not to add one and here’s where the title of this post comes in.

The founder of the non-profit Back to Basics is a long time member of our quilt guild. Her name is Beverly. If you click on that link, there’s an interesting bit of history about how it all began in 1984.

Beverly mentioned that she really could use more blankets for kids to nap on. She had reason to specifically request that they not be too fancy. I recently asked her what size she preferred. At 40″ x 45″ this quilt is the ideal so her organization is most likely where it will be donated. As the old saying goes “if it ain’t broke, don’t fix it”. I added the child-friendly border but kept it simple just as requested.

The scrappiness of the front made this backing a good fit. It’s now a two-sided quilt. 😉

The backing was a little longer than I needed with an two extra rows of squares. I salvaged those so they won’t go to waste. I already know how I’d like to use them and they’ve been set aside with a notation (so I don’t forget!).

I’m thankful to have plenty of fabric that I love. Some quilters have asked why I spend time taking out seams in order to save every last piece when I have a closet full of fabrics that I prefer. It’s a fair question.

Quilters donate their fabric and quilt tops hoping they will be used, not sold or discarded. Some have passed away, while others have had to give away their supplies because they can no longer quilt. They may never know what happens to their items, but I will . I feel a responsibility to honor them and their gift by using it and not tossing any of it aside.

I’m not going to throw something away just because I may like something I own better, even if it would be easier to do so. While not every quilter may agree, it’s my reason for using every piece I can. It’s my way to pay it forward and create quilts that comfort others.

I’m sure that most of my friends are tired of hearing my favorite quote but it stays with me so, here it is once again.

When I stand before God at the end of my life, I would hope that I would not have a single bit of talent left, and could say, ‘I used everything you gave me. – Erma Bombeck

Makeover madness

Rescued quilt top #9 drove me a little crazy. It wasn’t the quilt’s fault, it was mine. Now that it’s finished, it’s really satisfying to have met that challenge.

Here’s the before photo. It’s not unattractive, but at 49″x 50″, it may have been difficult to find the right recipient. The aim is to give it a second chance to provide comfort, not to remain in a closet.

Pictured below is the finished quilt which now measures 50 1/2″ x 70 1/2″.

The backing fabric was a red stripe. I took the opportunity to be more creative to increase the width. I want to explore more pieced back ideas in the future.

Vivian, the guild outreach chairwoman, found some extra floral strips in cream that were used on the top that I was able to incorporate into the back. I tried to use a design I hoped would complement the Trip Around the World pattern on the front.

I quickly decided what to do with the first few tops in this group of ten. This one was more challenging, and I changed my mind several times while planning. I’ll just say there was a lot of mumbling going on and leave it at that. 😉

The original pieces were cut to 3″ x 10″. I didn’t want to reduce them to 2 1/2″ and waste fabric, but they also wouldn’t fit in a quilt block that required a 3 1/2″ piece.

After disassembling the top, I counted the pieces by color and determined how many 3″ squares I could cut.

I took out my graph paper, set up a quadrant, and decided to add two fabrics for the squares and a border. I added a red fabric and a neutral (with a small black and red design) to the pieces I had to come up with the finished size I wanted.

This small pile of leftover squares is all that remains of the original fabric in the top and that makes me pretty happy.

There’s only one top left! It’s small and just needs a different border, so I’m already planning my next quilt.

Wedding Dress Blue

Quilting and other things I love in this colorful world