(Originally posted February 5th, 2021)

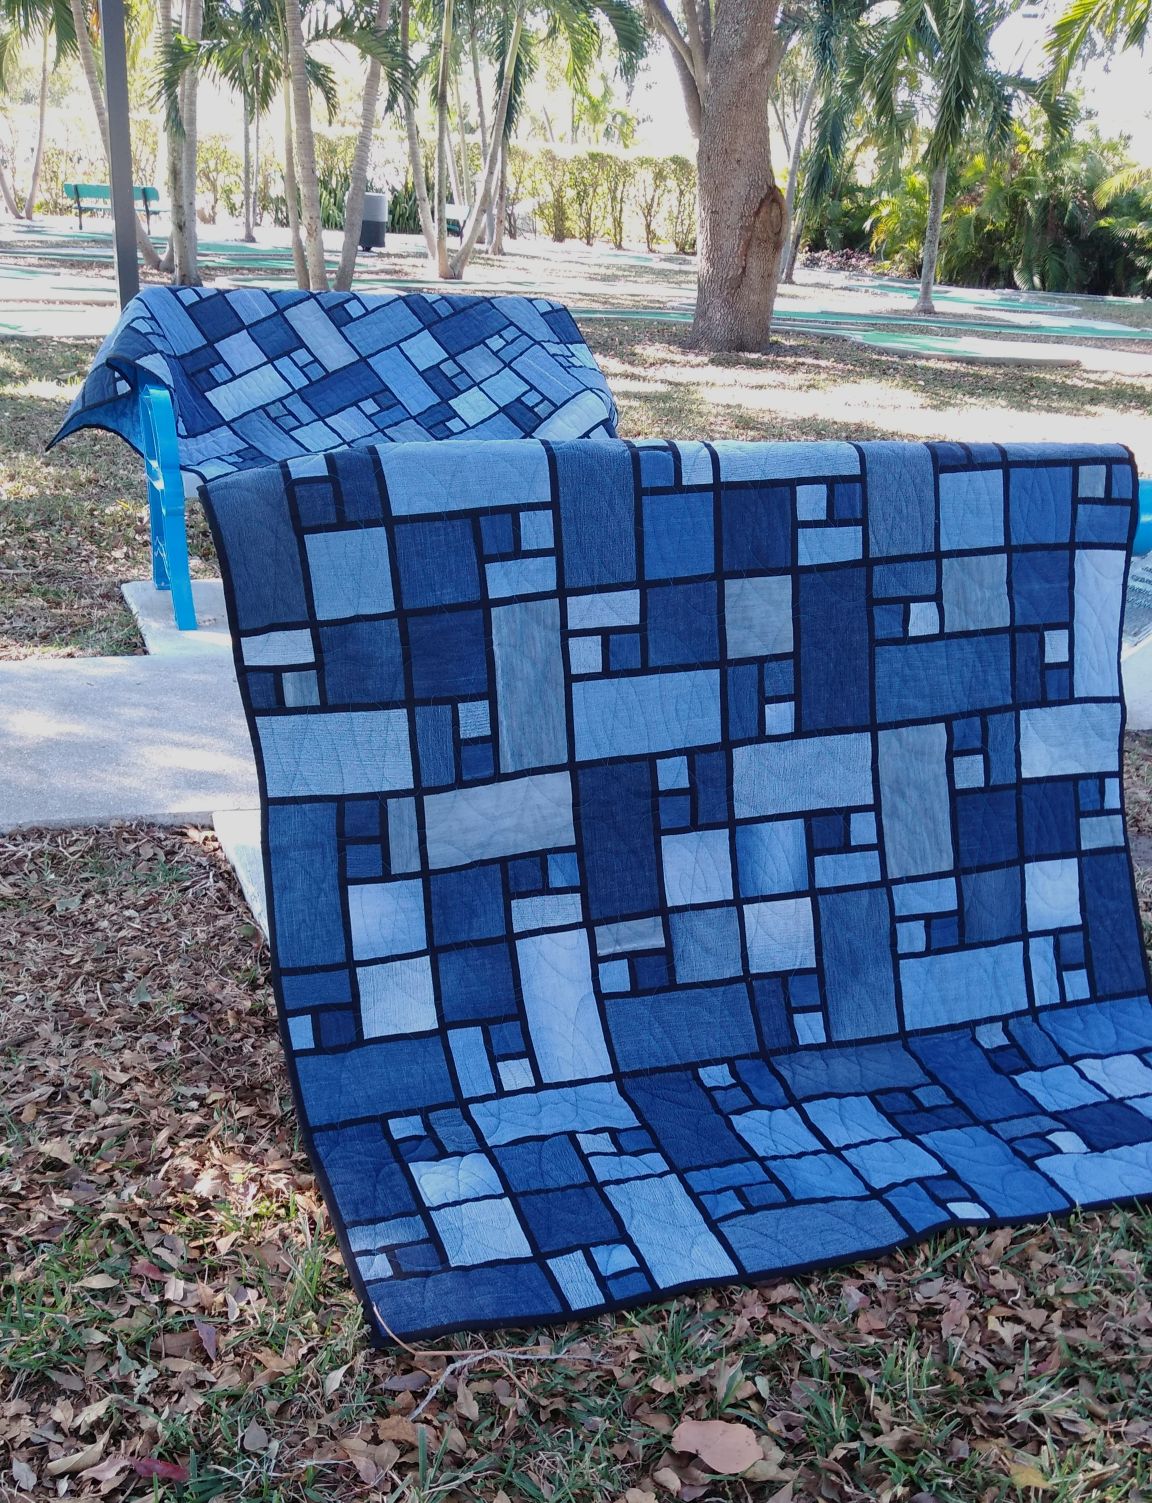
Alternately, you can just check out the cutting info below for the quilts I made. I deliberately chose a stained glass design so none of the denim pieces are sewn together. Having that strip of regular black quilting cotton between them made would make the seams less bulky and the quilt more comfortable to use.
These quilts were composed of 48 blocks each and measure 60″ x 80″ finished.
I’m included photos I took as I was constructing the second one along with a breakdown of the size pieces I used.
Press all seams toward the black fabric.
- 5″ x 10″
- 5″ square
- 5″ x 2 1/2″
- (2) 2 1/2″ squares
Each block black:
- 1″ x 10″
- (2) 1″ x 5″
- 1″ x 2 1/2″
If you’re using women’s jeans which often have a little stretch in them, measure the completed rows and use the average measurement before you cut the sashing strips to sew between the rows.
Click on the photos to view a larger image.

Begin by sewing black strips to the block pieces but, only sew them on half of the 2 1/2″ squares.
 |
| Sew 2 1/2″ squares with the black strip to a 2 1/2″ without the black. |
 |
| Sew the black edge of the 2 1/2″ x 5″ strip to the squares. |
 |
| Sew the black edge of the 5″ square to the previous unit. |
 |
| Add the black edge of the 10″ x 5″ square to the side of the previous unit. Construct all of your blocks with the pieces positioned in the same way. |
 |
| Next, lay your blocks out in pairs rotating one block 90°. You can see the top block has been rotated one clockwise turn to the right.
Sew a 10″ black strip to the lower edge of the top block. Sew the bottom block to the top unit. |
 |
|
My rows are 6 blocks across (3 pairs of blocks laid end to end). Add a 10″ black strip between each pair of blocks. DO NOT add a black strip to the beginning or to the end of each row. |