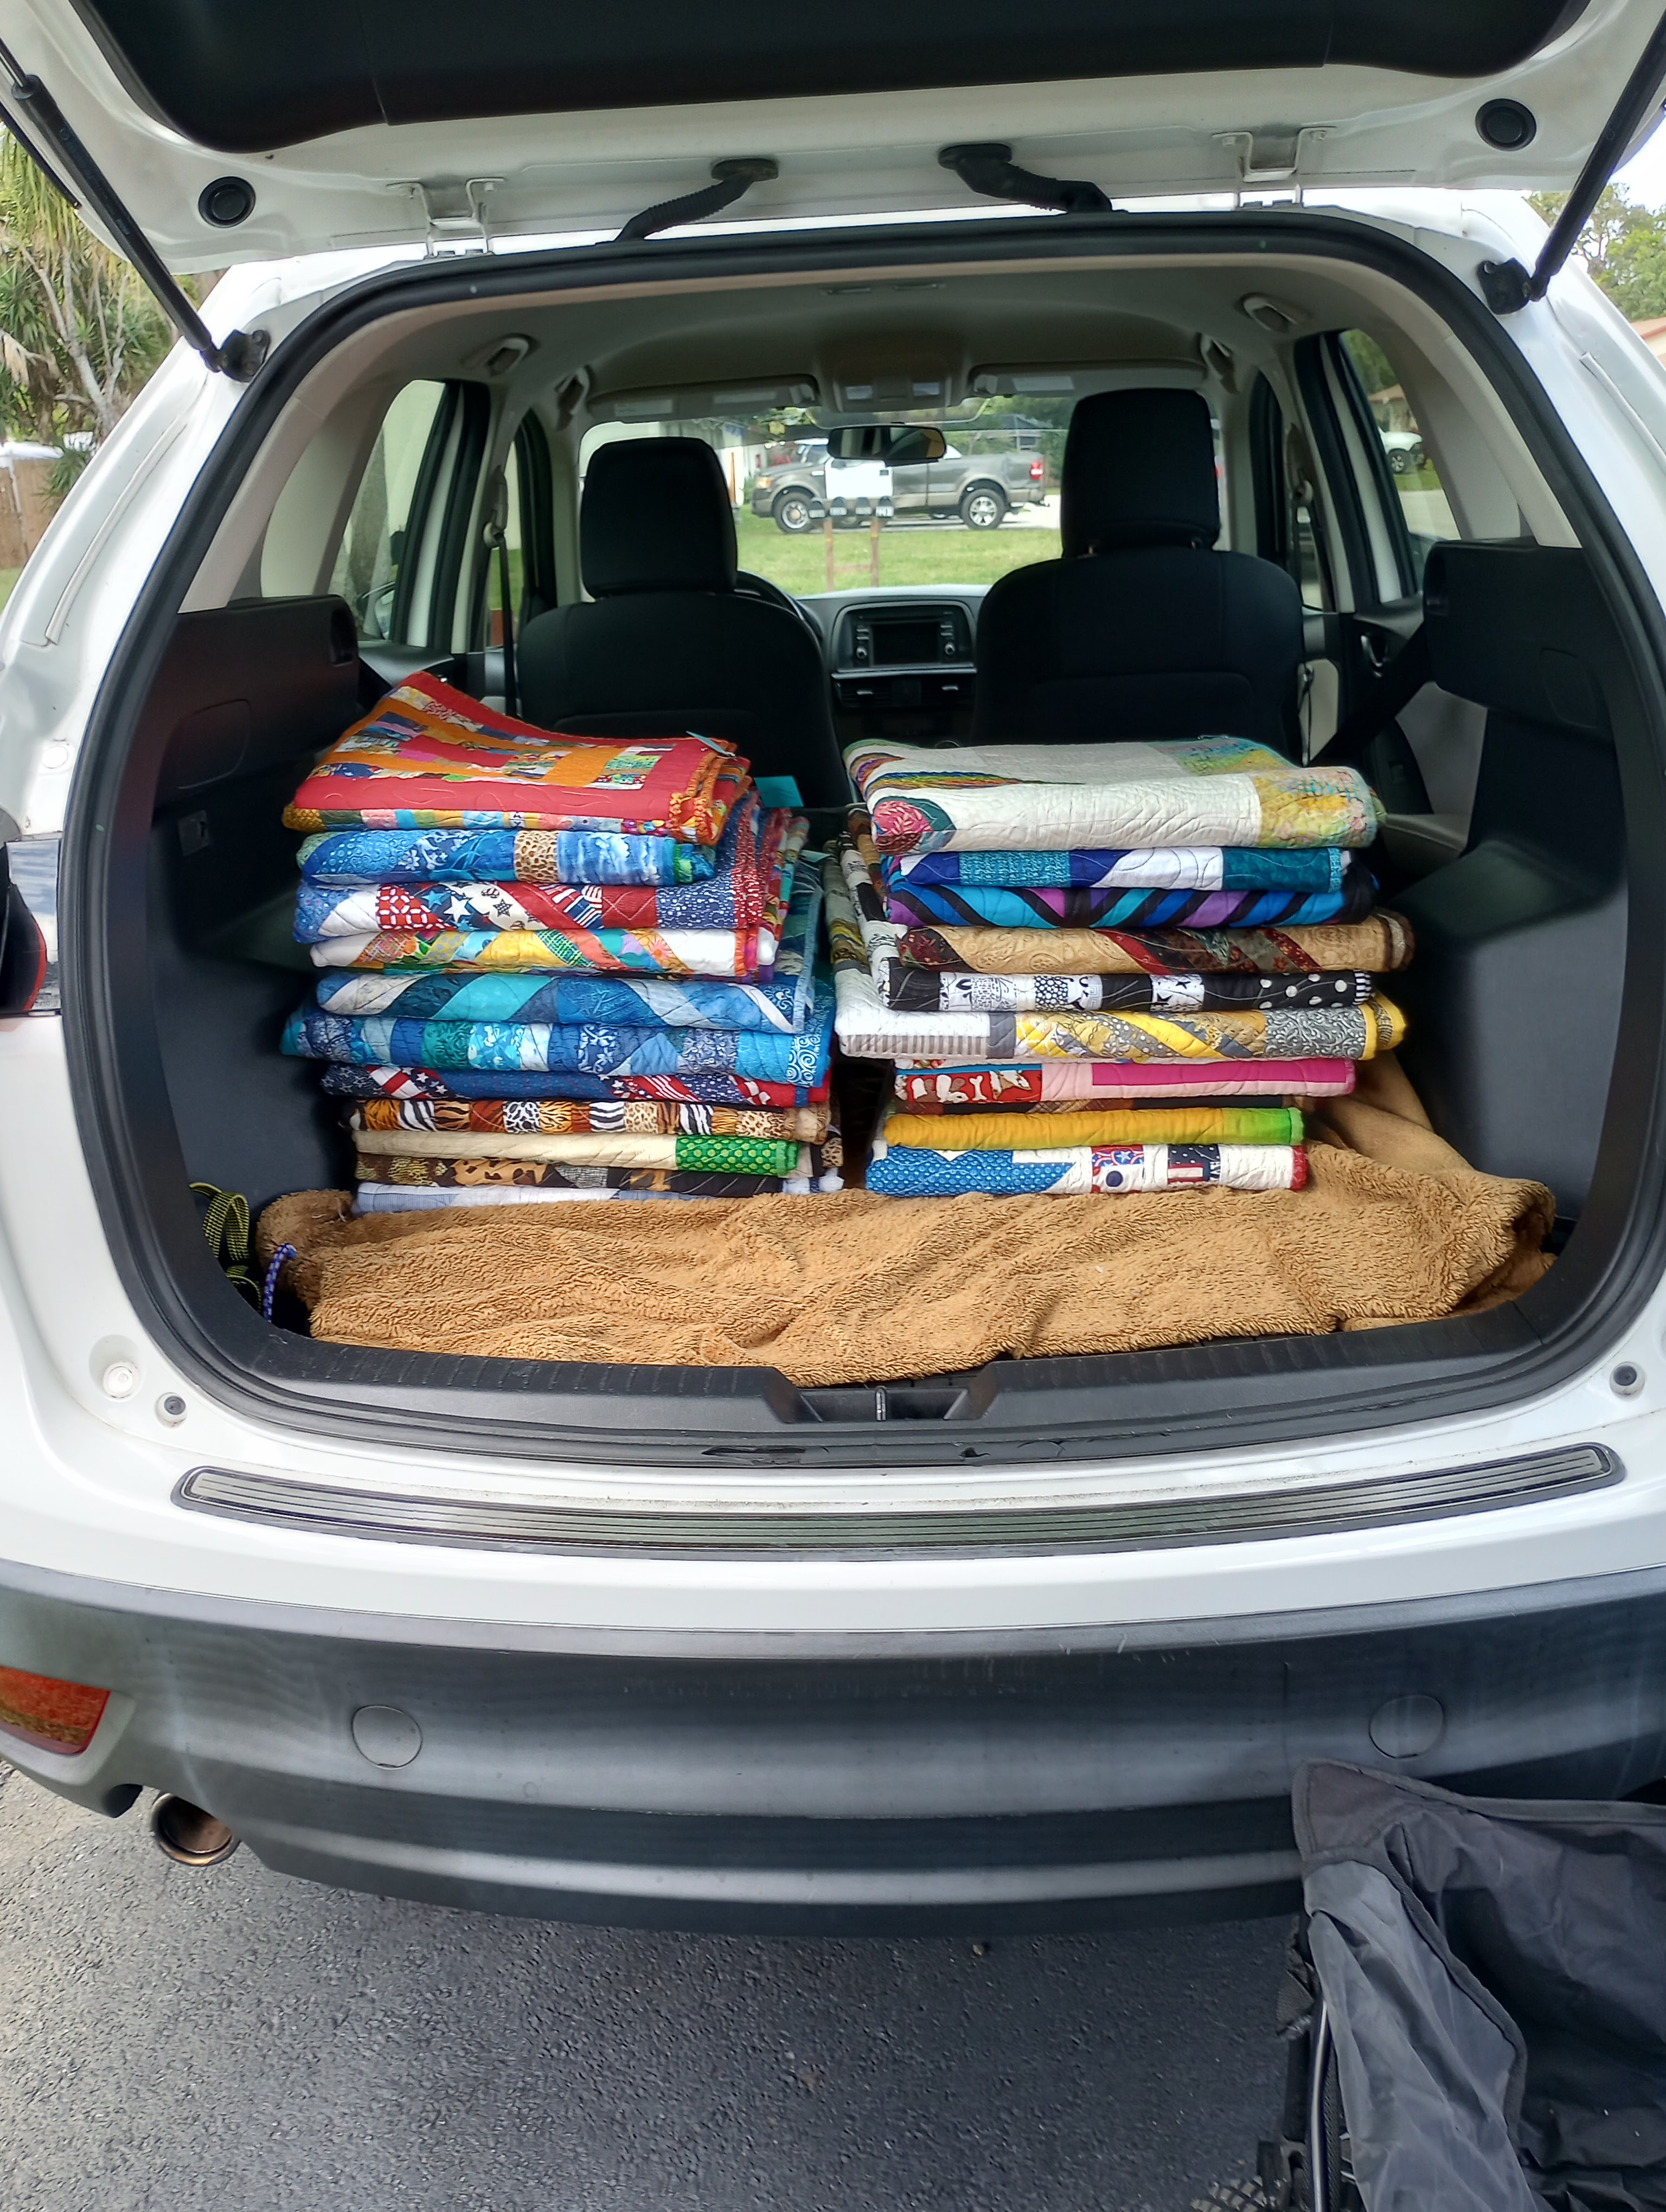
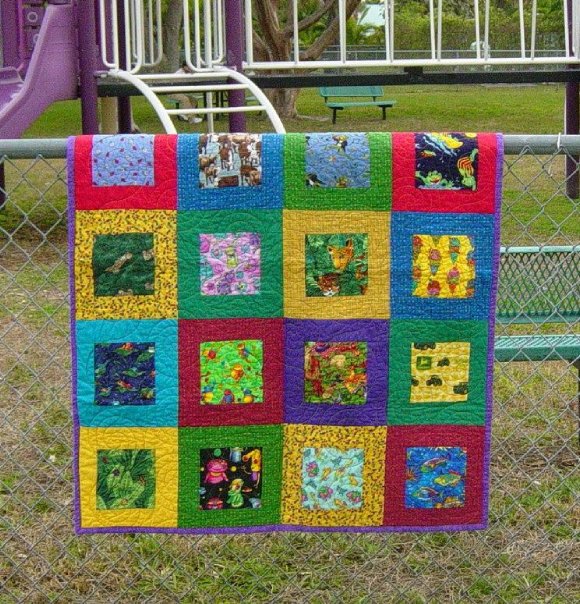
I’m not sure this is exactly what they meant when the guild asked if I’d do a string quilt trunk show… but, I’m ready! 😉
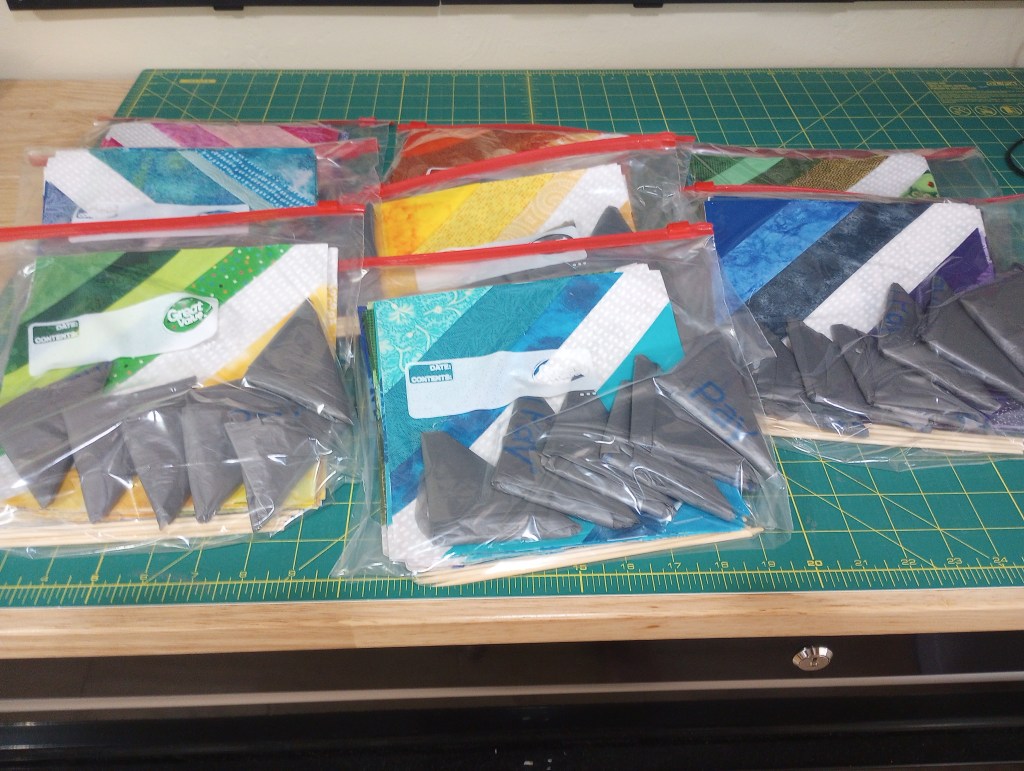
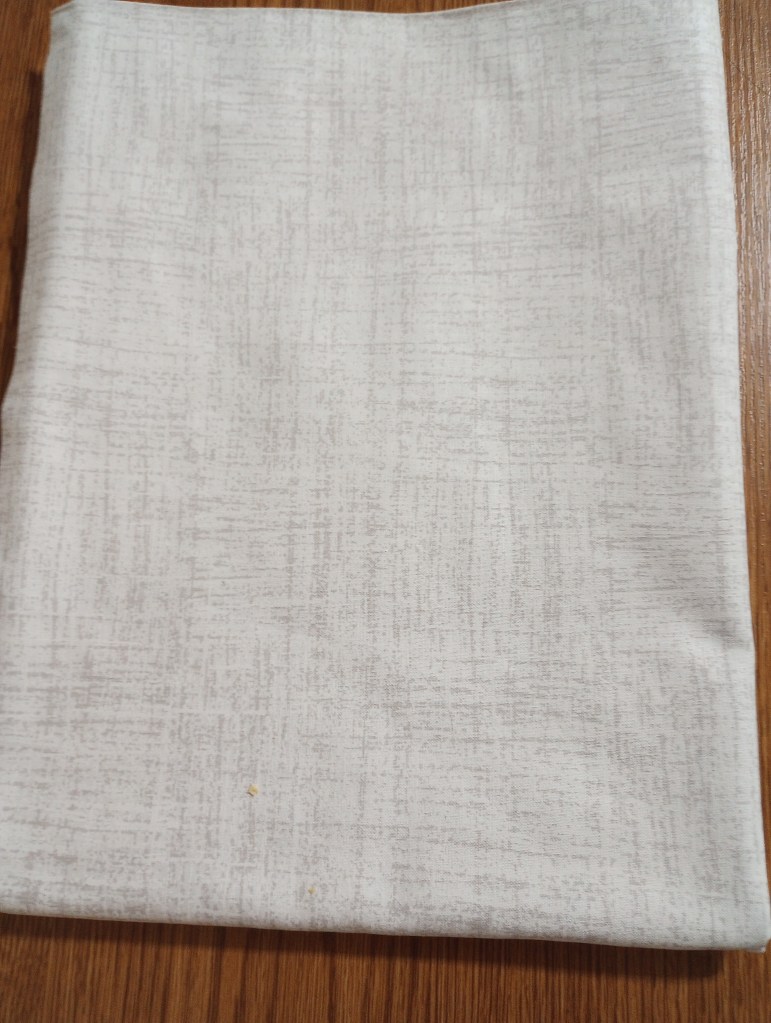
I’ve numbered the quilts and re-folded them. I want to undo them so they’re in halves, making it easier for volunteers to show the quilts.
The numbers let members note which photos they want, so I can email or text them. I plan to speak for half an hour, so I need to discourage picture-taking to keep things moving smoothly.
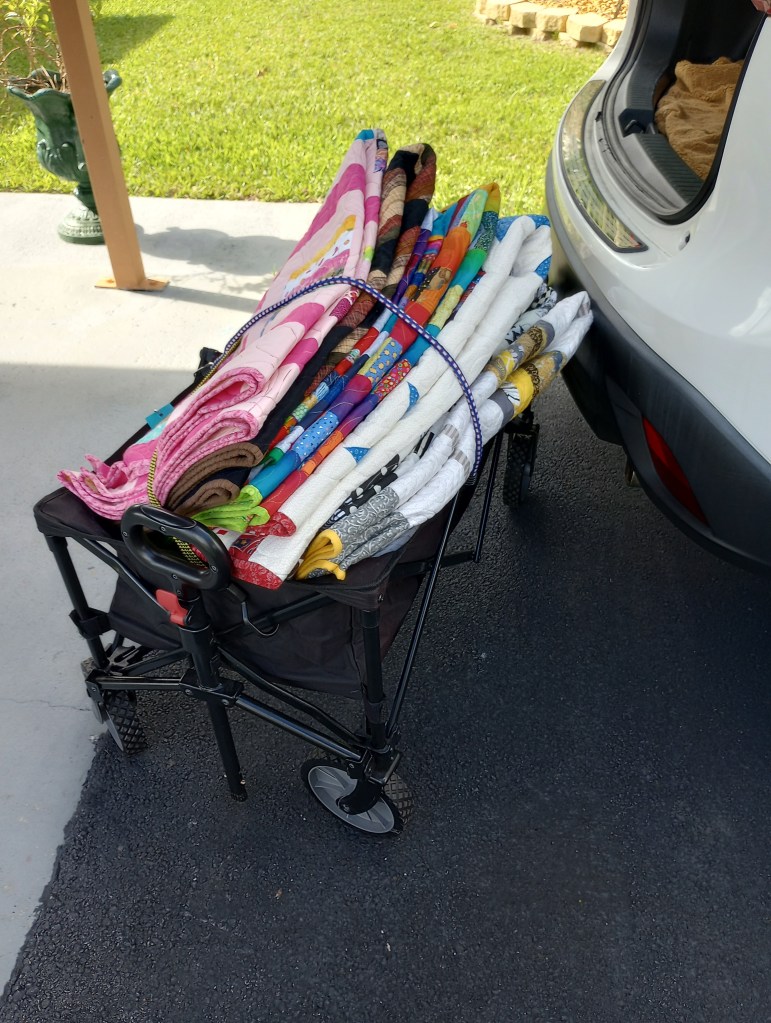
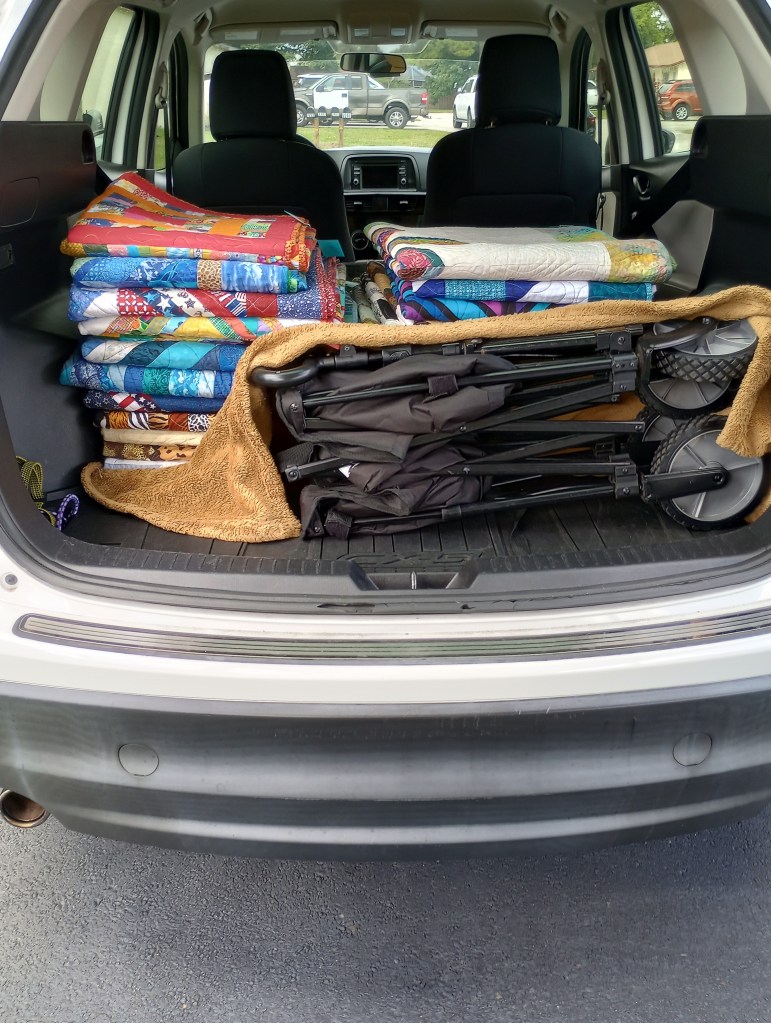
I tested loading my cart so I’d be able to move them from my car to the building in two trips and ensured there was space in the car for the cart, covering it to keep the quilts clean.
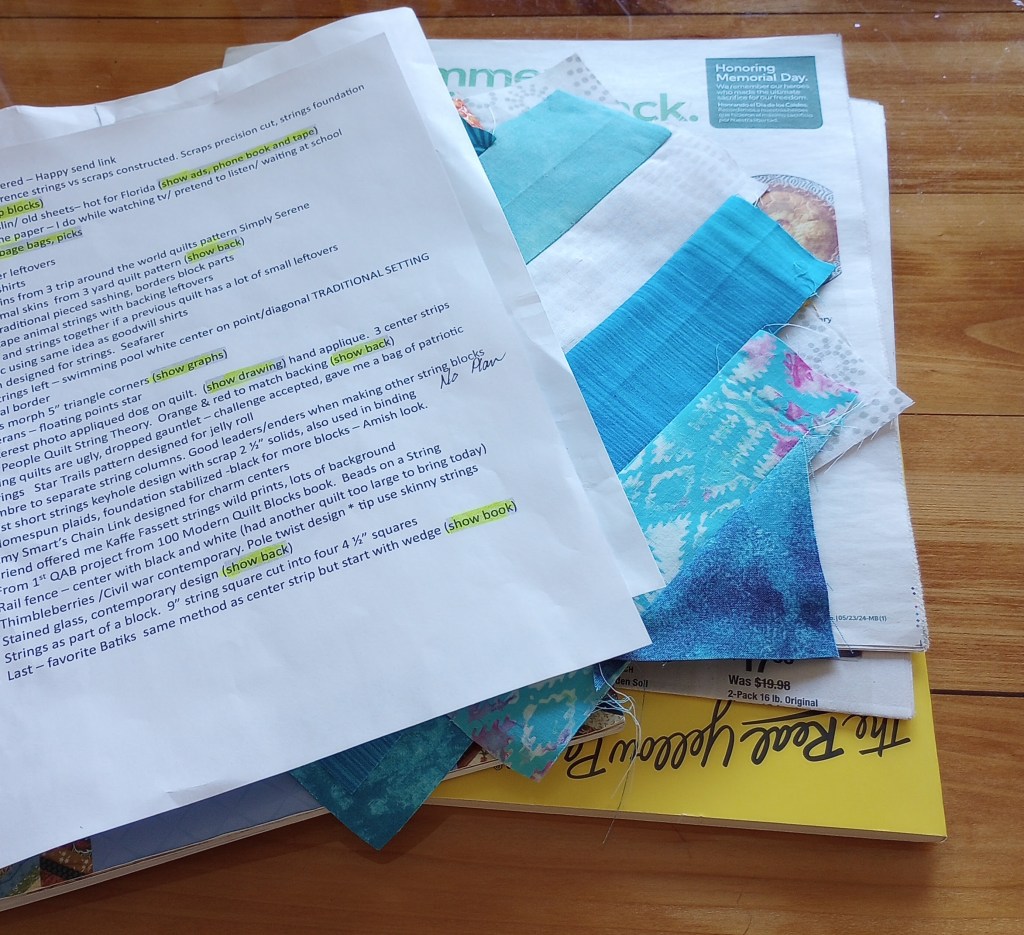
I also practiced the main points I want to mention, clocking myself each time to make sure I can stay on schedule. The packets to pass around each table include sample blocks, wood picks for paper removal, and Walmart bags for trash. Living in hot, humid South Florida, I prefer paper foundations that are removed rather than adding an extra layer with a muslin or old sheets that stay in the quilt and add extra weight.
My goal is to show how easy it is to remove the paper while I talk and display the quilts, just as I do while watching TV to show how achievable it is.
The toughest part has been narrowing down the quilts to 25. Now that I’ve made that decision, I’m excited to share my love of string quilts with my friends.
Wish me luck!
Someone asked me why my signature says “Pat E.” when my last name starts with an “S”. The reason is two-fold: my middle name starts with “E”, and I was nicknamed “Patty” (Pat E) when I was young. My siblings and friends still call me that, but most people know me as “Pat”. 🙂
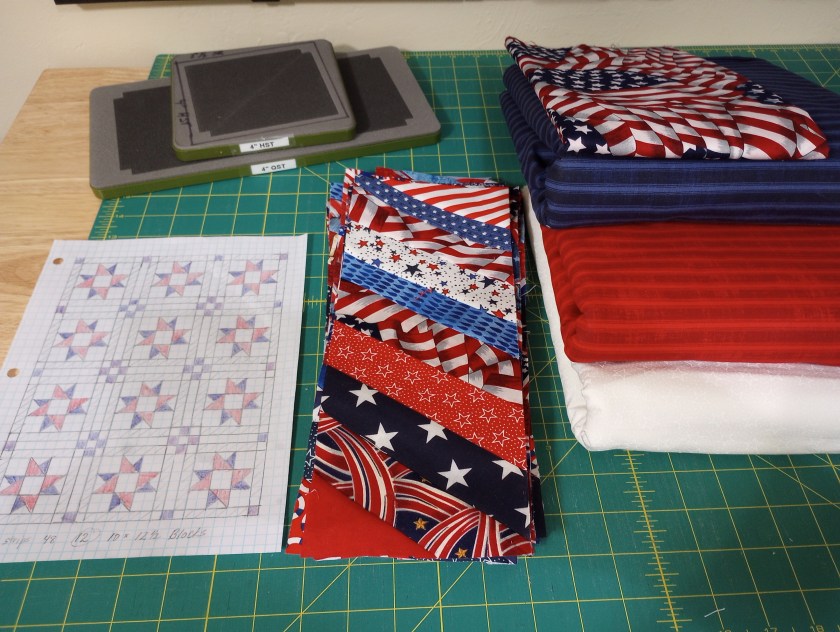
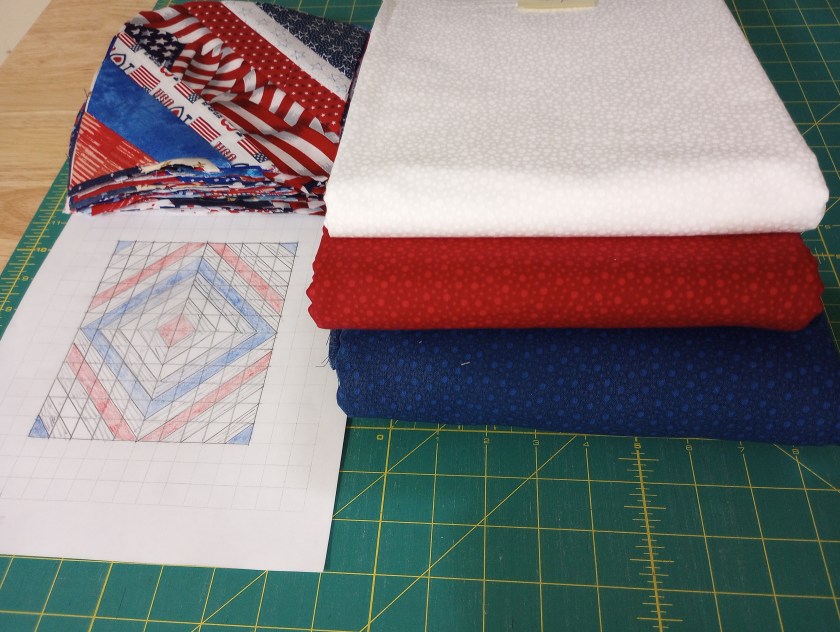
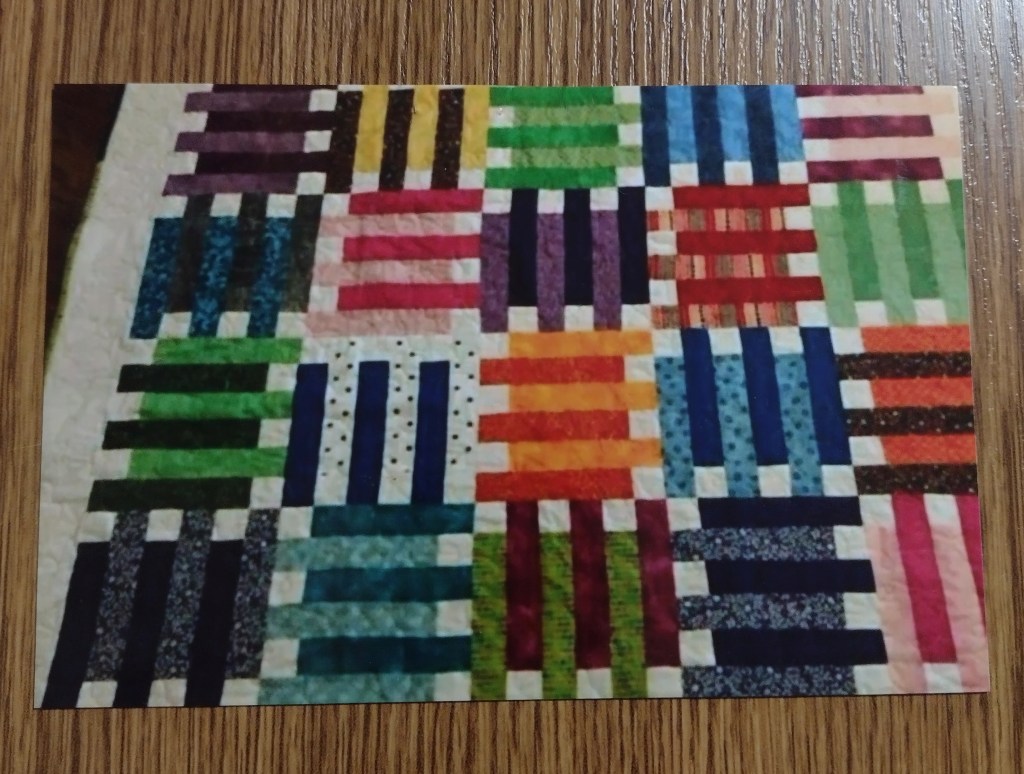
I planned this one before Christmas and I finally got around to working on it. I’m really happy with how it turned out.
Instead of using sashing with string blocks, I used string sashing with pieced blocks. I began with a dozen 10″ x 12.5″ string rectangles (the blocks in the lower left corner of the photo below).
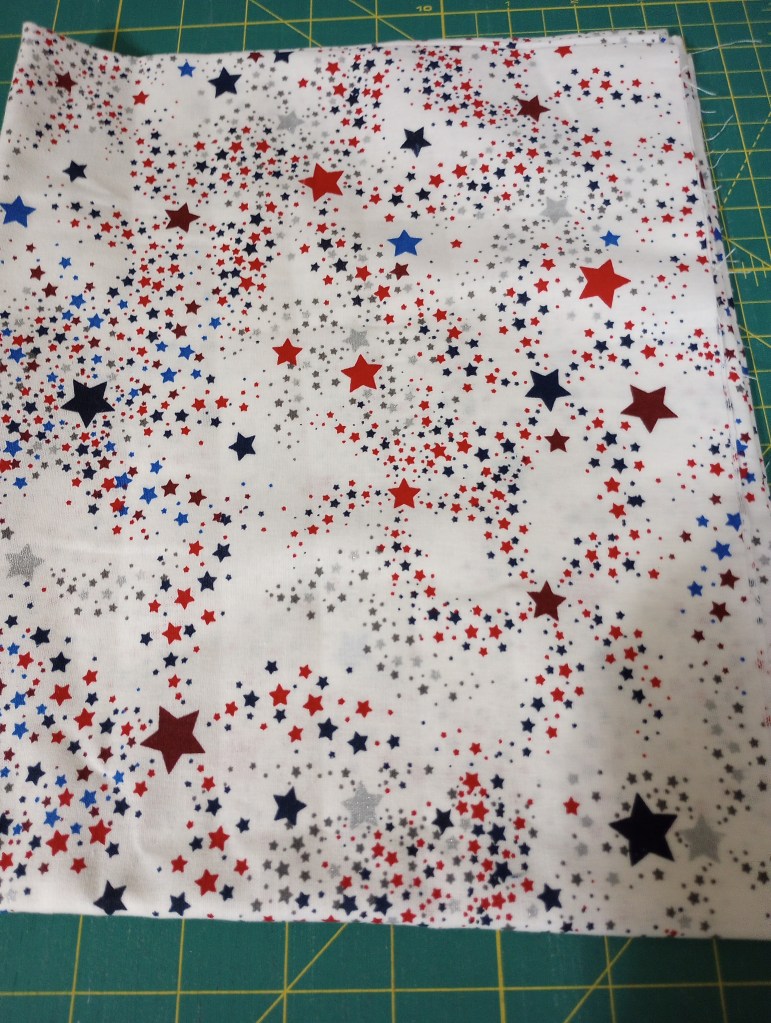
I chose not to use the blue and red stripe fabrics I originally considered because I just didn’t want to deal with trying to keep the stripe pieces all positioned in the correct direction. 😉 I also substituted the flag print for the center of the star after making the first block. I realized it was too busy and decided to use this star print on white instead.
I cut the string rectangles into four 2.5″ x 12.5″ pieces and used them for pieced sashing units. I’d considered mixing up the all the 2.5″ wide pieces but decided to keep them in pairs when I made the sashing.
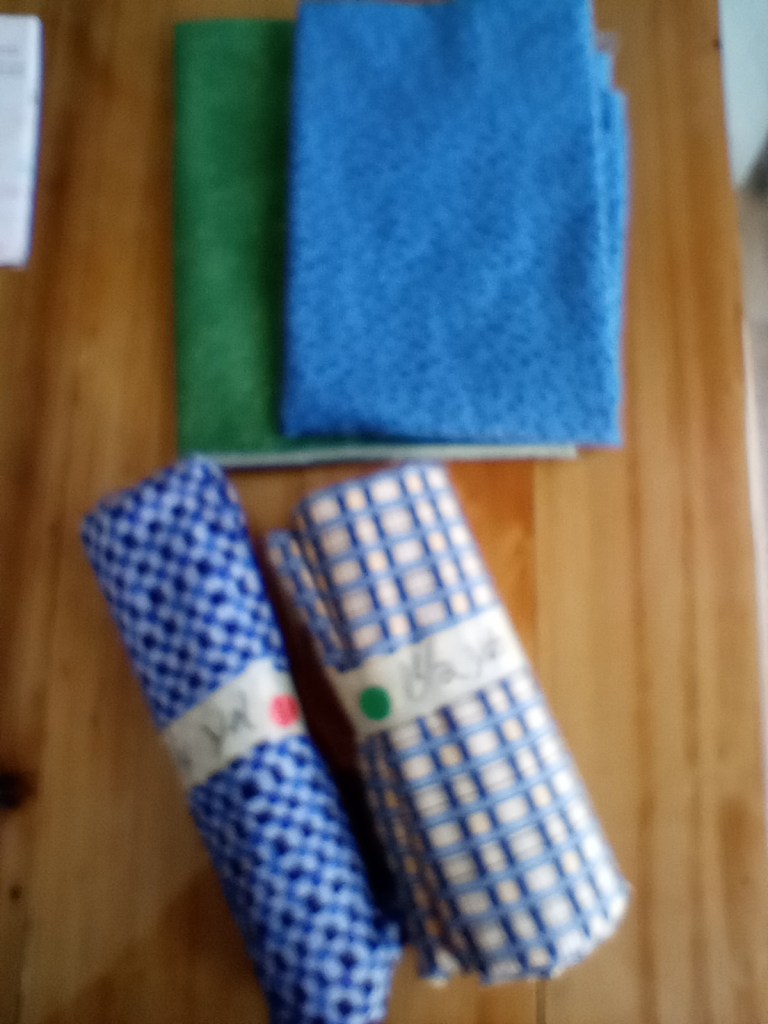
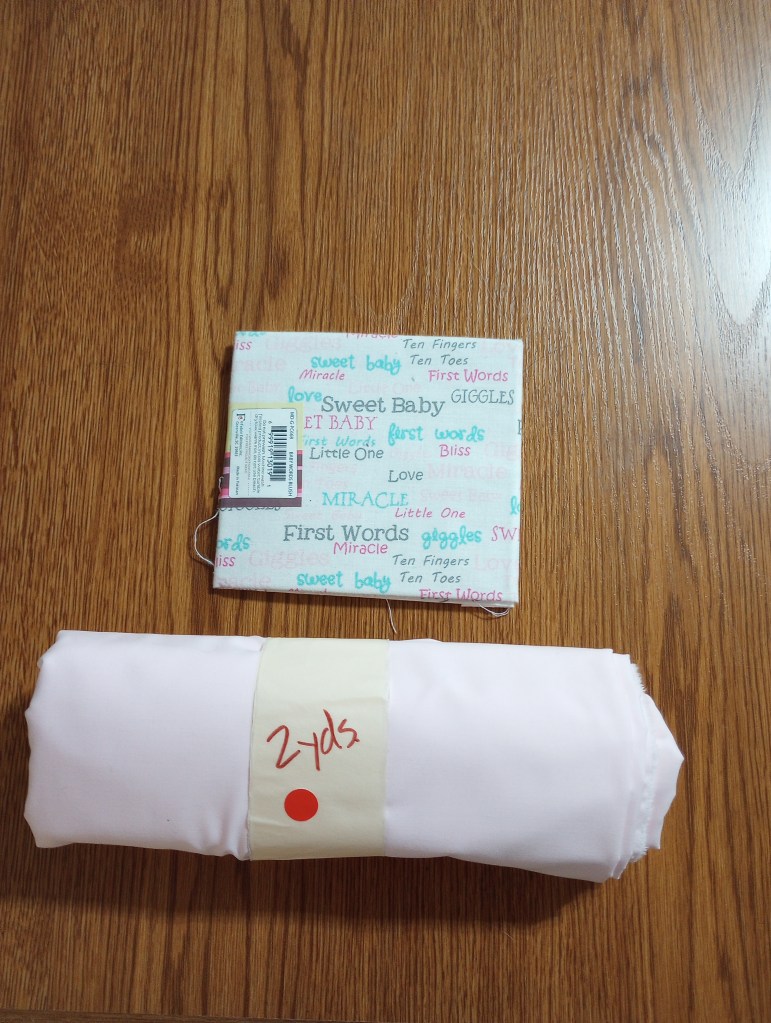
I purchased a bolt of bleached muslin from Marshall Dry Goods to use as backing for NICU quilts that I plan to make for future donations and decided to test it on the back of this quilt first.
It was soft right off the bolt and better quality than I expected at the price. I washed it first to check for shrinkage and how it would feel after the sizing was washed out of the fabric.
The muslin did not shrink at all, wasn’t too thin, and felt like a nice soft bed sheet. I’m really happy with it and the cost makes it very affordable!
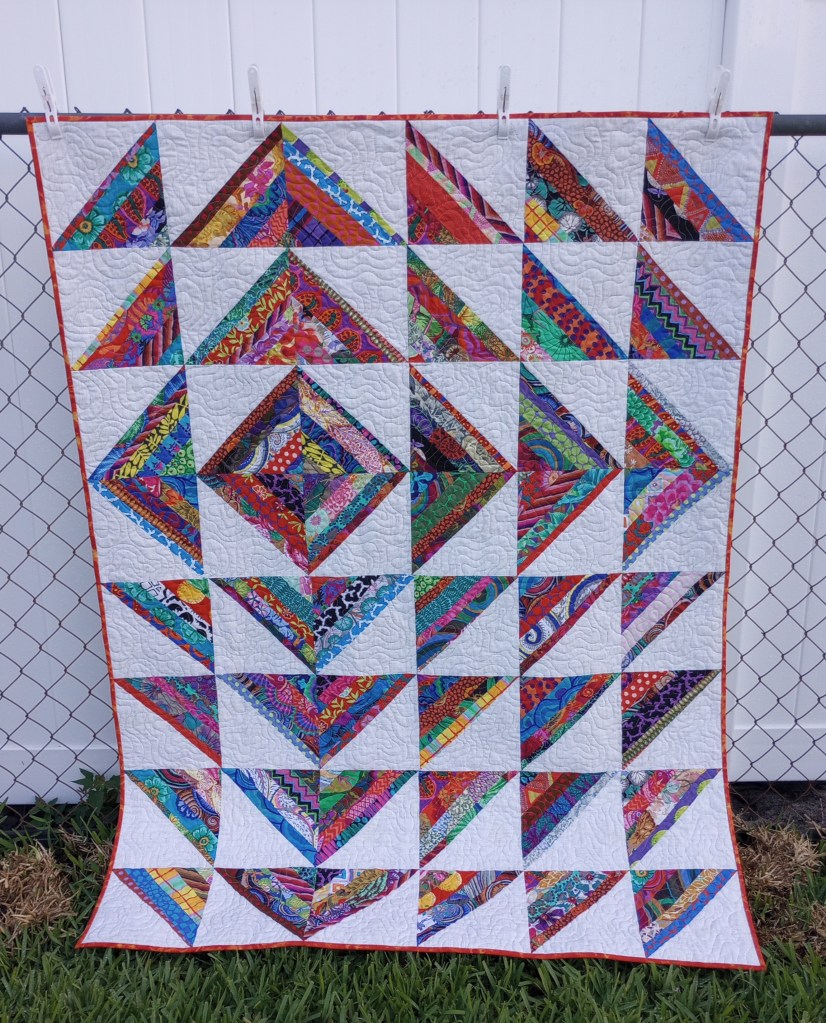
A friend sent me some Kaffe strings. She saves her scraps, but these were all less than 2.5″ wide. She wanted to share them with someone she thought might actually use them. I’ve never purchased this designer’s fabric, so it was a fun change of pace. I might have enough for a second quilt, but I’m not in a hurry to start another one (unless a great idea comes to mind).
Deciding on this layout took a while. They’re such bright and busy fabrics I knew it would take a lot of background and, I wanted a bit of a contemporary design. I’m happy with how it turned out.
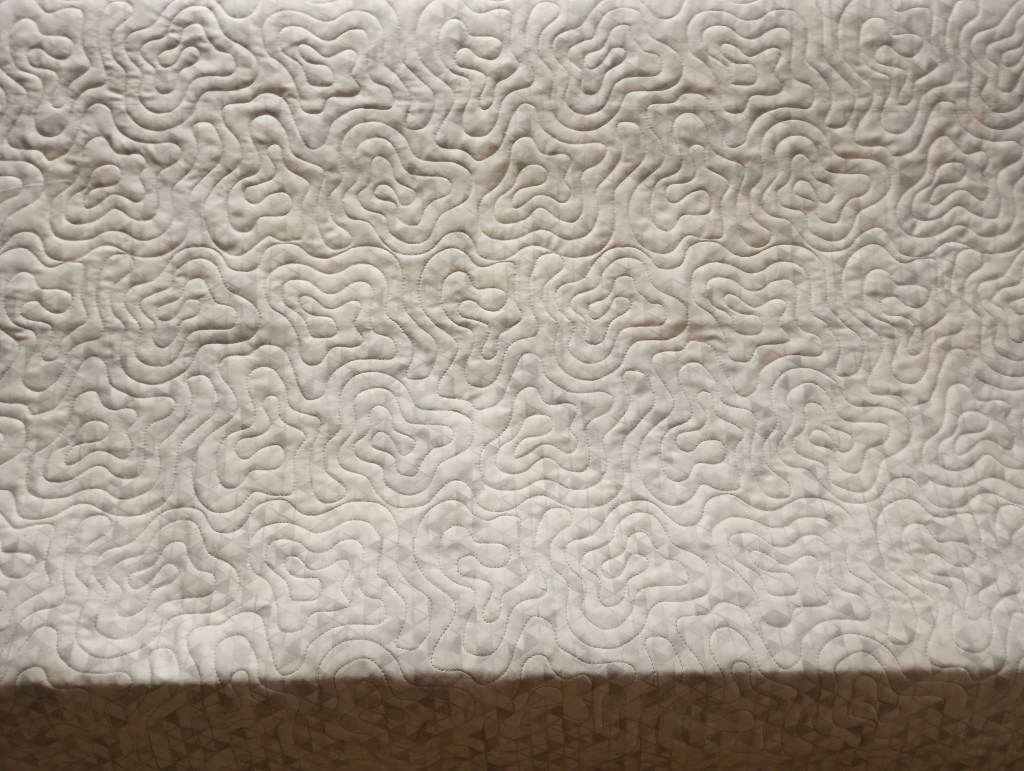
I used my favorite background fabric. You can see the Malachite design by Urban Elementz I used to quilt it better on the back of the quilt. It did take a bit of time to do the quilting, but I love the texture it gave the quilt and I think it has the same contemporary feel.
This week I decided to start trying to stick with a schedule so I don’t end the week wondering where it went. I may not get a chance to sew everyday but when I have the time, this is the plan.
Friday, Saturday, Sunday, Monday – piece/quilt a string or bucket list quilt top
Tuesday, Wednesday – quilt donation tops for the quilt guild
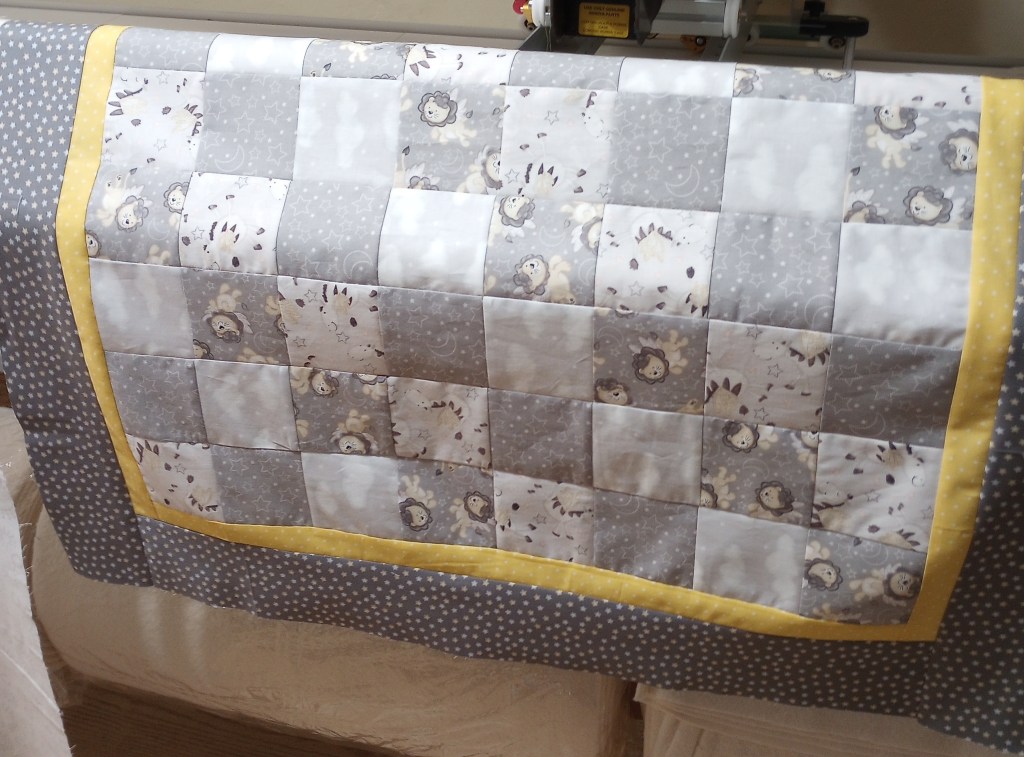
Thursday – work on my own baby/child quilt to donate
I wasn’t able to work on a little donation quilt top at my bee this week but, I did cut out the fabric and got it pieced at home.
It’s based on Bonnie Hunter’s free Streak of Sunshine quilt pattern. I altered it a bit, cutting my strips to 3.5″ and made 8 rows instead of 9 the patterns calls for so the quilt would finish at 36″ square, the preferred size for NICU preemie quilts.
After dinner last night I quilted it and started hand stitching down the binding. I should get it finished tonight.
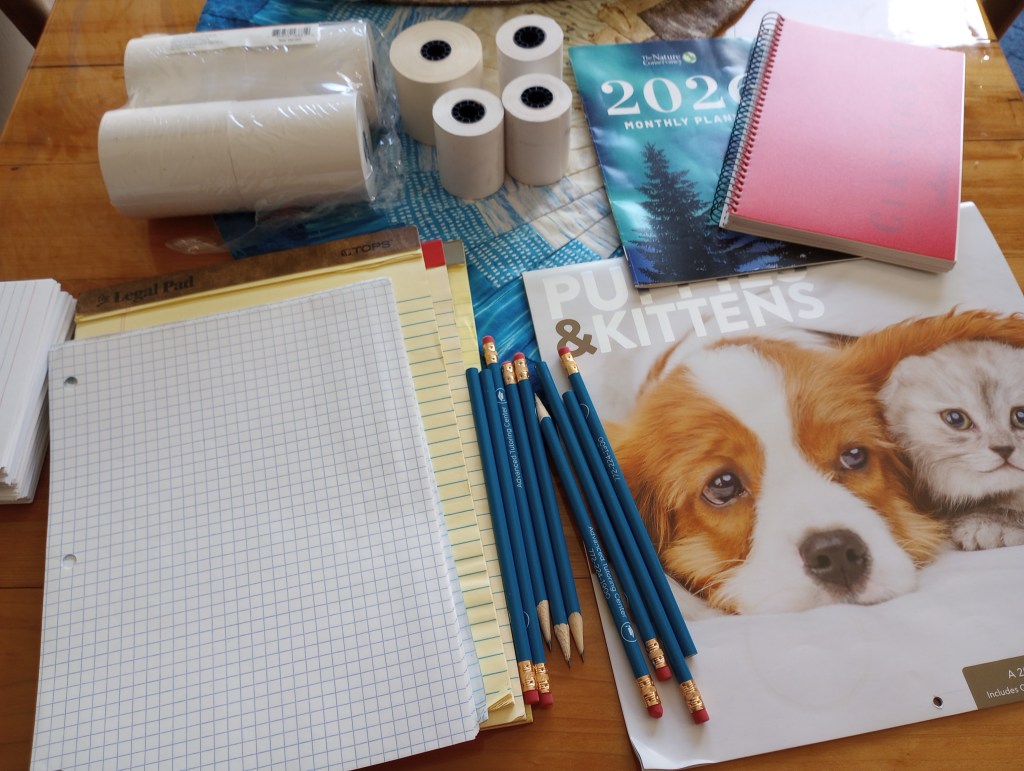
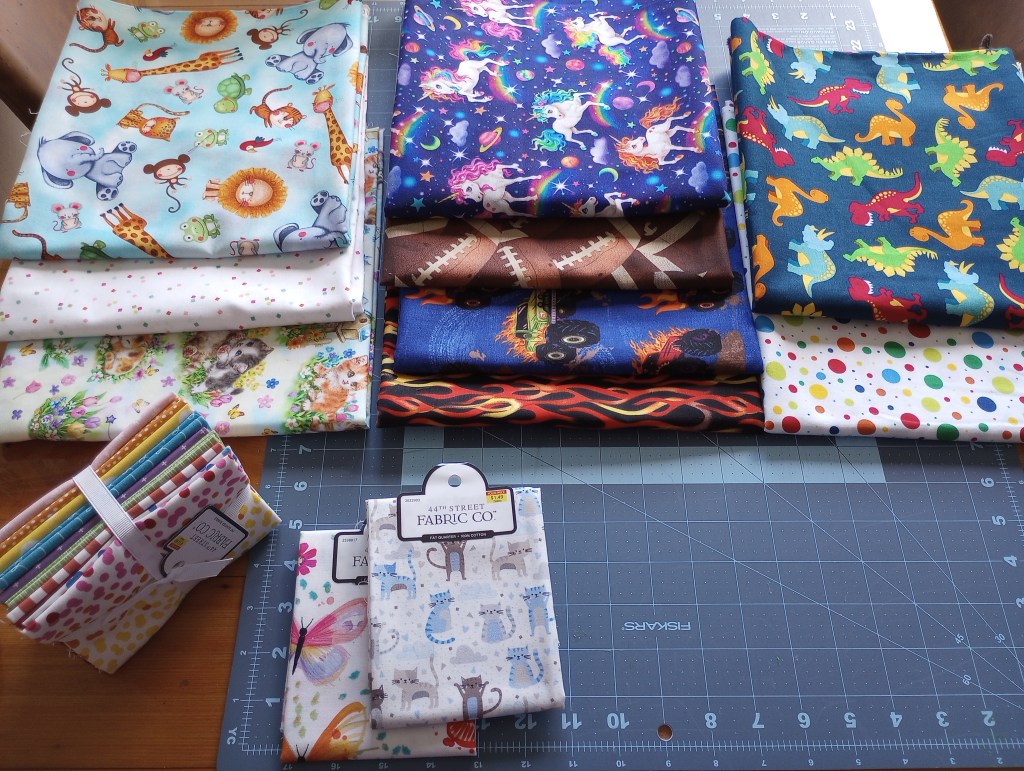
On Tuesday I made aanother quick trip to Resource Depot. I’m going to try and go every two weeks to look for fabric I can use for baby/kid quilts. I’ll need to start avoiding the office supply section. I have no clue why but I’m a sucker for office supplies! 😉 I’ll use everything I bought this week so I don’t regret it. I just know I have plenty now and there’s no reason to buy more. It’s too darn hard to resist the couple of bucks it costs to fill up a bucket with whatever you want. The week I got a couple of calendars, one for my purse and one for the fridge, more receipt tape for short string piecing, a bunch of pencils, and some pads of paper and graph paper.
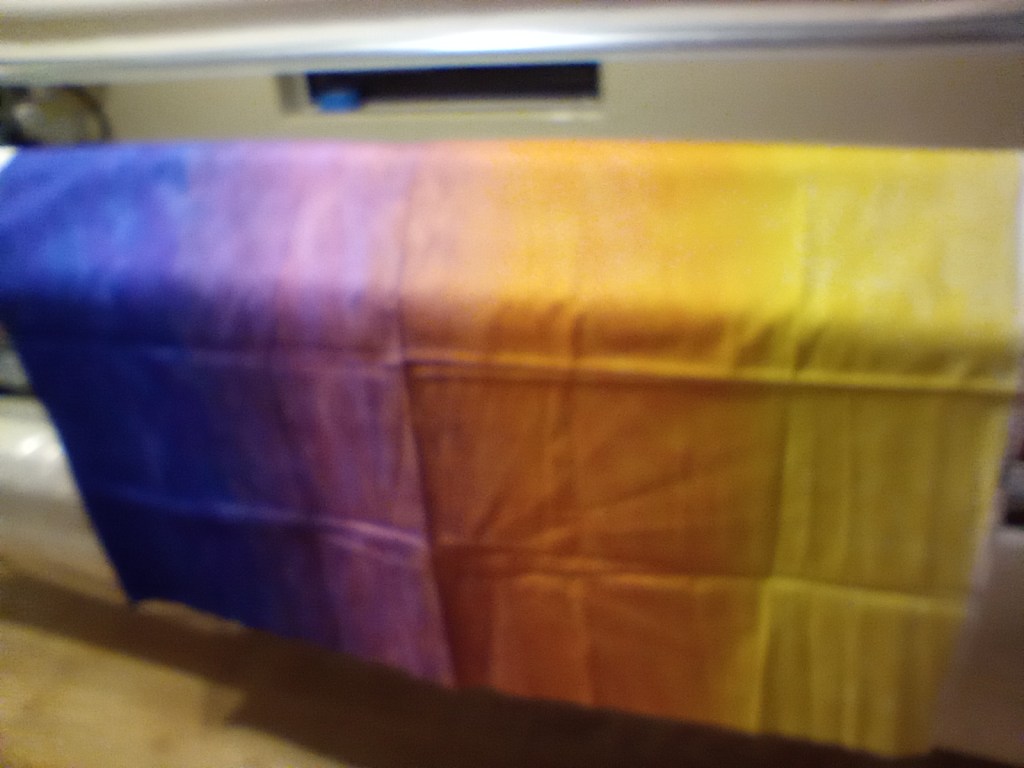
I found a few small pieces of fabric that’ll be great to use with some of the focus prints I got last week at Hobby Lobby in Mary’s Quick Strippie quilts. I found a baby print fat quarter, and some pink fabric that will work for backing a couple of future baby quilts meant for donation. The best find was a one-yard piece of ombre fabric by Hoffman. I really love ombre and had fun with a piece a year or two ago making this kid’s string quilt .
Today I’ll get back to working on another patriotic string quilt. I really wasn’t in the mood to work on patriotic strings again yet but, I purchased some bleached muslin from Marshall Dry Goods and was anxious to try it out for the backing.
I’m pleasantly surprised at the quality. I feared it would be too thin or scratchy to use on a baby quilt. It wasn’t. It would have been fine to use right off the bolt but I chose to pre-wash a piece to see how much it might shrink and remove any sizing that may have been in it. The fabric didn’t shrink at all and it was nice and soft after washing. I’ll probably buy a bolt of 45″ wide too and save my cute prints for the tops.
It was a bit of a pain to iron that 90″ wide piece of fabric and trim the stray threads down the sides. Next time, I think I’ll go ahead and use it right off the bold and wash the completed quilt afterwards. I plan to use it mostly on baby quilts so it needs to be nice, soft, and cuddly. ♥
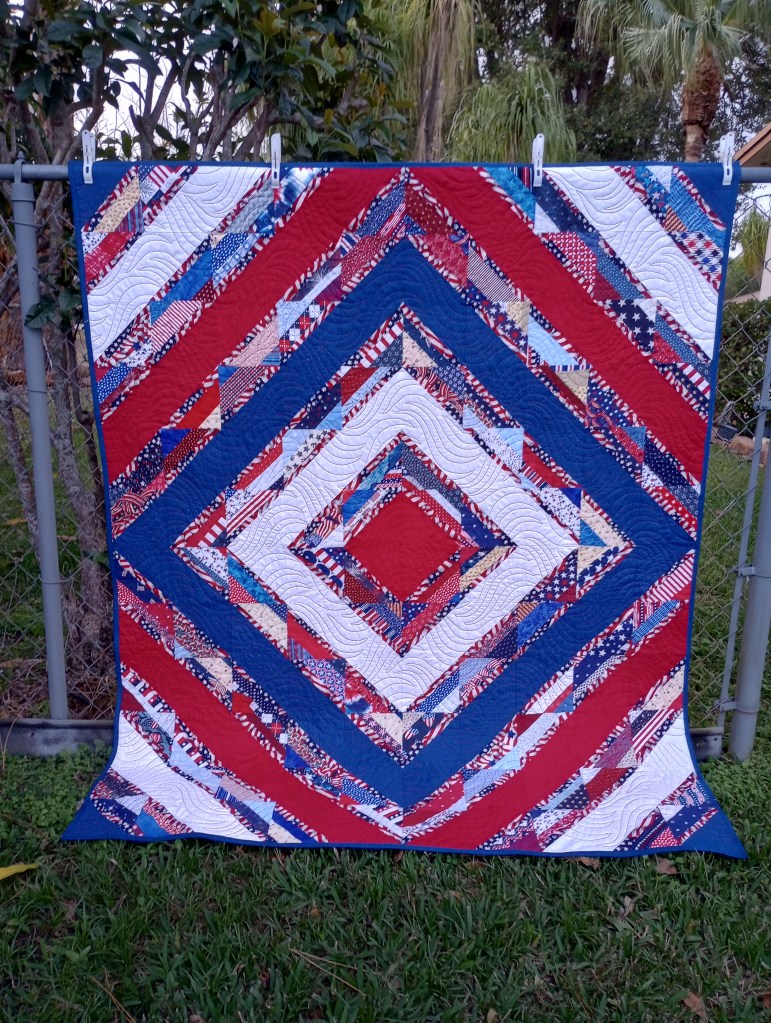
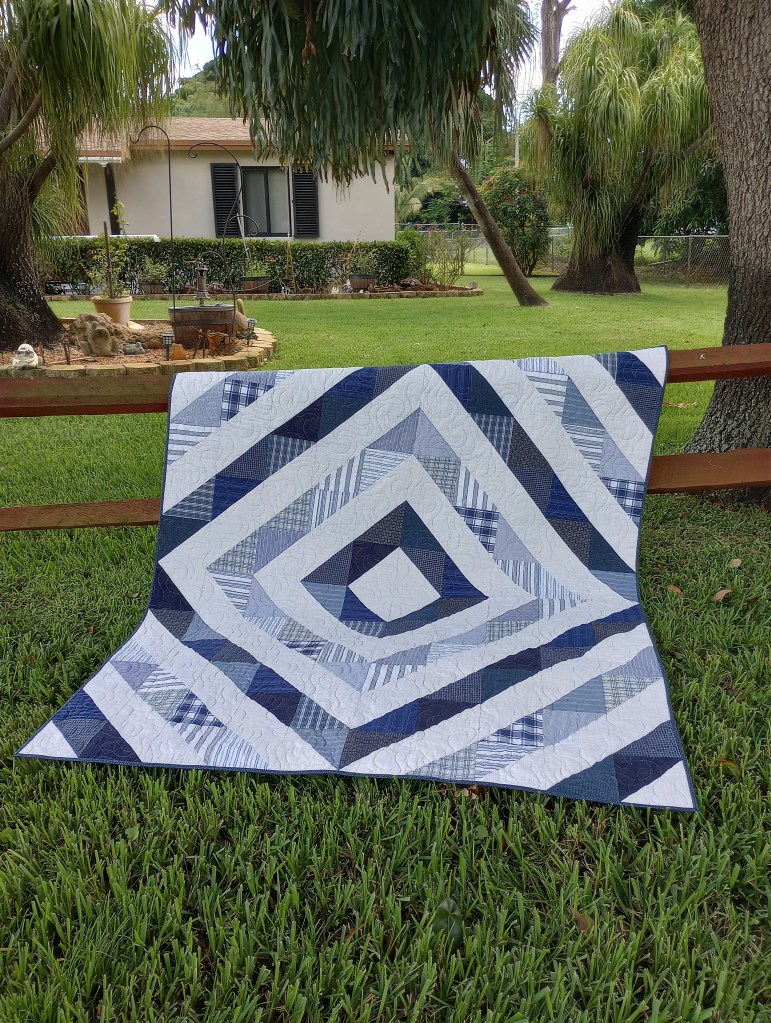
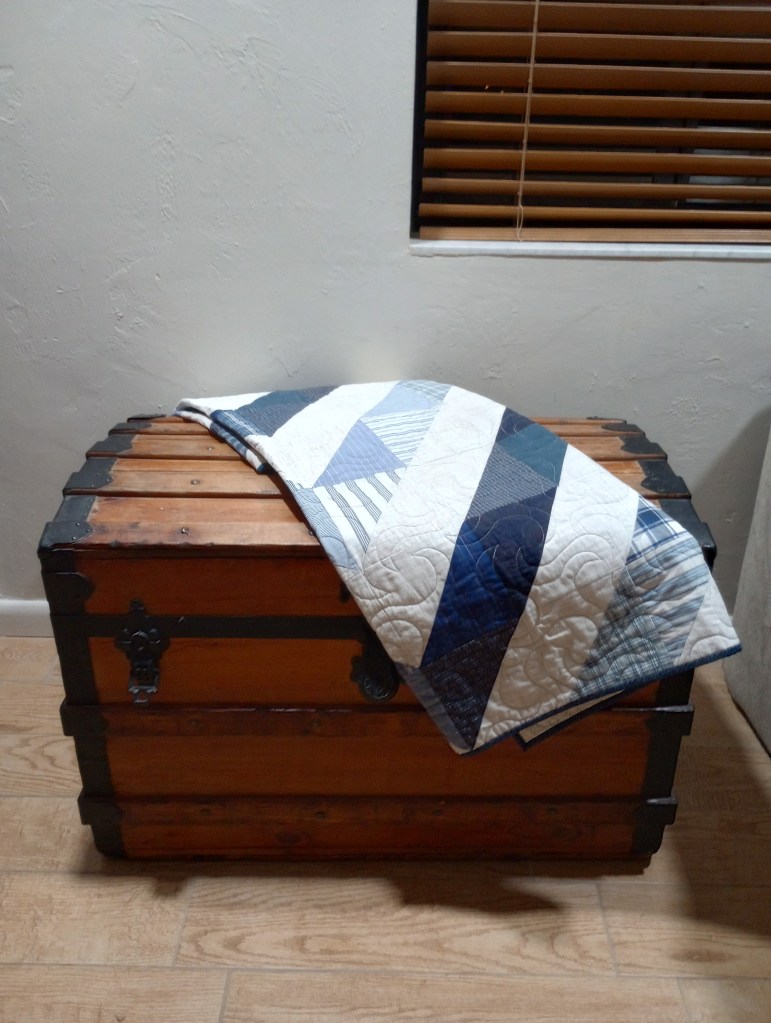
I finished a quilt today and this one is a bit larger than the size I normally make for string quilts.
I began by making 7 1/2″ string blocks then paired them with either a red, white, or blue square – drew a diagonal line on the solid fabric and stitched on both sides of the line. Cut in half and you have a pair of half square triangles. Those were trimmed to 6 1/2″.
I made a similar quilt with upcycled men’s plaid shirts a couple of years ago. I love the quilt and display it in our living room. For that reason, I was fairly certain I’d like this string version too.
I have a couple more string quilts I want to make next, well actually three of them. 🙂 Each one will either be inspired by, or a deliberate effort to replicate one, I’d seen on Mary’s Heartstrings Quilt Project website. All three of them go back several years so it’s time to stop procrastinating and just do it!
On Thursday I went to Hobby Lobby to check out the fabric sale. I’d looked online as the kids prints first so I’d have an idea of what to look for. I bought a few of the ones I’d seen online and at 12 yards for only $60 I was happy I went.
I plan to take a break one day a week an work on a baby or children’s quilt. They’re usually pretty quick and always fun to make. I’m saving up ideas too on how to use up the scraps I’ll be generating from those.
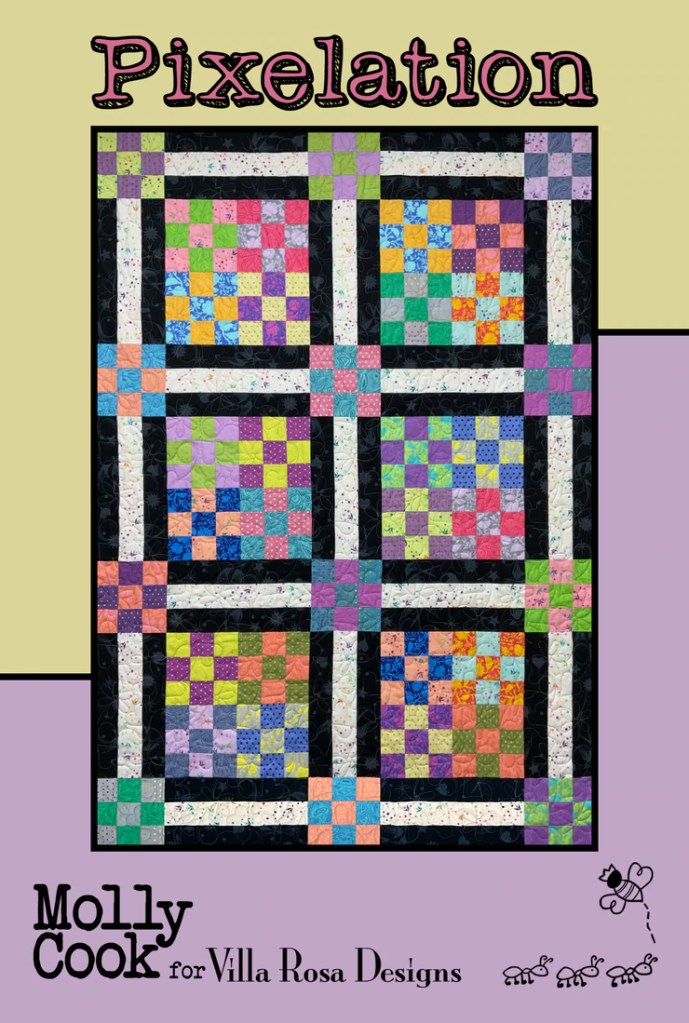
The pixelation pattern in the middle of the bottom is the only one in this set I haven’t made so I may just start making some 9 patch blocks as leaders/enders while I’m working on other things. Note: the quilt above the Pixilation pattern is not mine. I didn’t take a photo of the one I’d made. I probably saved this photo from Pinterest to my ideas file. I’ll have to be sure to snap a picture of the next time I make it!
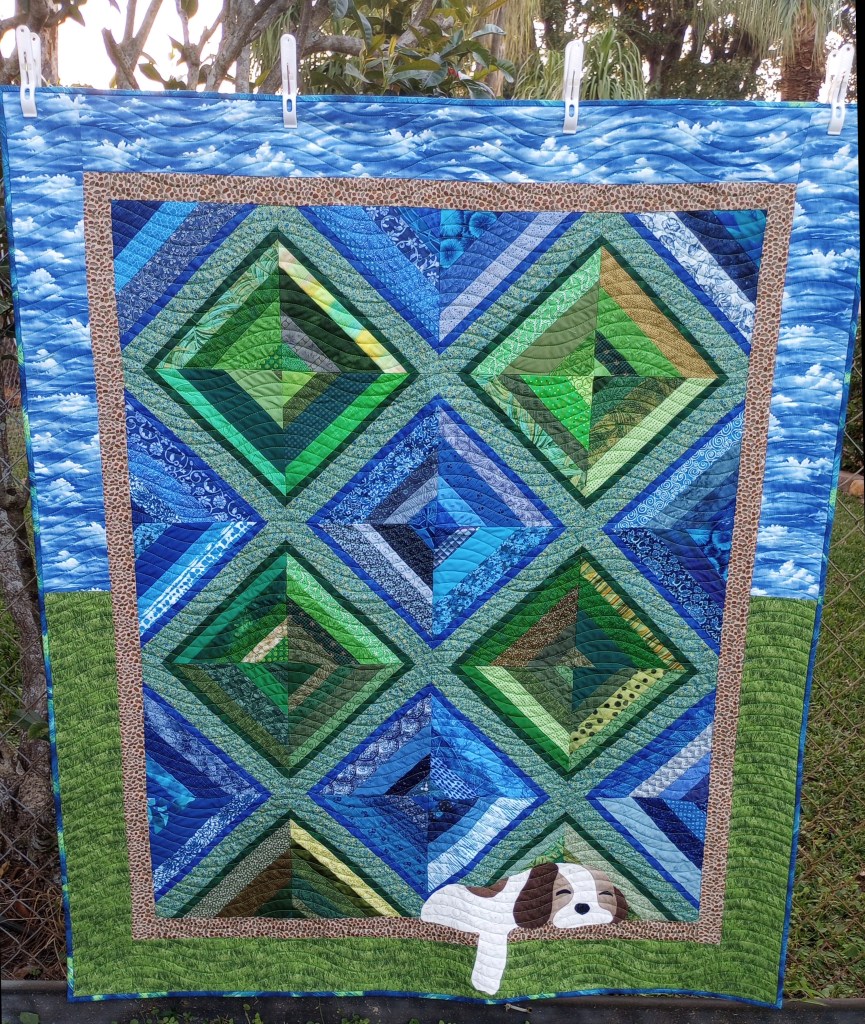
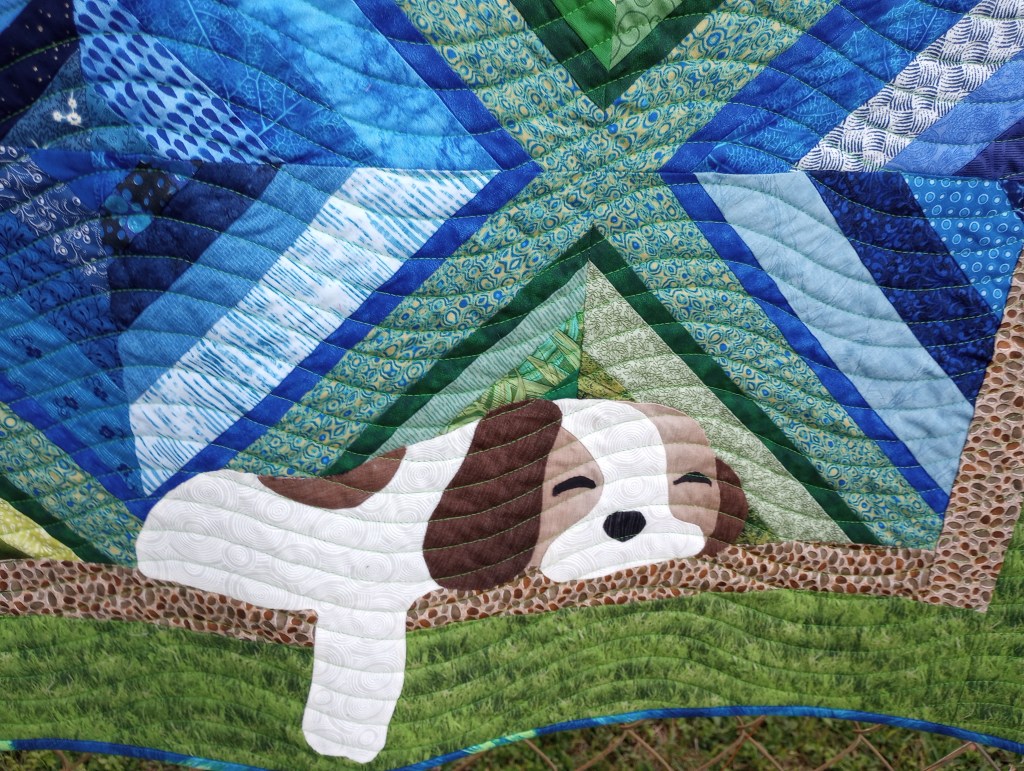
I finished this quilt on Wednesday, I’ve just been too busy (and tired) to take a photo of it. This picture isn’t that great but, it’ll have to do. 😉
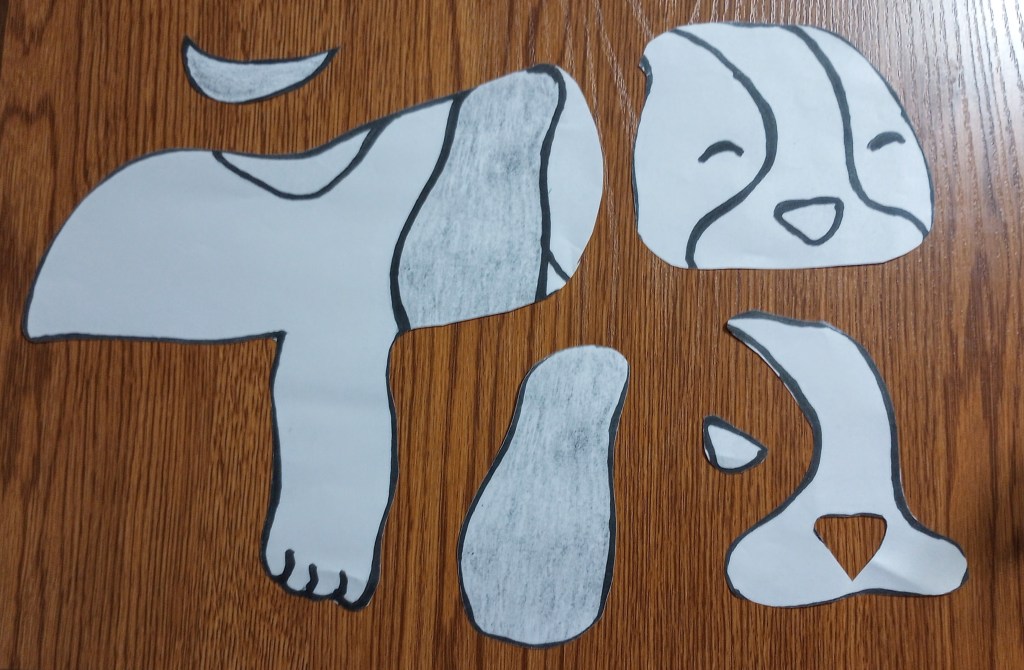
I don’t do needle-turn applique very often but I decided it was worth the effort for this little sleeping puppy.
The only fabric I had to purchase for it was the green “grass” lower outer border. I wanted him to look like he was outside and it just wouldn’t have been the same with a plain green. I had just the right brown ombre fabric to get different shades from it for his ears, face, and the spot on his back.
I chose to use a blue/green print for the center strip of the string blocks flanked by a solid blue on one side and solid green on the other. I ‘m really happy with that choice because I think the end result gives definition to the blocks.
I’d seen a photo somewhere, probably Pinterest, a long time ago of quilt with a puppy on it. I’m no artist but I drew him from that photo the best I could.
I enlarged the drawing on an Office Depot copy machine, and made a couple of copies so I could cut the pieces out for the individual parts.
Quilting over applique always gives me pause. I’m never quite sure if I want to do it or, try to quilt around it. Because I hope a kid falls in love with this one and drags it around, it may get washed a LOT. So, quilting over the applique to make sure it was well secured and none of my hand stitches came out felt like the best option.
My patriotic string top got pieced this week too and it’s ready to be quilted. It’s the one I mentioned at the end of this post last week.
I had 4 tops to quilt for my guild’s outreach program first. The patriotic string top will be up next. In the meantime, I’ve started a new one – with Kaffe Fassett strings. Even Sam looked at the blocks I was making and said “that’s pretty wild”. 🙂 🙂 🙂 Hope it turns out the way I have it pictured in my head… you just never know until you try!
You can see a few more of my String Quilts by clicking on the link.